10
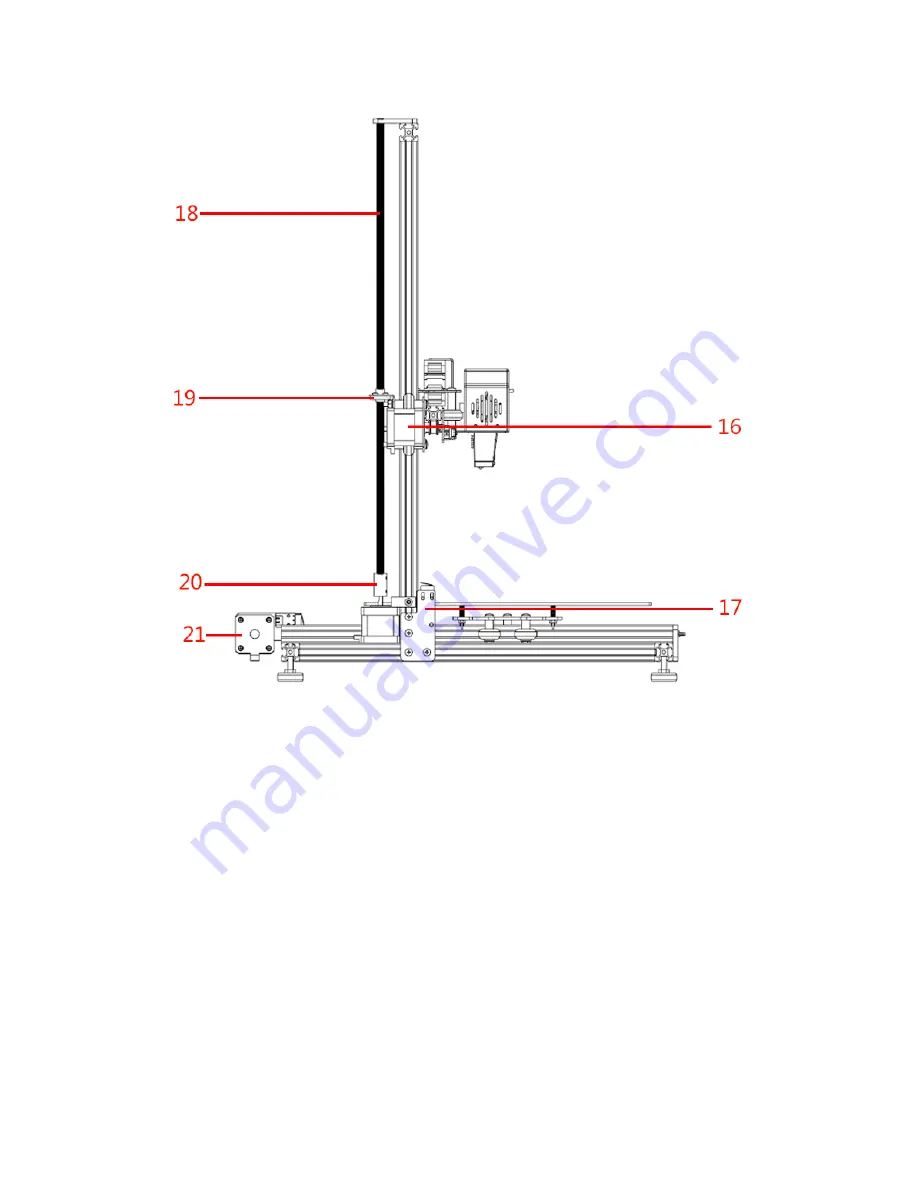
1.Frame 2.Towline 3. Extruder 4.Slideron the right side of the Z
axis 5.Nozzle 6.The print platform 7.Z-motor2 8.Foot
pad9.Slideron the left side of the Z axis 10.X-endstop 11.Cooling
fan12.Y axis the wheel stand 13.Z-endstop 14. Z-motor1 15.Y
axis pulley 16.X-motor 17.Z-endstop mounting plate 18.Z
-screw rod 19.Z axis screw 20.Coupling 21.Y-motor
Summary of Contents for Gantry
Page 1: ...1 User Guide ADIMLab gantry 3D printer Version V1 3 2 ...
Page 5: ...5 Place the printer on a flat solid platform ...
Page 19: ...19 2 Choose language ...
Page 21: ...21 Set nozzle number 1 and extruder diameter 0 4 Click apply ...
Page 24: ...24 ...
Page 28: ...28 3 FilamentSetting 4 Printer Settings ...
Page 29: ...29 六 Start printing ...
Page 32: ...32 3 Click Slice with Slic3r button ...
Page 35: ...35 2 Click Connect become green It mean succed click Start Print star printing ...
Page 37: ...37 2 Slice file copy to SD card Plug in the printer ...


