


132
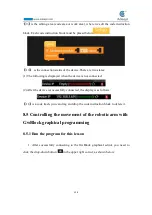
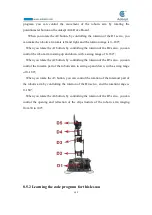
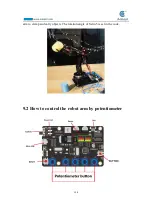
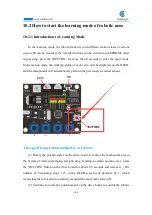
program, you can control the movement of the robotic arm by rotating the
potentiometer button on the Adeept Arm Drive Board.
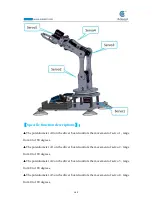
When you rotate the A0 button, by controlling the rotation of the D1 servo, you
can make the robotic arm rotate left and right, and the rotation range is 0~180°;
When you rotate the A1 button, by controlling the rotation of the D2 servo, you can
control the robot arm to swing up and down, with a swing range of 0~180°;
When you rotate the A2 button, by controlling the rotation of the D3 servo, you can
control the forearm part of the robotic arm to swing up and down, with a swing range
of 0~180°;
When you rotate the A3 button, you can control the rotation of the foremost part of
the robotic arm by controlling the rotation of the D4 servo, and the rotation range is
0~180°;
When you rotate the A6 button, by controlling the rotation of the D5 servo, you can
control the opening and retraction of the clip structure of the robotic arm, ranging
from 30 to 100°;
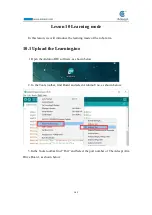
8.5.2 Learning the code program for this lesson
Summary of Contents for Robotic Arm
Page 1: ...1...
Page 33: ...30 9 Running effect is as follow...
Page 74: ...71 SERVO of number 5 4 2 1 3...
Page 86: ...83 Effect diagram after assembling...
Page 95: ...92 40mm 60mm 66 5mm 65mm 13mm 70mm...
Page 99: ...96...
Page 111: ...108...
Page 137: ...134...
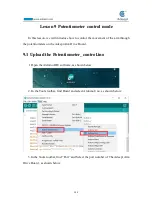
Page 154: ...151 7 the library file controlP5 needs to be added...
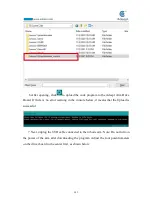
Page 156: ...153 9 Click Run 10 Running effect is as follow...
Page 164: ...161...
Page 181: ...178...
Page 182: ...179...


