background image

20

INST

ALLA

TION

CONFIGURA

TION

OPERA

TION

FUR

THER

INFORMA

TION

INDEX

WARRANTY

Adder Technology Ltd warrants that this product shall be free from defects in 
workmanship and materials for a period of two years from the date of original purchase. 
If the product should fail to operate correctly in normal use during the warranty period, 
Adder will replace or repair it free of charge. No liability can be accepted for damage due 
to misuse or circumstances outside Adder’s control. Also Adder will not be responsible 
for any loss, damage or injury arising directly or indirectly from the use of this product. 
Adder’s total liability under the terms of this warranty shall in all circumstances be 
limited to the replacement value of this product.

If any difficulty is experienced in the installation or use of this product that you are 

unable to resolve, please see the 

Getting assistance

 section.

SAFETY INFORMATION

• 

For use in dry, oil free indoor environments only.

• 

Warning - live parts contained within power adapter(s).

• 

No user serviceable parts within power adapter(s) - do not dismantle.

• 

Plug the power adapter(s) into socket outlets close to the module that they are 
powering.

• 

Do not use an unearthed power socket or extension cable.

• 

Do not use a power adapter if its case becomes damaged, cracked or broken or if you 
suspect that it is not operating properly.

• 

Replace the power adapter(s) with a manufacturer approved type only. 

• 

If you use a power extension cord with the module, make sure the total ampere rating 
of the devices plugged into the extension cord does not exceed the cord’s ampere 
rating. Also, make sure that the total ampere rating of all the devices plugged into the 
wall outlet does not exceed the wall outlet’s ampere rating.

• 

Do not attempt to service the modules yourself.

Summary of Contents for AdderLink XD150

Page 1: ...AdderLink XD150 User Guide Experts in Connectivity Solutions Extender Solutions ...

Page 2: ... 9 Local data link connection 9 Local power connection 10 Remote video connection 11 EDID management 11 Remote USB connections 11 Remote audio connection 12 Remote serial port connection 12 Remote data link connection 12 Remote power connection 13 Configuration Mode switch settings 14 Firmware upgrades 15 Operation Indicators 16 Further information Getting assistance 17 Appendix 1 Options port pin...

Page 3: ...tending high speed signals The AdderLink XD150 extender modules are totally transparent in operation leaving you free to use your computer as though you re still sitting next to it Higher rate or longer reach The AdderLink XD150 extenders provide two operational modes so that you can choose your priority To support a higher resolution display up to 1920 x 1200 60Hz or to cover a greater distance u...

Page 4: ...mputer See Local video connection for further details USB port Connects to a USB port on your computer See Local USB connection for further details Audio port Connects to the speaker audio output port of your computer See Local audio connection for further details Local module USB ports Connect your USB keyboard mouse and other devices See Remote USB connections for further details Status indicato...

Page 5: ...h cables As mentioned above patch links affect performance For each additional break patch within a run you will need to reduce the distance given above by roughly 5 meters For best results patch cables should be of type CAT 7a and be less than 2 meters in length If patch cables are greater than 2 meters then they must be CAT 7a Adder recommend the following CAT 7 shielded foiled twisted pair cabl...

Page 6: ...IED ITEMS Information wallet containing Eight self adhesive rubber feet Safety document AdderLink XD150 local module 2 x Power adapter with locking connector and country specific power cord AdderLink XD150 remote module Video cable DVI D to DVI D USB cable 2m type A to B ...

Page 7: ...pe A to B Part number VSC24 Replacement power adapter with locking connector Part number PSU IEC 12VDC 1 5A Country specific power cords CAB IEC AUS Australia CAB IEC EURO Central Europe CAB IEC UK United Kingdom CAB IEC USA United States CAB IEC JAPAN Japan Serial cable 2m Part number VSC40 Single link DVI D to DVI D video cable Part number VSCD1 ...

Page 8: ... the position of the AdderLink XD150 modules Situate the local module close to the system to which it will be connected and near to a source of mains power Place the remote module in similar close proximity to the peripherals that it will connect with plus a source of mains power Consult the precautions listed within the Safety information section ...

Page 9: ...t 60Hz aka 1080P are supported This allows greater separation between the local and remote modules to be achieved Please see the section Mode switch settings for details To connect the video port 1 Connect the supplied digital video link cable between the DVI D socket on the local module rear panel and the DVI D video output socket of your host computer From video output socket on your host comput...

Page 10: ...o 150 meters Best results will be gained when single lengths of CAT7 cable are used without the need for patch cables To connect the data link cable 1 Connect the CATx cable from the remote module to the LINK port on the front panel of the local module From AdderLink XD150 remote module Local serial port connection The Options port provides an RS232 serial connection with the remote module When se...

Page 11: ... nearby main supply socket To disconnect the power adapter 1 Isolate the power adapter from the mains supply 2 Grasp the outer body of the power adapter plug where it connects with the module 3 Gently pull the body of the outer plug away from the module As the body of the plug slides back it will release from the socket and you can fully withdraw the whole plug IMPORTANT Please read and adhere to ...

Page 12: ...ween the local and remote modules to be achieved Please see the section Mode switch settings for details To connect the video display 1 Connect the DVI D video cable from your video display to the video output port on the rear panel of the remote module From your video display EDID management When a remote module is connected and the video display attached to it is detected the EDID Extended Displ...

Page 13: ...e used without the need for patch cables To connect the data link cable 1 Connect the CATx cable from the local module to the LINK port on the rear panel of the remote module From AdderLink XD150 local module Remote serial port connection The Options port provides an RS232 serial connection with the local module When serial devices are attached to the Options ports on the local and remote modules ...

Page 14: ...ety information given within the Safety information section of this guide In particular do not use an unearthed power socket or extension cable Note Both the modules and the power supplies generate heat when in operation and will become warm to the touch Do not enclose them or place them in locations where air cannot circulate to cool the equipment Do not operate the equipment in ambient temperatu...

Page 15: ...able length to around 100m or less depending on the type of link cable used Note When high rate mode is used the modules will continually check the link quality to ensure that it is capable of supporting the higher pixel clock If excessive data errors are detected the modules will fall back to Long Reach mode until the local module is reset or the link is broken and re established Switch A USB com...

Page 16: ...uter as a mass storage device with the volume label FIRMWARE 5 Use your computer s file manager application to copy the upgrade file downloaded earlier to the mass storage device that has the volume label FIRMWARE Once the local module has received all of the data the front panel indicators of the local module will chase from side to side to show that the upgrade procedure is underway 6 Once the u...

Page 17: ... on once the USB extender and hub located within the remote module have been successfully enumerated by the USB host on your computer Link This indicator will be on once a good link exists between the local and remote modules Green and amber status indicators The green and amber status indicators on the link connectors of each module provide further status information Green This indicator will be ...

Page 18: ...ng problems after checking the information contained within this guide then we provide a number of other solutions Online solutions and updates www adder com support Check the Support section of the adder com website for the latest solutions and firmware updates Adder Forum forum adder com Use our forum to access FAQs and discussions Technical support www adder com contact support form For technic...

Page 19: ...eads and patch cables The pin outs are listed in this section for both types of connector Note Although the pins labeled Not used are inactive they are still connected internally and so no links should be made at all to these pins 8p8c 10p10c Signal 1 Not used 1 2 5VDC power output 100mA max 2 3 GND reference for all signals 3 4 RS232 RXD data receive 4 5 Not used 5 6 Not used 6 7 RS232 TXD data t...

Page 20: ...h external and internal sources Proximity to other electromagnetic sources are the main external threat and these can be subdued using overall screening that surrounds all four of the cable pairs However interference is also possible from neighbouring twisted pairs within the same cable and this can be just as hazardous to data integrity Such crosstalk is countered by shielding each cable pair sep...

Page 21: ...tion or use of this product that you are unable to resolve please see the Getting assistance section SAFETY INFORMATION For use in dry oil free indoor environments only Warning live parts contained within power adapter s No user serviceable parts within power adapter s do not dismantle Plug the power adapter s into socket outlets close to the module that they are powering Do not use an unearthed p...

Page 22: ...he separation between the equipment and the receiver c Connect the equipment to an outlet on a circuit different from that to which the receiver is connected d Consult the supplier or an experienced radio TV technician for help FCC Compliance Statement United States This equipment generates uses and can radiate radio frequency energy and if not installed and used properly that is in strict accorda...

Page 23: ...ION FURTHER INFORMATION INDEX www ctxd com Documentation by 2014 Adder Technology Limited All trademarks are acknowledged Part No MAN XD150 ADDER Release 1 0a Web www adder com Contact www adder com contact details Support forum adder com ...

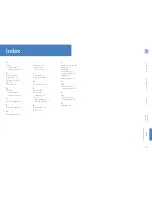
Page 24: ...re upgrade 15 H High rate mode 2 I Indicators 16 Interference protection 19 L Link quality 4 Long reach mode 2 M Mode switches 14 P Patch cable 4 Peripherals connecting 8 Power local module 10 remote module 13 R Reset button 3 15 RS232 9 12 S Safety information 20 Screening 19 Serial port local module 9 remote module 12 Shielding 19 Switch settings 14 U USB local module 8 remote module 11 V Video ...

Reviews: