SETTING THE ALARM:
1) Hold “ALARM” for 3 seconds.
2) The hour number(s) flash. Press “+” or “-” to enter the desired hour. Press
“ALARM” to confirm the hour setting.
3) The minute number(s) flash. Press “+” or “-” to enter the desired minute.
Press “ALARM” to confirm the minute setting.
To view the alarm time, press the “ALARM” button during the normal operating mode.
Alarm time will display for five seconds. Then, the current time is displayed.
To Turn the Alarm On and Off:
Press the “+” button during the normal operating mode.
To Turn off the Alarm for One Day:
To turn the alarm off for one day, press the “ALARM”
button when the alarm sounds
Snooze:
When the alarm sounds, press the “SNOOZE” button to trigger the snooze feature. The
alarm is silenced for five minutes. Then, it will sound an alarm again.
MIN/ MAX MEMORY:
Press the “MEMORY” button to view the maximum values (Inside/Outside Temperature
and Humidity) for 5 seconds. Press the “MEMORY” button again to view the minimum
memory.
The memory will automatically refresh every 24 hours.
NOTE:
The air pressure record will not be cleared manually, but instead will be cleared
automatically every 12 hours.
8 MULTIPLE WIRELESS SENSORS
The main unit supports up to three wireless sensors. Each additional wireless sensor
must be designated a different channel number. Assigning different channel numbers
differentiate each sensors temperature and hygrometer readings for the main units’
display.
Additional wireless sensors are sold separately. Call 1-800-556-2548 to order.
WIRELESS SENSOR MODEL # 01022
1) Open each sensor by removing the 4 screws and the cover.
2) Install batteries, see section 3.
3) Use the interior slide switch to select a channel – 1, 2, or 3.
4) Choose Celsius or Fahrenheit with the C/F button, for the sensor display.
5) With the “MODE” button choose what you want the sensor display to show:
Temperature only,
Humidity only, or
Temperature and humidity, alternating.
6) Press the “TX” button to send a signal to the base station.
7) Replace the cover and the 4 screws.
8) Mount the sensor. See section 4 for placement of the wireless sensor unit.
9
8
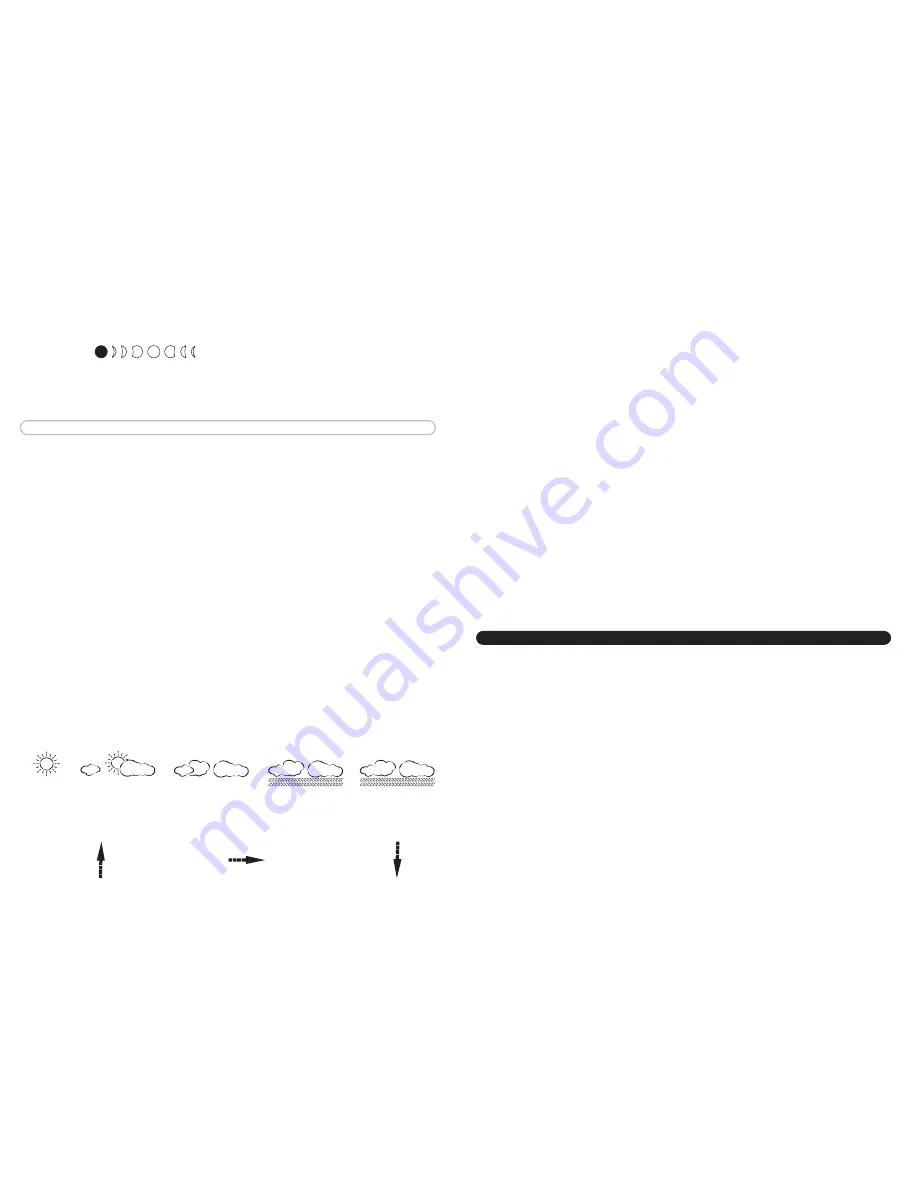
Moon Phase:
The moon phase will automatically display based on the calender date. The moon phase
display will scroll from left to right, and pause for about 5 seconds to display the current
moon phase. NOTE: the moon phase will not be correct unless the date and year are
programmed correctly.
OTHER ADJUSTMENTS
Changing the Pressure Units:
To change the scale between mb (milibars) hPA
(hectoPascals) and inHg (inches of mercury), hold “P-” for three seconds.
View Pressure History:
To view air pressure from 0 (current) to the past 12 hours, press the
“PRESSURE” button. The hour is displayed in the small box in the pressure portion of
the upper display. Each time you press “PRESSURE”, the value changes to that of the
previous hour.
NOTE:
The sample base station Upper Display (illustrated in
section 5
) shows what the
pressure is, the current hour being zero (0). This pressure history is available only after
the barometer has operated and kept pressure data for 12 continuous hours.
Barometer History Graph:
The bar chart just below the air pressure display, shows the
pressure readings (range from +0.24 inHg to –0.24 inHg/ –8 hPa mb to +8 hPa mb) of
the current and past 1, 2, 3, 6 and 12 hour periods.
WEATHER FORECASTING
The main unit predicts weather conditions of the next 12 – 24 hours based on the
changes in atmospheric pressure. The coverage area is approximately 19-31 miles (30 –
50 km). The weather forecast is based on atmospheric pressure changes and is approxi-
mately 70-75% correct. As weather conditions cannot be 100% correctly forecasted, we
cannot be responsible for any loss caused by an incorrect forecast.
Trend Indicators:
Arrow icons in the upper display will indicate the following trends:
Rising
Steady
Falling
The arrow icons will indicate rising, steady or falling if the temperature or humidity
change is more than 1 unit (degree/percent) within an hour.
(FLASHES)
STORMY
RAIN/SNOW
CLOUDY
PARTLY CLOUDY
SUNNY
Adjust the barometric pressure to reflect your current conditions:
NOTE:
Please see http://weather.unisys.com/surface/sfc_con_pres.html to help set
and adjust the barometric pressure.
1) Hold “PRESSURE” button for 3 seconds
2) Press “P+” , and/or “P-” to adjust the air pressure according to the current pressure.
3) Press the “PRESSURE” button to confirm the setting


