


REFERENCE
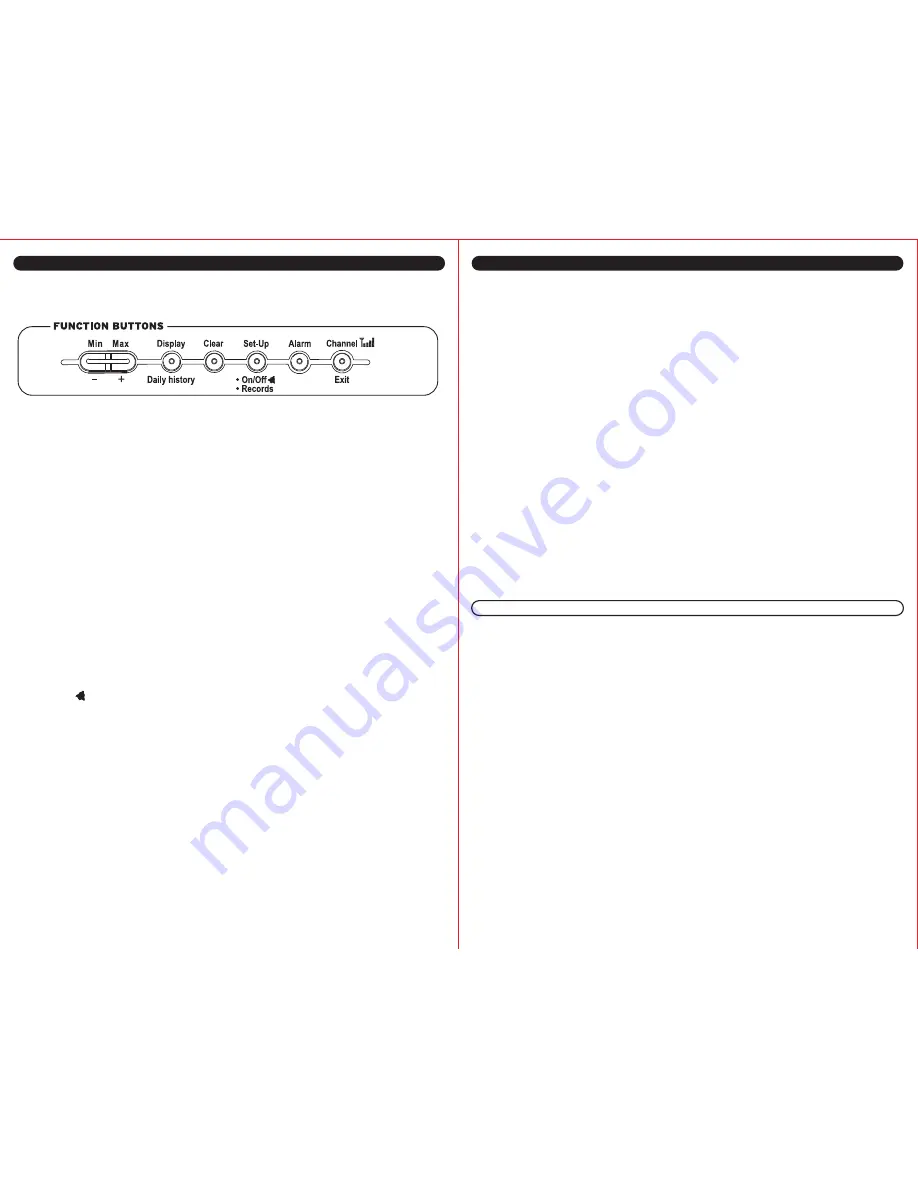
BUTTON OPERATION DESCRIPTIONS:
The main unit has 7 buttons for user operation. Some buttons have multiple functions.
Please refer to the following for button operation description:
1.
MIN BUTTON:
Press the “MIN” button to enter the MIN MODE. The “MIN” icons on the
main unit will be displayed, showing minimum temperature, humidity, wind speed and
pressure for that day (resets every evening at midnight). Press the “EXIT” button to exit the
MIN MODE. The “MIN” icons will disappear.
2.
MAX BUTTON:
Press the “MAX” button to enter the MAX MODE. The “MAX” icons on
the main unit will be displayed, showing maximum temperature, humidity, wind speed and
pressure for that day (resets every evening at midnight). Press the “EXIT” button to exit the
MAX MODE. The “MAX” icon will disappear.
3.
- / + BUTTON:
In alarm and set up modes, decreases/ increases time, temp, humidity
levels.
4.
DISPLAY (DAILY HISTORY) BUTTON:
Press the “DISPLAY” button to toggle between
the following information in the upper right hand side of the main unit: WIND CHILL, HEAT
INDEX, DEW POINT, and RAIN GAUGE (sold separately).
5.
DAILY HISTORY(DISPLAY) BUTTON:
See pages 11-12 for instructions on viewing daily
highs and lows.
6.
CLEAR BUTTON:
Press the “CLEAR” button to clear any settings currently stored in
the main unit.
7.
SET-UP (ON/OFF/RECORDS BUTTON):
Press and hold for 3 seconds to enter the
general set-up mode.
8.
ON/OFF (SET-UP):
Turns off alarm when beeping; sets alarm when in ALARM mode.
9.
RECORDS BUTTON:
See page 13 for instructions on viewing long term highs and lows.
10.
ALARM BUTTON:
Press the “ALARM” button to stop any alarm for one day when the
alarm sounds. Press and hold for 3 seconds to enter the alarm set-up mode. See page 11.
NOTE:
In “SET-UP” and “ALARM” setting mode, pressing either the “MIN” or “MAX”
buttons will allow the user to change any values. The user may press and hold the button
for rapid scroll through of values.
11.
CHANNEL (EXIT) BUTTON:
Press the “CHANNEL” button to view the outdoor
temperature and humidity for any additional sensors used. Additional sensors are sold
separately. Additional sensors are optional. Press and hold the “CHANNEL” button will force
the main unit into signal searching mode.
NOTE:
Pressing the “EXIT” button will exit all of the MIN/MAX, SET-UP, and ALARM
settings while in these modes.
12.
SNOOZE BAR (TOP OF UNIT):
Press the “SNOOZE” bar to enter into the snooze
mode for 5 minutes when the time alarm is activated. The ALARM icon will be displayed and
blinking.
GENERAL SET-UP
The general setting mode allows the user to change several product default settings, which is
done by simply accessing one setting after the other by pressing the “SET-UP” button. In
normal mode,
press and hold
the “SET-UP” button for 3 seconds to enter the manual set-up
mode. The icon to set will be blinking. If no key is pressed for 30 seconds, the manual set-up
mode returns to the normal display mode. The general programming takes the user through
the modes listed below.
1. Manual time setting (hours/minutes), if atomic time is not available.
2. Calendar setting (month/date/year).
3. Time zone setting (P/M/C/E) (Note: zone will be blinking to the right of the WAVE icon).
a. P = Pacific Standard Time
b. M = Mountain Standard Time
c. C = Central Standard Time
d. E = Eastern Standard Time
4. Daylight Saving Time setting (ON or OFF)
DST ON = Daylight Saving Time enabled.
DST OF = Daylight Saving Time disabled.
5. Temperature unit setting (ºC or ºF)
6. Wind speed unit setting (mph/kph/knots)
7. Air pressure unit setting (mbar/hPa/inHg).
While in the set-up mode, use “MAX” (+) or “MIN” (-) buttons to adjust the blinking values.
Press and hold
for rapid scrolling through of the values. Press the “EXIT” button to exit the
set-up mode.
SELECTABLE DISPLAY MODES:
The following information options can be displayed on the main unit above the digital wind
direction compass. Press the “DISPLAY” button to toggle between the below weather data
information.
WIND CHILL:
Wind chill is the rapid cooling of the human body caused by air motion. Air motion acceler-
ates the rate of heat transfer from a human body to the surrounding atmosphere, especially
when temperatures are low. The wind chill is a calculation of temperature data from the
wireless thermo-hygrometer remote sensor and the wind sensor.
HEAT INDEX:
Heat index is the perceived temperature to the human body based on both air temperature
and the amount of moisture present in the air. The heat index is a calculation based on the
combined temperature and humidity data received from the wireless thermo-hygrometer
remote sensor.
DEW POINT:
The dew point temperature is the temperature to which the air must be cooled to reach
saturation. The dew point is a calculation of temperature and humidity data received from
the wireless thermo-hygrometer remote sensor.
RAIN GAUGE (Sold Separately):
When using the ACURITE
®
on Wireless Rain Gauge models 614/626, displays the rainfall
amount from the past 1 hour, 24 hours, 2 days and 19 days, as well as total amount of rainfall
recorded by this unit.
8
9