Funzione telecomando a raggi infrarossi
Instructions for the infrared remote control
Temperaturregler mit infrarot fernbedienung
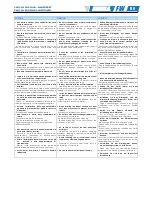
Informazioni Generali
Ogni volta che premi in bottone ON/SEND tutte le
informazioni sul display vengono trasferite al
termostato.
Puntare il telecomando in direzione del termostato e
fare attenzione che il termostato riceva l’input.
Per spegnere premere il tasto
OFF.
Se per dieci secondi non viene premuto nessun tasto
il display tornerà alla sua funzione normale.
Il programma TIMER ripeterà automaticamente
quanto impostato fino a che non viene cancellato
(TIMER OFF).
General Informations
Each time you press ON/SEND all the information
on the display are transfered to the thermostat.
Aim the infrared remote control in direct line to
the thermostat and make sure that the
thermostat receives the transmission.
To switch off simply press
OFF
button.
If no button is pressed for 10 seconds the display
will return to normal display mode
The Timer program will repeat itself until
cancellation (TIMER OFF).
Allgemeine Hinweise :
Jedesmal, wenn die Taste ON/SEND gedrück wird,
werden alle Daten, die auf dem Display zu lesen
sind, an den Empfänger in der Kassette übertragen.
Richten Sie den Handsender auf die Kassette und
achten Sie darauf, daß die Übertragung auch
erfolgreich war. Zum Ausschalten nur die Taste
OFF
drücken. Wird nach 10 Sek keine Taste gedrückt,
kehrt das Display in den Normalmodus zurück Wenn
dasProgramm TIMER eingeschaltet ist, wiederholt
sich der Zyklus (Programm) so lange, bis zur
Abschaltung (TIMER OFF).
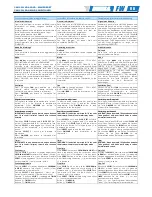
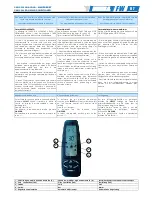
Modalita’ D’impiego
On/Send
Serve per attivare il condizionatore e aggiornare le
informazioni.
Operating Instructions
On/Send
Activates the air conditioner and/or updates the
information.
Arbeits-Hinweise
On/Send
Diese Taste setzt die Klimakassette in Betrieb
oder aktualisiert die Daten.
Mode
Premi
Mode
per cambiare tra : CALDO, FREDDO,
REGOLAZIONE AUTOMATICA E VENTILAZIONE.
Per regolazione automatica si intende che a
seconda
della
temperatura
impostata
sul
telecomando il condizionatore farà freddo se
questa é più bassa della temperatura ambiente o
caldo se questa é più alta. (Es. sul telecomando
imposto 20 °C - la temperatura ambiente é 25 °C :
in questo caso il condizionatore farà freddo).
Premi ON/SEND per inviare le informazioni al
termostato.
Mode
Press
Mode
to change between : COOL, HEAT,
AUTO CHANGE and FAN ONLY.
The meaning of the AUTO CHANGE is the
following one : the function of the air conditioner
depends on the temperature set in the i.r.
remote control and on the room temperature.
(Exp. : on the I.R. remote control the temperature
is 20 °C and the room temperature is 25 °C. The
air conditioner will start heating)
Press ON/SEND to send the information to the
thermostat.
Mode
Mit der Taste
Mode
wird zwischen HEIZEN,
KÜHLEN, AUTOMATIK und VENTIALTION gewählt.
Die automatische Funktion hängt ab von dem
Sollwert, der
im
Thermostat
der Kassette
eingegeben
wurde
und
der
gemessen
Raumtemperatur. Z.B.: Mit der Fernbedienung
wurden
20°C
Sollwert
eingegeben.
Die
Raumtemperatur beträgt 25°C. Das Klimagerät
wird beim Einschalten automatisch kühlen.
Druecken Sie die Taste ON/SEND, um die
Informationen
an
den
Thermostat
zu
uebertragen.
Ventilatore
Premi il bottone
FAN
per cambiare tra : alta
velocità, media velocità, bassa velocità e
ventilatore automatico (lettera A sul display).
Premi
ON/SEND
per inviare le informazioni al
termostato.
Fan
Press
FAN
to change between : COOL, HEAT,
AUTO CHANGE and FAN ONLY.
Press
ON/SEND
to send the information to the
thermostat.
Ventilation (Fan)
Drücken Sie die Taste
FAN
um zwischen die Hohe-
mittlere-niedrige und automatische (mit A auf Display
angezeichnet)
Geschwindigkeit
zu
wechseln.
Drücken Sie die Taste
ON/SEND
um die Information an
den Thermostat zu überzutragen.
Regolazione temperatura
Per regolare la temperatura desiderata : premi i
bottoni (+) o (-) ed imposta la temperatura
desiderata.
Premi
ON/SEND
per
inviare
le
informazioni al termostato.
Temperature adjustment
To adjust desired temperature (set point): press
the set buttons (+) or (-) and set the desired
temperature. Press
ON/SEND
button to send
information to the thermostat.
Einstellung der Temperatur
Um die gewünschte Raumtemperatur einzustellen,
werden die Taste (+) oder (-) benutzt. Drücken Sie
die Taste
ON/SEND
um die Information an den
Thermostat zu überzutragen.
Impostazione orologio
IMPORTANTE! Se non viene premuto nessun bottone
per 10 secondi il display tornerà alla funzione
normale.
Premendo
SELECT
lampeggerà
CLOCK SET.
Usa i
bottoni (+) per aumentare e (-) per diminuire l’ora.
Premere
SELECT
e lampeggeranno i minuti; usa i
bottoni (+) per aumentare e (-) per diminuire i
minuti.
Premere
SELECT
di nuovo per terminare la
regolazione.
Premi
ON/SEND
per inviare le informazioni al
termostato.
Real time clock adjustment
IMPORTANT! If no button is pressed for 10 seconds
the display will return to normal display mode.
Press
SELECT
button and
CLOCK SET
will flash.
Use button (+) to increase and (-) to decrease
the hours. Press
SELECT
again and the minutes
will flash; use button (+) to increase and (-) to
decrease the minutes.
Press
SELECT
again to end the adjustment.
Press
ON/SEND
to send information to the
thermostat
.
Einstellung der Realzeit
ACHTUNG! Wenn innerhalb 10 Sekunden keinerlei
Taste gedrückt wird, kehrt das Display in seinen
Normalzustand zurück.
Drücken Sie die Taste
SELEKT und es blinkt
CLOCK SET
auf. Mit den Tasten (+) und (-) werden die Stunden
eingegeben. Drücken Sie
SELEKT
und die Minuten
blinken auf. Benutzten Sie die Tasten (+) oder (-) um
die Minuten zu steigern oder zu verringern.Drücken
Sie nochmals
SELECT
um die Daten zu speichern.
Drücken
Sie
die
Taste
ON/SEND
um
die
Informationen an den Thermostat zu ubertragen.
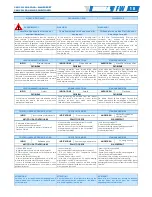
Timer
IMPORTANTE: se non viene premuto nessun bottone
per 10 secondi il display tornerà alla funzione
normale.
Orario Avvio
Premere
SELECT
(2 volte) e sul display appariranno
PROGRAM & START.
Sistemare l’ora usando i bottoni
(+) per incrementare e (-) per diminuire. Premere
SELECT
e lampeggeranno i minuti; usa i bottoni (+)
per aumentare e (-) per diminuire i minuti.
Orario Spegnimento
Premere
SELECT
e sul display appariranno
PROGRAM
& START.
Sistemare l’ora usando i bottoni (+) per
incrementare e (-) per diminuire.
Premere
SELECT
e lampeggeranno i minuti; usa i
bottoni (+) x aumentare e (-) per diminuire i minuti.
Premere il bottone
SELECT :
lampeggerà
TIMER
utilizzando i bottoni (+,-)scegliere la funzione desiderata.
Bottone (+) :
TIMER
acceso
Bottone (-) :
TIMER
spento
Timer
IMPORTANT: If no button is pressed for 10 seconds
the display will return to normal display mode.
Start Time
Press
SELECT
(twice) and
PROGRAM & START
will
flash in the display. Using the set buttons adjust
the hour. Press (+) to increase, (-) to decrease.
Press
SELECT
button and the minutes will flash.
Adjust them using the button (+) to increase and
(-) to decrease.
Stop time
Press
SELECT
and on the display
PROGRAM &
START
will flash. Adjust the hour pressing (+) to
increase and (-) to decrease. Press
SELECT
and
the minutes will flash; use the buttons (+) to
increase and (-) to decrease.
Press
SELECT : TIMER
will flash using the buttons
(+,-) chose the required mode.
Button (+) :
TIMER ON
Button (-)
: TIMER OFF
Timer
ACHTUNG: Wenn innerhalb 10 Sekunden keinerlei
Taste gedrückt wird, kehrt das Display in seinen
Normalzustand zurück.
Start-Zeit
Drücken Sie
SELEKT
(2 Mal) und es blinkt
PROGRAM
& START
auf. Mit den Tasten (+) und (-) werden die
Stunden eingegeben. Nach einem weiteren Druck
auf Taste
SELEKT
kann man die Minuten mit den
Tasten (+) und (-) ändern.
Stop-Zeit
Drücken Sie
SELEKT
(2 Mal) und es blinkt
PROGRAM &
STOP
auf. Mit den Tasten (+) und (-) werden die
Stunden eingegeben. Nach einem weiteren Druck auf
Taste
SELEKT
kann man die Minuten mit den Tasten (+)
und (-) ändern. Drücken Sie die Taste
SELEKT
: es blinkt
TIMER,
benutzen Sie die Tasten (+,-) um den
gewünschten Wert zu wählen.
Taste (+) : um Timer-Programm einzuschalten.
Taste (-): um Timer-Programm auszuschalten.
F
F
A
A
N
N
C
C
O
O
I
I
L
L
A
A
D
D
A
A
C
C
Q
Q
U
U
A
A
–
–
W
W
A
A
N
N
D
D
G
G
E
E
R
R
Ä
Ä
T
T
F
F
A
A
N
N
C
C
O
O
I
I
L
L
R
R
O
O
O
O
M
M
A
A
I
I
R
R
C
C
O
O
N
N
D
D
I
I
T
T
I
I
O
O
N
N
E
E
R
R
0 6
Summary of Contents for FW 230N
Page 16: ......


