


7.3
Removing and replacing a tape drive
Tape drives are installed at the back of the library.
When replacing one drive in a two drive configuration, you can power down the drive that you are
replacing without interrupting power to the rest of the library and the second drive. Refer
to “Changing
the drive configuration”
on page
49.
NOTE:
This part is hot pluggable. It is not mandatory to power down the library to replace a drive.
To remove a tape drive:
1.
Using your Remote Management Unit or the Operator Control Panel, unload the tape
cartridge(s) from the drive to be removed
.
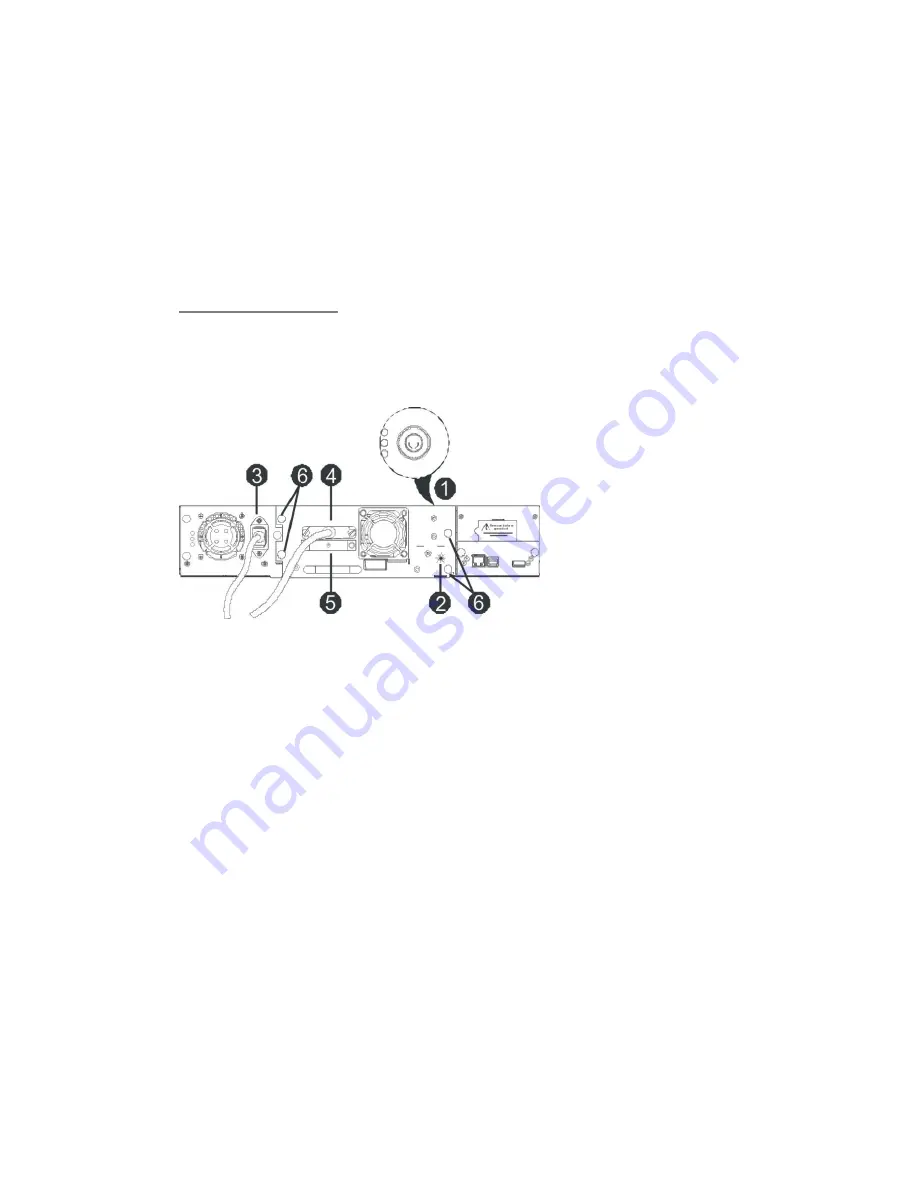
Figure 53
Drive sled components of rear panel
2.
Power down the library using the power button on the front panel (see Figure 53 detail 1).
3.
The LED on the tape drive being removed is off (Figure 53 detail 2).
4.
Remove the power cable, SCSI cable and terminator, if applicable from the tape drive being
removed (see Figure 53 details 3, 4 and 5).
5.
Loosen the captive thumbscrews on the drive (Figure 53 detail 6).
IMPORTANT:
Before pulling the lower drive sled please pull forward the product ID slide located
below the drive sled (see figure 54 detail 1). Otherwise the slide or the attached label
could be damaged.
6.
Pull straight back on the tape drive handle to remove it from the library. Take care to slightly
push down the product ID slide so it does not interfere with the drive sled (see Figure 54).
Summary of Contents for actiLib Autoloader 2U
Page 1: ...actiLib Autoloader 2U User and Service Guide Date September 17 2009 ...
Page 10: ...Figure 63 Releasing the magazine 73 ...
Page 21: ...Figure 9 Shipping lock before transportation 3 4 5 2 1 ...
Page 31: ...5 7 OCP Menu Flow Charts Figure 17 OCP User interaction Mode actiLib Library 2U ...
Page 32: ...Figure 18 Interaction Mode Information ...
Page 33: ...Figure 19 Interaction Mode Information continuation ...
Page 34: ...Figure 20 Interaction Mode Commands ...
Page 35: ...Figure 21 Interaction Mode Configuration ...
Page 36: ...Figure 22 Interaction Mode Configuration continuation ...
Page 37: ...Figure 23 Interaction Mode Service ...


