


www.acti.com
Hardware Manual
18
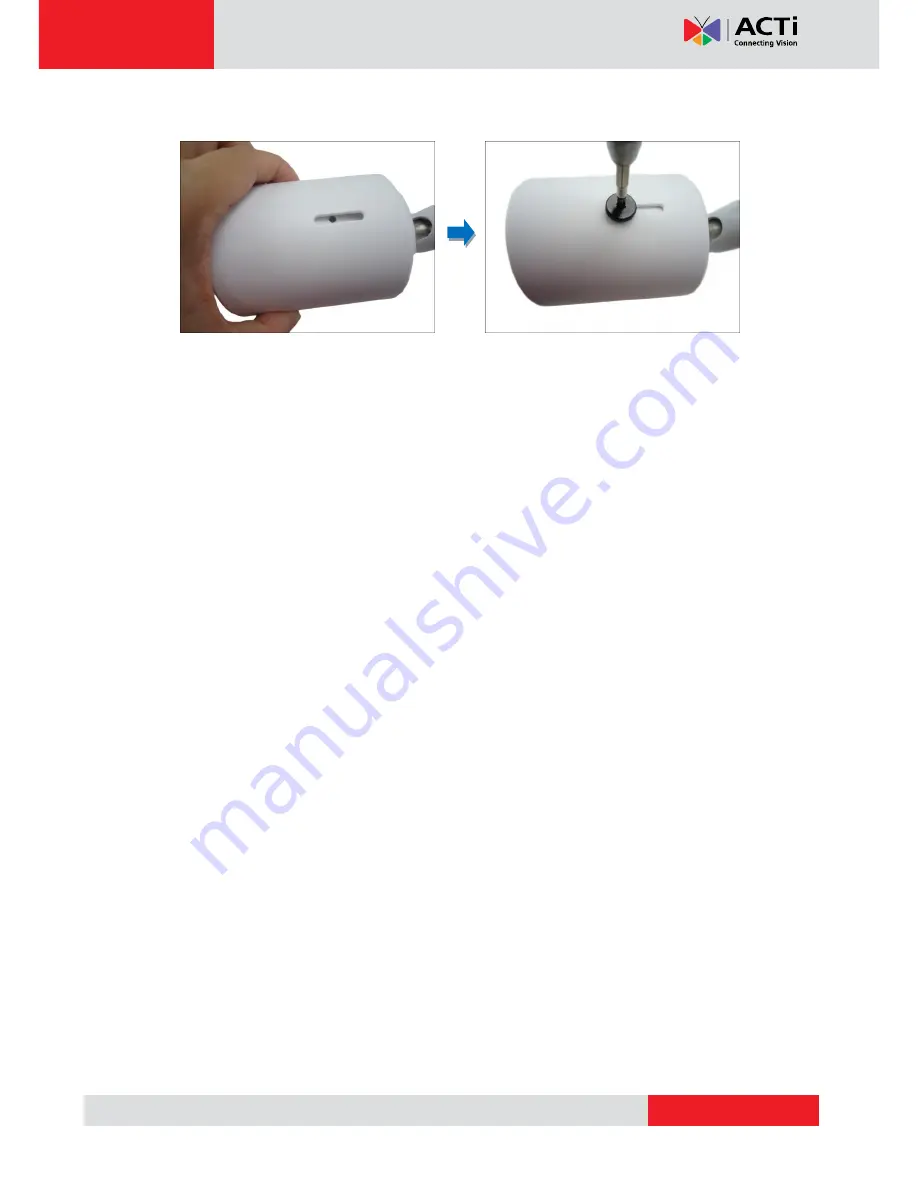
7.
Attach the set screw to secure the sunshield.
How to Remove the Memory Card
In case there is a need to remove the card, make sure to access the camera
Web
Configurator
to safely “unmount” the card first (see the camera Firmware Manual for more
information). Once unmounted from the firmware, simply pull the card from the slot.


