ANR-DNV3N3 Series
User Manual
Acrosser Technology Co., Ltd.
www.acrosser.com
ANR-DNV3N3
Series
Networking 1U Rackmount
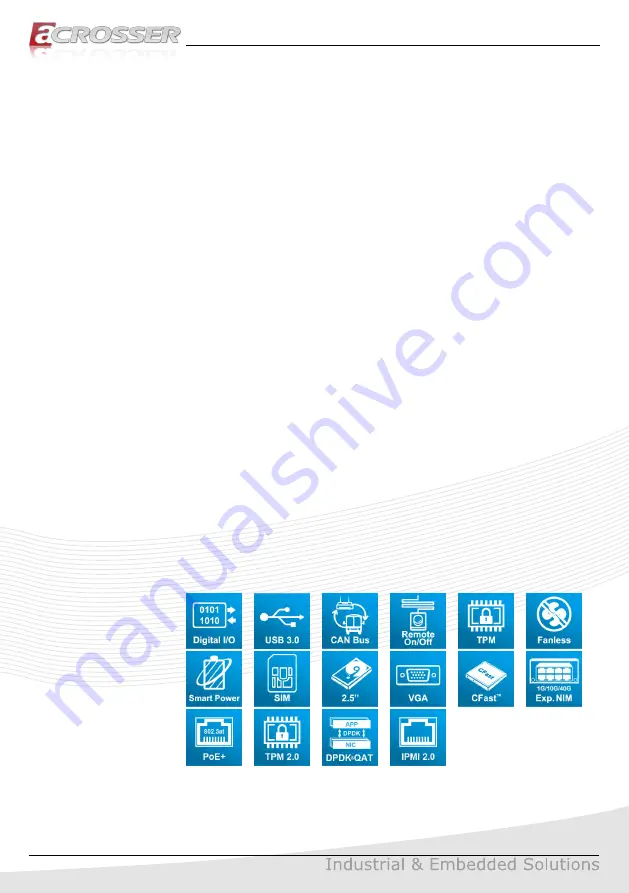
•
Intel
®
Denverton
SoC
• 10 GbE Copper
(2-pair bypass, up to optional 4x PoE)
• 2 or 4 10GbE Fibber
Page 1: ...R DNV3N3 Series User Manual Acrosser Technology Co Ltd www acrosser com ANR DNV3N3Series Networking 1U Rackmount Intel Denverton SoC 10 GbE Copper 2 pair bypass up to optional 4x PoE 2 or 4 10GbE Fibb...
Page 2: ...ages arising out of the use or inability to use the product or documentation even if advised of the possibility of such damages Copyright This document contains proprietary information protected by co...
Page 3: ...vanced Setup W83627DHG Super IO Configuration 23 3 2 3 Advanced Setup W83627DHG HW Monitor 24 3 2 4 Advanced Setup Serial Port Console Redirection 26 3 2 5 Advanced Setup Network Stack Configuration 2...
Page 4: ...s 38 4 2 1 GPIO Watchdog LAN Bypass Subsystem LCM 38 4 3 API List and Descriptions 39 4 3 1 GPIO 39 4 3 2 Watchdog 39 4 3 3 LAN Bypass Subsystem 40 4 3 4 LCD Control Module 41 4 3 5 Power Supply Unit...
Page 5: ...dels Description Model Name Description ANR DNV3N3 04 Intel Atom C3558 4 core SoC 9 GbE Copper 2 pair bypass 1 SFP and 2 SFP 2 USB 3 1 3x 2 5 SATAIII 1 VGA and ATX PSU ANR DNV3N3 08 Intel Atom C3758 8...
Page 6: ...IOS Support Console Re direction Support Bypass Setting Scenario Normal Bypass SYS ON V SYS OFF V WDT Timeout V PWR Lost Remained prior status Support PXE boot from all RJ 45 Coppers BMC Chipset ASPEE...
Page 7: ...Gen3 x8 slot support FullHt HalfLen PCIe Add In Card For C3758 and above SoC not available when Exp NIM is used 2x Smart Cooling Fan 1x Power Switch 1x VGA Single ATX 250WPSU or 1 1 Redundant 300W PSU...
Page 8: ...ion 430 L x 400 W x 44 H mm Operating Temperature 0 40 C 32 104 F Storage Temperature 20 80 C 4 176 F Relative Humidity 0 to 90 40 C non condensing EMC Safety Certification CE FCC Class A RoHS 2 cULus...
Page 9: ...ANR DNV3N3 Series 9 www acrosser com 1 4 System Dissection 1 4 1 Dimensions Unit mm...
Page 10: ...Console Port Micro USB RST Reset Button Mgmt 0 LAN 0 Port Console Console Port RJ45 Navigation Joystick LCM menu control buttons IPMI IPMI Indicator Green HDD HDD Activity Indicator Yellow PWR Power I...
Page 11: ...ve LED LAN 1 8 LAN 1 8 Port PoE Power PoE Power LED 1 4 3 Rear I O Panel AC Inlet Power Switch VGA Expansion Card Slot AC Inlet AC Inlet 1U Redundant ATX PSU VGA VGA connector Power Switch Power on of...
Page 12: ...2 Components Assembly Please follow the instruction to install the inner modules 2 1 PCIe Card Installation Step 1 Remove the screw that lock the cover shield Take out the cover shield Step 2 Install...
Page 13: ...3 Secure the PCIe card by 1 head screw driver 2 2 NIM Module Insertion The products shown in this procedule are used for illustration only may not reflect the exact outlooks Step 1 Remove the screw t...
Page 14: ...V3N3 Series 14 Acrosser Technology Co Ltd Step 2 Open the dummy cover Step 3 Insert your NIM module into the Module A slot Firmly push it all the way in Step 4 Push the latch left This will lock the m...
Page 15: ...ANR DNV3N3 Series 15 www acrosser com Step 5 Use your fingers to lock back the screw Or you may use a screw driver to lock back the screw...
Page 16: ...Ltd 2 3 HDD Installation To install your HDD into the system Step 1 Push the latch right to open the open the HDD s cover Step 2 Insert your HDD into the HDD bracket from aside Pay attention to its o...
Page 17: ...ANR DNV3N3 Series 17 www acrosser com Step 3 Prepare the screw pack Fasten the HDD with 4 screws Step 4 Ready to insert your HDD assembled with bracket into the system...
Page 18: ...NR DNV3N3 Series 18 Acrosser Technology Co Ltd Step 5 Firmly push the HDD bracket into the chassis Make sure to close the door hatch Step 6 Take the door key from the screw pack to lock the HDD bracke...
Page 19: ...ANR DNV3N3 Series 19 www acrosser com 2 4 Rack Installation Step 1 Secure both left and right 1U mounting ears to the server s front panel chassis with your Phillips screwdriver...
Page 20: ...d then press the Enter key to select the item and configure the functions Version 2 19 1266 Copyright C 2020 American Megatrends Inc Select Screen Select Item Enter Select Change Opt F1 General Help F...
Page 21: ...stem System Date System Time Use this option to change the system date and time Highlight System Date or System Time using the arrow keys Enter new values using the keyboard Press the key or the arrow...
Page 22: ...onsole Redirection Trusted Computing Network Stack Configuration CSM Configuration USB Configuration OnBoard Bypass Controller 3 2 1 Advanced Setup OnBoard Bypass Controller Version 2 19 1266 Copyrigh...
Page 23: ...an Megatrends Inc Advanced W83627DHG Super IO Configuration Super IO Chip Serial Port 1 Configuration Set Parameters of Serial Port 1 COMA W83627DHG Serial Port 1 Configuration Set Parameters of Seria...
Page 24: ...83627DHG HW Monitor Version 2 19 1266 Copyright C 2020 American Megatrends Inc Select Screen Select Item Enter Select Change Opt F1 General Help F2 Previous Values F3 Optimized Defaults F4 Save Exit E...
Page 25: ...n Smart Fan Mode FAN Target Temperatur FAN Tolerance Smart Fan Mode Select Thermal Cruise Mode 45 2 Smart Fan Mode Thermal Cruise Mode You can adjust FAN Target Temperatur and FAN Tolerance manually I...
Page 26: ...If this item is set to Enabled you can select a COM Port to be used for Console Redirection Version 2 19 1266 Copyright C 2020 American Megatrends Inc Select Screen Select Item Enter Select Change Opt...
Page 27: ...ta packet he standard setting is 1 Stop Bit Select 2 Stop Bits for slower devices Flow Control Use this item to set the f low control to prevent data loss from buffer overf low Whensending data if the...
Page 28: ...E Support Ipv4 HTTP Support Ipv6 PXE Support Ipv6 HTTP Support IP6 Configuration Pol PXE boot wait time Media detect count Enable Disable UEFI Network Stack Enabled Disabled Disabled Disabled Disabled...
Page 29: ...Support Boot option filter Option ROM execution Network Storage Video Other PCI devices Enable Disable CSM Support Enabled UEFI only Do not launch UEFI UEFI Do not launch CSM Support Use this feature...
Page 30: ...ABLE option will keep USB devices available only for EFI applications 19 UEFI only Enabled Enabled Enabled Enabled Legacy USB Support Select Enabled to support onboard legacy USB devices Select Auto t...
Page 31: ...gs Processor Configuration Displays and provides option to change the Processor Settings 3 3 1 IntelRCSetup Processor Configuration Version 2 19 1266 Copyright C 2020 American Megatrends Inc Select Sc...
Page 32: ...RCSetup South Bridge Chipset Configuration Version 2 19 1266 Copyright C 2020 American Megatrends Inc Select Screen Select Item Enter Select Change Opt F1 General Help F2 Previous Values F3 Optimized...
Page 33: ...ort Configuration of SATA Controller port SATA Port Configuration of SATA Controller port 3 3 4 IntelRCSetup M 2 SATA Port Version 2 19 1266 Copyright C 2020 American Megatrends Inc Select Screen Sele...
Page 34: ...Reset the system after saving the changes 3 20 Password Description If ONLY the Administrator s password is set then this only limits access to Setup and is only asked for when entering Setup If ONLY...
Page 35: ...State Quiet Boot Boot Option Priorities Driver Option Priorities Select the keyboard NumLock state On Disabled Bootup NumLock State This feature selects the Power on state for the Numlock key Quiet B...
Page 36: ...ve completed the system configuration changes select this option to save all changes made and reset the system Discard Changes and Exit Select this option to quit the BIOS Setup without making any per...
Page 37: ...of the timer to reboot can be read from the timer 4 1 4 LCD Control Module The LCM short for LCD Control Module APIs provide interfaces to control the module By invoking these APIs programmers can im...
Page 38: ...col to control the module By invoking these APIs programmers can implement the applications which have the functions listed below Pmbus 1 Read vout 12v 2 Read vout 3 3v 3 Read vout 5v 4 Get power supp...
Page 39: ...riable as the parameter The pin0 pin1 is the status of the output pins Return Value 1 HIGH 0 LOW Syntax Set_gpo int pin int value Description Set the status of GPIO Output value Parameters Set value 0...
Page 40: ...set which pair bypass Wdt timer Parameters pair 1 4 time 1 255 sec 0 stop Return Value 0 Successful 1 fail Syntax int set_bypass_wdt_action int pair int action Description This function can set which...
Page 41: ...ction int pair Description This function can get which pair bypass power off action Parameters pair 1 4 Return Value 0 bybpass 1 normal 1 fail Syntax int set_bypass_current_action int pair int action...
Page 42: ...turn Value None Syntax int get_lcm_key_code unsigned char data Description Scan the LCM and return the identification of the pressed direction key Parameters unsigned char pointer one byte the key cod...
Page 43: ...t PMBUS Syntax float pmbus_read_vout_12V void Description This function can get power supply unit Vout 12V Parameters None Return Value float Vout 12V Syntax float pmbus_read_vout_3V3 void Description...
Page 44: ...2 Read Linear 2 96h READ_ 12V_POUT Read Linear 2 99h MFR_ID Read ASCII 6 9Ah MFR_MODEL Read ASCII 13 9Bh MFR_REVSION Read ASCII 2 9Eh MFR_SERIAL Read ASCII 12 A7h MFR_POUT_MAX Read Linear 2 A8h MFR_T...
Page 45: ...back to normal state the register will be set at 0x00 Contents in 20h VOUT_MODE Command Code Mode Bits 7 5 Bits 4 0 Parameter Linear 000b Five bit two s complement exponent for the mantissa delivered...
Page 46: ...eserved Return 0 Contents in 7Bh STATUS_IOUT Command Code Bit Number Status Bit Name Meaning 7 6 Reserved Return 0 5 12V_OC_WARNING 12V_IOUT Max Current of 110 1Sec 1 Normal 0 4 0 Reserved Return 0 Co...
Page 47: ...U2 PRESENT Module Plug OUT 1 Module Plug IN 0 2 PSU1 PRESENT Module Plug OUT 1 Module Plug IN 0 1 PSU2 STATUS FAIL 1 OK 0 0 PSU1 STATUS FAIL 1 OK 0 MFR Meaning Command Code Command Name Meaning 99h MF...
Page 48: ...0 Disabled 1 Enabled Return Value None 4 3 8 Notes Syntax int libw83627_init void Description use the watchdog gpio function before must be call this function first Parameters None Return Value 0 Succ...
Page 49: ...R DNV3N3 Series 49 www acrosser com 5 FAQ Q 1 Where is the serial number located on my system The serial number S N is an alpha numeric character located on the bottom or side chassis for reference on...
Page 50: ...il Address Your Company Address Acrosser Model Name Acrosser Serial Number Describe System Configuration CPU Type Memory Size Storage Device e g HDD CF or SSD Additional Peripherals e g Graphic Card O...
Page 51: ...ndustrial Zone Tairan 8th Road Futian District Shenzhen China Postal 518040 TEL 86 755 83542210 FAX 86 755 83700087 Acrosser Nanjing Office 228 504 211100 Room 504 No 228 Tian Yuan East Rd Jiang Ning...