11
11
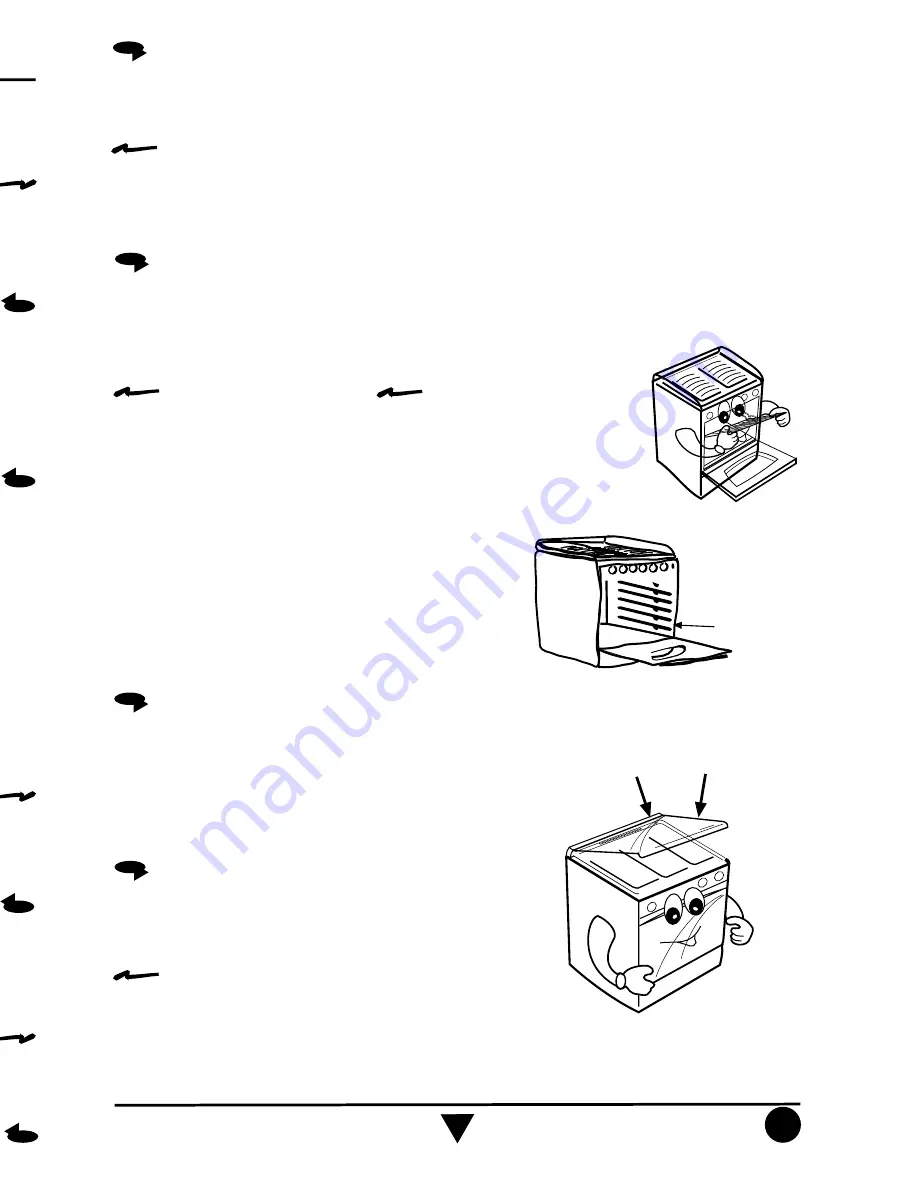
GLASS LID
Some models (see page 2) include a glass lid.
The glass lid is made of resistant tempered glass, it
should be handled with care to avoid breaking the
glass. Open or close the glass lid with care.
SHUT OFF VALVE
Some models (see page 2) include a shut off valve.
This valve controls the gas supply to the range.
Glass Lid Shut Off Valve:
The shut off valve operates with the glass lid, when
the glass lid is opened, the shut off valve is opened,
when the glass lid is closed the shut off valve is
closed. To operate the oven, the glass lid must be
opened.
SHUT OFF VALVE
GLASS LID
OVEN RACK
The oven has 4 different supports for the oven rack, this rack has a stop to avoid droping
from the oven, to change the rack position follow the steps:
To remove the oven rack:
1.- Pull the oven rack until it
stops.
2.- Lift the front part.
3.- Pull it again until it is
released.
To install the oven rack:
1.- Push the oven rack until it
stops.
2.- Lift the front part.
3.- Push it again until it stops.
An extra rack position is provided for special
cooking operations other than baking, such as
roasting, where a large roasting container will
require more heat and therefore need to be closer
to the heat source or oven bottom.
EXTRA RACK
POSITION
Algunos modelos
(ver Pag.
2) cuentan
con capelo
de vidrio.
El capelo
de vidrio
templado
aunque es
resistente,
debe manejarse con cuidado para evitar que se
rompa. Abra o cierre el capelo sin golpearlo.
CAPELO DE VIDRIO
VÁLVULA DE SEGURIDAD
Algunos modelos
(ver Pag.
2) cuentan
con válvula
de seguridad, esta válvula abre y cierra el
suministro de gas a la estufa.
Válvula de Seguridad en Capelo:
La válvula permite el paso del gas solo con el
capelo abierto. Para operar el horno el capelo
debe estar abierto.
CAPELO
Para retirarla de la estufa:
1.- Jale la parrilla hasta el tope.
2.- Levante la parrilla de la parte
frontal.
3.- Jale nuevamente para liberarla.
Para instalarla en la estufa:
1.- Empuje la parrilla hasta el
tope.
2.- Levante la parrilla de la parte
frontal.
3.- Empújela nuevamente para
que llegue hasta el fondo del
horno.
PARRILLA DEL HORNO
Para hornear alimentos muy grandes puede
usarse el soporte extra de la parte inferior.
El horno tiene 4 diferentes soportes para la parrilla, la parrilla tiene un tope que evita
que se salga completamente del horno, para cambiar la posición de la parrilla siga los
pasos:
SOPORTE EXTRA
VÁLVULA
DE SEGURIDAD
ASADOR ELÉCTRICO SUPERIOR:
Algunos modelos
(ver Pag.
2) cuentan
con asador
eléctrico superior,
el asador
se localiza
en la parte superior de la cavidad del horno.
Como funciona el asador eléctrico superior:
Gire la perilla del asador eléctrico superior en sentido contrario a las manecillas
del reloj hasta la posición deseada, oprima por 3
segundos y automáticamente encenderá el asador
superior, el asador tiene tres posiciones de calor:
bajo, medio y alto.
WAIST HIGH WARMER:
Some models (see page 2) have waist high warmer, is located on the top of the oven
cavity.
To use the Waist High Warmer:
Turn the knob counter clockwise until the desired position, push the knob 3 seconds
and the waist high warmer will turn on automatically, it has 3 positions, low, medium
and high.
Summary of Contents for ACK2400
Page 4: ...4 ...
Page 8: ...8 ...
Page 10: ...10 r ...
Page 12: ...12 A lu p A la ti y d 1 2 3 A S a in L p p A n L la s p ...
Page 14: ...14 Ase est Abr Cie pas No Apa Lla aut No oca exp Interrup Termos Relev ...
Page 16: ...16 So ...


