Model DT233-0600
Dual Two-Wire mV/TC Input Transmitters
Acromag, Inc. Tel: 248-295-0880
- 16 -
http://www.acromag.com
- 16 -
https://www.acromag.com
Input/Output Configuration
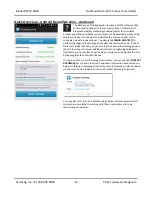
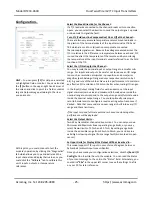
The I/O Configuration screen is shown at left and is used to Configure your
transmitter channels Input and Output. You can set your input
type/range, digital filtering level, break detect, CJC, rescale each channels
input and output, and set the input units via this screen.
Note that if your unit is connected when you select this tab, the app
automatically reads your transmitter
’s current
I/O and scaling information
and displays it.
Likewise, changing any option on this page sends the changes to the
transmitter immediately.
Note that the Device Status is indicated at the bottom of all pages and will
report if changes were sent successfully (Connected).
Input Calibration
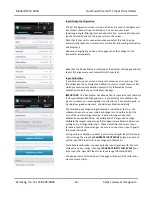
If you have setup your unit and encounter excessive error, you may click
the Calibration tab to display the Calibration control screen shown at left,
which presents Input calibration controls first, followed by Output
calibration controls as you scroll down the page.
IMPORTANT:
The transmitter has already had its input & output channels
factory calibrated with high precision. If you attempt to recalibrate the
input or outputs, you may degrade its performance if done improperly, or
by using low grade equipment. Consider recalibration carefully.
The selected input range being calibrated is indicated at the top. The
software does not use your scaled sub-range zero to calibrate, but the
zero of the nominal range selected. Some sub-ranges have their
calibration extrapolated from the calibration of a larger native range.
Calibrate the largest native range first to keep its recalibration from over-
writing any sub-range calibration. These transmitters have two input
terminals specific to input ranges--be sure to connect your input signal to
the proper terminals.
For input zero calibration, connect a precise input signal level for the zero
of your range, then tap the
[CALIBRATE INPUT ZERO]
button one time to
set the input ADC level to its input range zero (0%) point.
For full-scale calibration, connect a precise input signal level for the full-
scale value of your range, then tap
[CALIBRATE INPUT FULL-SCALE]
one
time to set the input ADC level to its input range full-scale (100%).
The device status at the bottom of the page will report if the calibration
was sent successfully.

