


CATALYST (continued)
Now divide the concentration of carbon monoxide (CO) expressed in percent by the concentration of
carbon dioxide (CO2) to obtain the appliance combustion ratio.
The combustion ratio of the gasses emitted by the catalytic convertor should not exceed 0.0015.
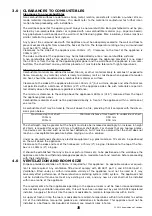
If replacing the catalytic converter, remove the
hood, front fret/facia and the grille (as shown
in figure 16). The catalytic converter retaining
clamp is secured with 4 nuts and slip proof
washers, located on the inside of the firebox,
at the top, remove these nuts and the clamp
can be removed. Withdraw the clamp, followed
by the catalytic converter and its seals from
the firebox and discard.
Refit a new catalytic converter and seal in
reverse order.
TESTING FOR FIREBOX LEAKAGE
Appliances that are several years old or have been extensively dismantled should be checked for
soundness. It is important that all the products of combustion pass through the catalytic converter at
the top of the firebox before leaving the appliance.
The firebox is heated by lighting for a few minutes to provide a flow through the firebox. The burner
is then shut off and a smoke pellet or match introduced at the base of the fire underneath the burner
tray. Large quantities of smoke will emerge from the top of the appliance, but none should emerge
from the joints or gasket faces, especially around the door.
It is important to note that the appliance can never be expected to be 100% smoke tight and small
quantities of smoke may be seen in corners of joints and gasket faces etc without affecting safety
when the fire is in operation.
TROUBLESHOOTING GUIDE
Fire sparks but pilot does not light
No gas to fire - check isolators are open.
Pipe work blockage or kink - rectify.
Air not fully purged - re-purge supply or wait longer.
Spark earthing to metal work - check gap is correct.
Blocked pilot - check and replace where necessary.
Pilot lights but then goes out
Severe restriction in gas supply - clear obstruction.
Faulty thermocouple - replace pilot unit.
Blocked pilot - replace.
Blocked lint gauze - clean.
Hold control knob in for longer.
Check the control knob does not foul on the data plate.
If the pilot will not stay lit there is a problem with dirt, the
gas supply, or the thermocouple is in need of replacement.
Modifications are dangerous and can have a serious unseen
effect on safety.
NEVER MODIFY OR BEND THE THERMOCOUPLE TO MAKE
THE PILOT STAY ALIGHT
.
Fire does not spark at pilot
Electrode lead detached - refit.
Spark gap too large or small - reset correctly.
Faulty piezo unit - replace gas valve.
Debris shorting out electrode - clean.
Spark shorting to metalwork under tray - realign electrode lead.
9.4
13
©
2011 Acquisitions of London
CO (%)
CO2 (%) = ratio
9.5
10.0
Figure 16