Acoustic Research AWD211 Owner'S Manual Download Page 7

B

UTTONS

 & J

ACKS

7

Using the Wireless Headphones

Turning the Headphones On

1.  Make sure the transmitter is plugged 

in and connected to an audio source. 
Start playback on the audio source. 
The indicator light on the top of the 
transmitter turns blue when a signal 
is transmitting.

2.  Press the On/Off button on the right 

headphone.


The headphones and transmitter should tune automatically in a 
matter of seconds—you should hear sound from the headphones. 


Use the volume controls on the bottom of the right headphone to 
adjust the headphone volume. 


If you don’t hear sound from the headphones:


Make sure the indicator light on top of the transmitter is blue. If it is 
and you still don’t hear sound from the headphones, press the pair 
button on the back of the transmitter and the pair button on the 
right headphone simultaneously for three seconds.


If the indicator light on top of the transmitter is not blue:

Make sure the transmitter is plugged in and your audio source is 
connected to the transmitter and playing audio. If you’re using a 
variable-level audio output (something you can set the volume on), 
adjust the volume on your audio source. Then adjust the volume 
using the Volume wheel on the right earphone.

Turning the Headphones Off

While you hear sound coming from the headphones, press the On/Off 
button. Don’t forget to unplug the transmitter too!

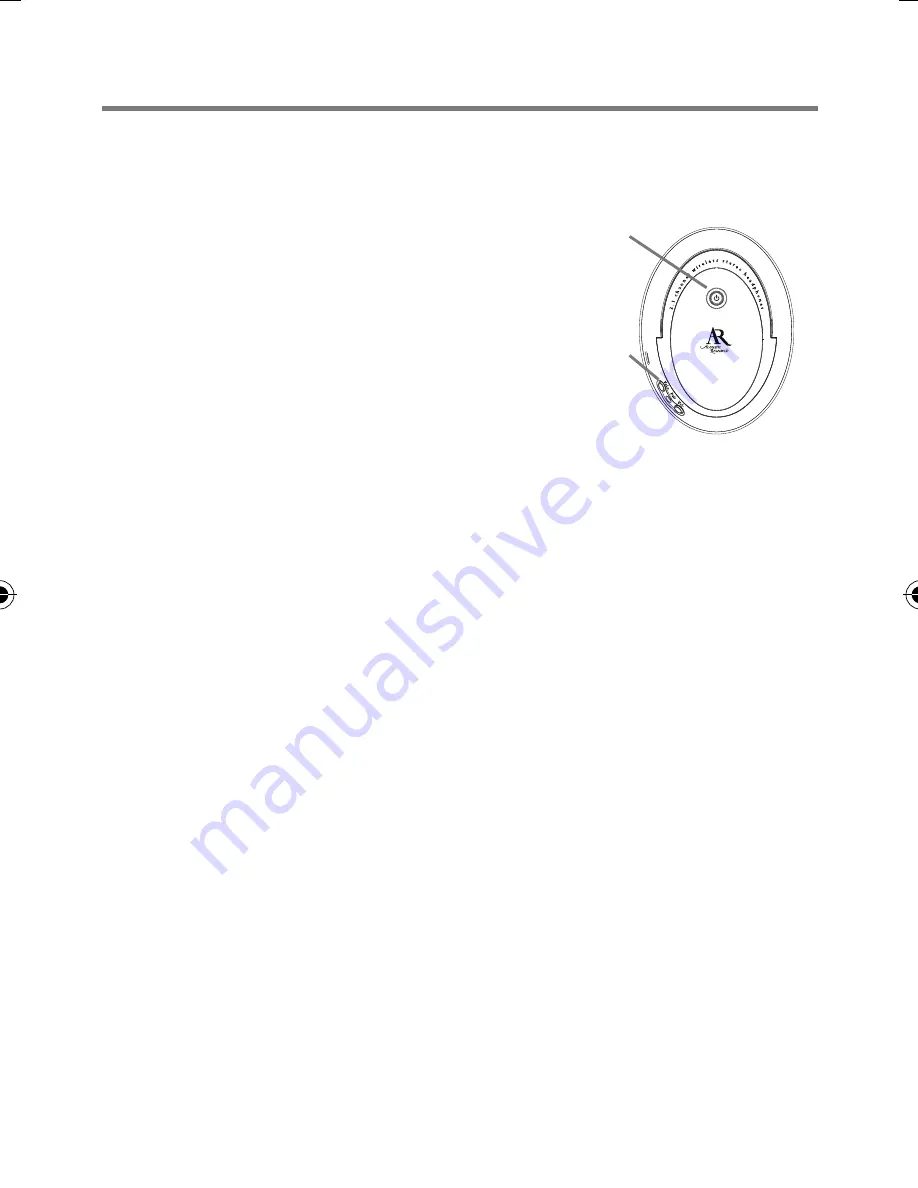
Right headphone, side view

On/Off 

button

Volume 

controls

Summary of Contents for AWD211

Page 1: ...WIRELESS 2 1 STEREO HEADPHONES OWNER S MANUAL AWD211...

Page 2: ...y cord or plug is damaged liquid has been spilled or objects have fallen into the apparatus the apparatus has been exposed to rain or moisture does not operate normally or has been dropped FCC Informa...

Page 3: ...anywhere inside or outside your home Easy push button pairing makes it simple to get started wirelessly This manual covers various connection options and detailed operating instructions for setup and...

Page 4: ...h an alkaline battery DO NOT mix new and used batteries DO NOT leave batteries installed in the product when not in use for long periods Always remove old weak or worn out batteries promptly and recyc...

Page 5: ...or injury DO NOT place the headphones in the charging cradle if you installed alkaline or other non rechargeable batteries this could cause the batteries to leak which would damage the headphones To c...

Page 6: ...e 3 5mm jack of the included stereo audio cable into the adapter and connect the stereo cable to the transmitter Setting Up the Transmitter The 2 4GHz digital wireless transmitter works with a wide va...

Page 7: ...dicator light on top of the transmitter is blue If it is and you still don t hear sound from the headphones press the pair button on the back of the transmitter and the pair button on the right headph...

Page 8: ...panel of the transmitter Back Panel PAIR allows you to link manually to the headphones if they do not automatically link AUDIO IN jacks connect to the provided audio cable DC IN jack connects to the A...

Page 9: ...st the source s volume control Fixed level audio outputs from stereo receivers amps are typically designated as tape or VCR audio output connections sometimes marked on the component as TAPE OUTPUT TA...

Page 10: ...or compact stereo systems inserting a headphone plug into the headphone jack results in automatic cutoff of the regular or hard wired speakers Most TVs regardless of age or price have variable output...

Page 11: ...r is receiving audio the transmitter s indicator light should be blue If the transmitter s indicator light is blue and you still don t hear sound from the headphones press the pair button on the back...

Page 12: ...ing non rechargeable batteries in the product while plugged into an AC outlet THE EXTENT OF THE COMPANY S LIABILITY UNDER THIS WARRANTY IS LIMITED TO THE REPAIR OR REPLACEMENT PROVIDED ABOVE AND IN NO...

Reviews: