– 24 –
– 25 –
FireWire Users:
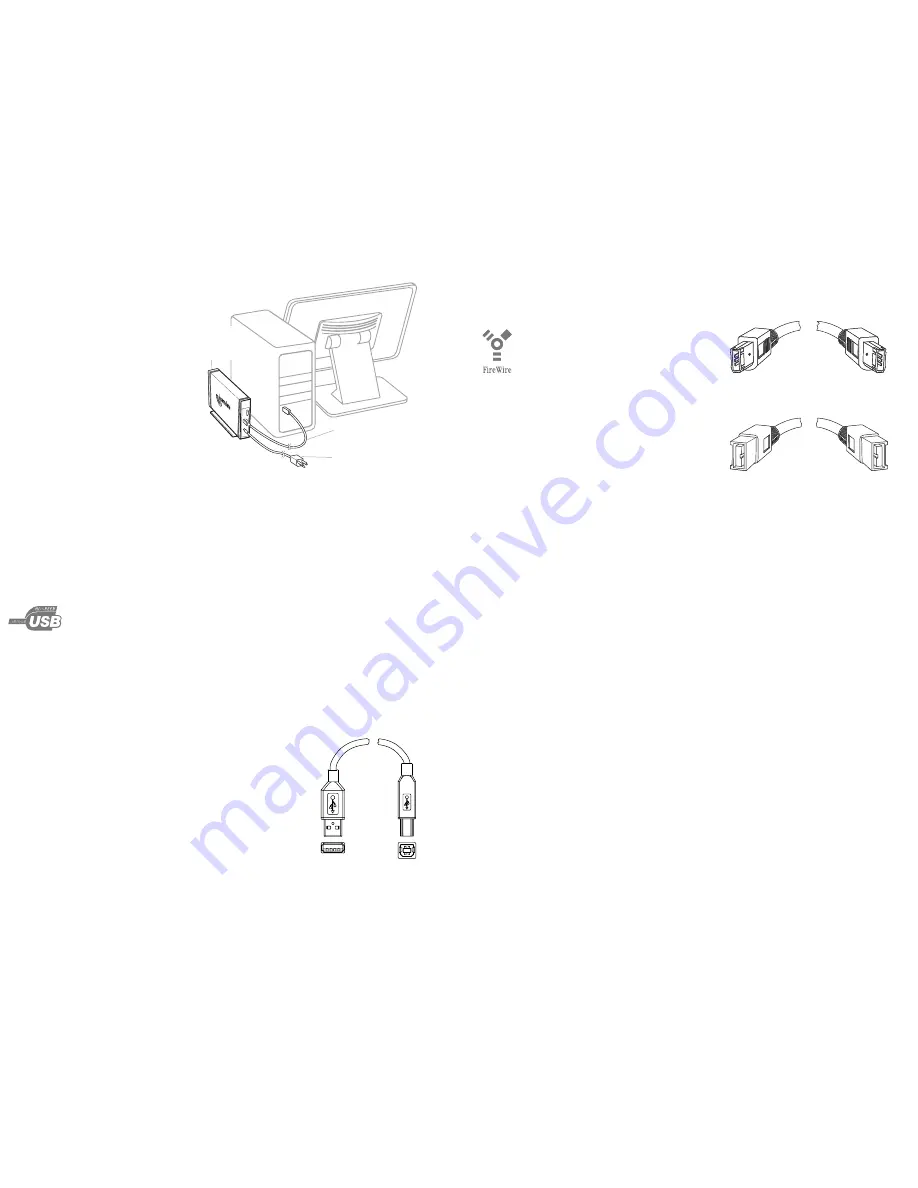
• FireWire plugs are shaped so they
can only be inserted one way. Be
sure to insert the plugs properly or
you may damage the Drive and void the
warranty.
• FireWire-equipped Drives have at
least two FireWire ports for daisy-
chaining other FireWire devices. You
can use either port to connect the
Drive to your computer.
Before you install the Drive, we recommend that you restart
your computer or shut it down and connect the Drive with
the computer turned off.
1. The pins of the small AC adapter plug are arranged in a
pattern such that the plug can be inserted into the Drive’s
Power Port only one way. Orient the plug correctly and
insert the plug into the Power Port. The plug should not
require much effort to insert. If the plug will not go in,
check that the orientation is correct and try again. Do not
force the plug or you may damage it and/or the Drive.
2. Plug the power cord into the socket in the AC adapter.
Plug the other end into a three-prong (grounded) outlet.
3. Connect the USB 2.0 or FireWire cable.
4. Press the power switch located on the back of the Drive.
If you are using a FireWire connection proceed to the section
“Mounting a FireWire-Connected Drive.”
If you are using a USB connection proceed to the section
“Mounting a USB-Connected Drive.”
6-pin to 6-pin cable
9-pin to 9-pin cable
Connecting
the Drive
to Your
Computer
Windows 98SE Users
with PushButton Drives
You will need your Windows 98SE CD-ROM and the Acom-
Data Software CD, which contains the USB 2.0 driver. Before
connecting the Drive, insert the AcomData Software CD into
your CD drive. The CD will launch automatically and you will
see the Retrospect Express start screen. Click Quit to exit the
screen, but leave the CD in the drive.
USB Users:
• We recommend that when you install the Drive, you con-
nect it to a USB port on your computer rather than to a
USB hub. Once the installation has been successfully com-
pleted, you can then connect the Drive to a USB hub if you
so choose. We recommend this approach because if you
experience a problem during installation, it will be easier
to troubleshoot if a USB hub is not used.
• Each end of the USB cable has different
connectors called 'A' and 'B'. The 'A' con-
nector plugs into your computer or USB
hub. The 'B' connector plugs into the
Drive. Be sure to correctly insert the con-
nectors, or you may damage the Drive
and void the warranty.
��������
��������
���������
��������
��
�
���
�
���
�
�����
���
�������
��
�����
�
����
�
���
�
���
����
�������
�
���
��
����
�
���
�
���
����
�������
�
���
��
����


