LED-HC101 II
6. How to control the fixture
There are three ways to control the fixture
A. Control by DIP switches
B. Control by Universal DMX controller
C. Master/Slave operation
A. Control by DIP switches
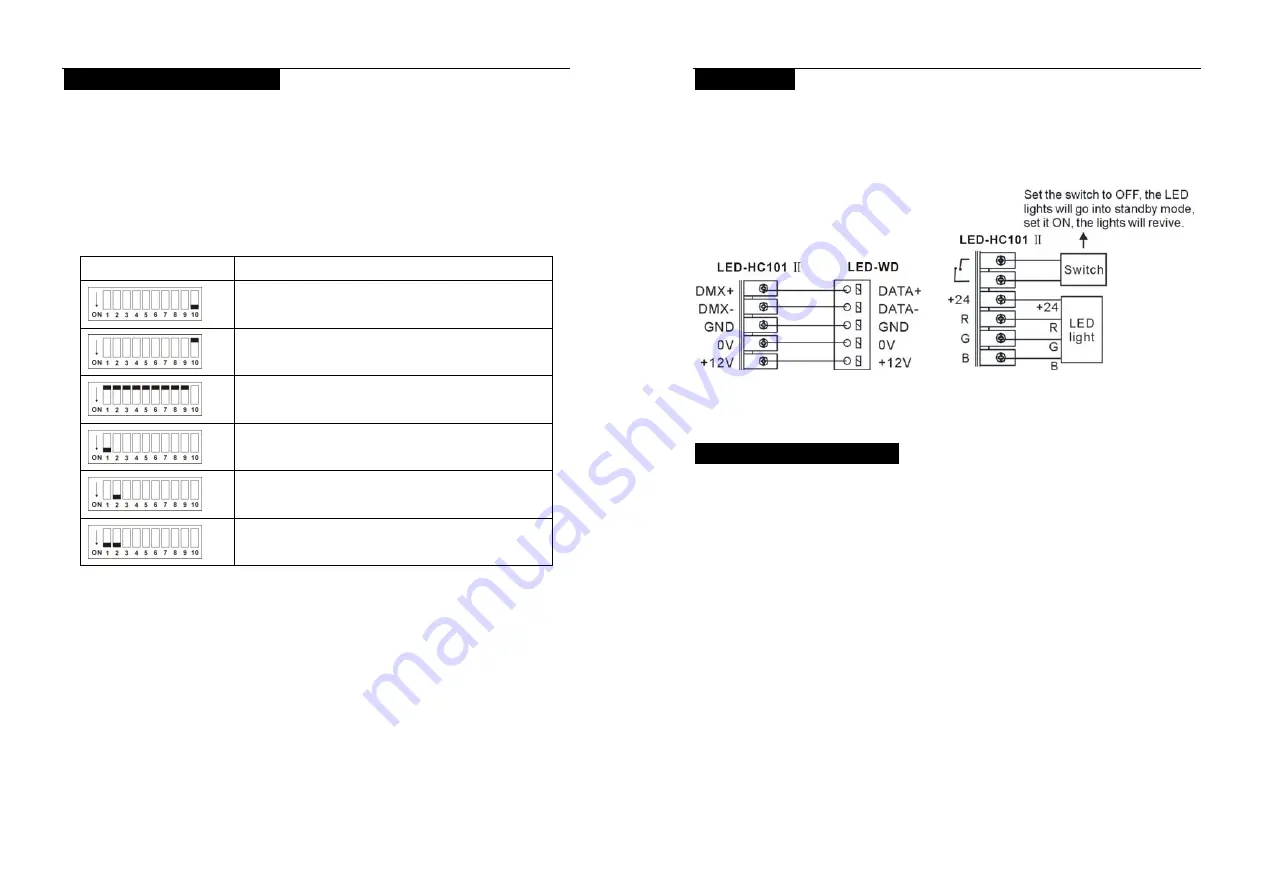
Dip switches setting
Mode
Master
Slave
Sound
Chase
Use Dip switch 3, 4, 5 to choose chase speed (1-8)
Fade
Use Dip switch 3, 4, 5 to choose fade speed (1-8)
Color
Use Dip switch 6, 7, 8, 9 to choose color (16)
B. Control by universal DMX controller
If you use a controller with 5 pins DMX connector, you need to use a 5 to 3 pin
adapter. The fixture uses four channels. Please refer to the following diagram to use
your controller to activate the fixture.
LED-HC101 II
4. Installation
1. Ensure that mains power supply is off before installing or wiring the LED fixture
2. Unscrew the screws and connect the wires as diagrams below
3. Tight the screws.
CAUTIONS
:
the LED controller total output power consumption is 100 watt.
5. DMX512 Address Setting
Each fixture needs to have a start address set to receive the data sent by the
controller. The address number is between 0-511 (usually 0 & 1 are equal to 1). The
address, also know as the start channel, is the first channel used to receive
instructions from the controller.
There are four ways to set the fixture DMX start address:
A. DMX address setting by dip-switches
B. Auto DMX addressing
C. Remote DMX address setting by CA-T DMX TESTER
D. Remote DMX address setting by universal DMX controller
If you use the function B, C or D to set the DMX start address, the fixtures of
the chain all DIP switch MUST be set to OFF.
When you set the address by DMX controller and dip-switch at the same
time, the order of the DMX controller will be invalid.
7A
4A


