3-10
Machine Maintenance Procedures
3G Card Removal
0
Prerequisite:
Battery Pack Removal
1.
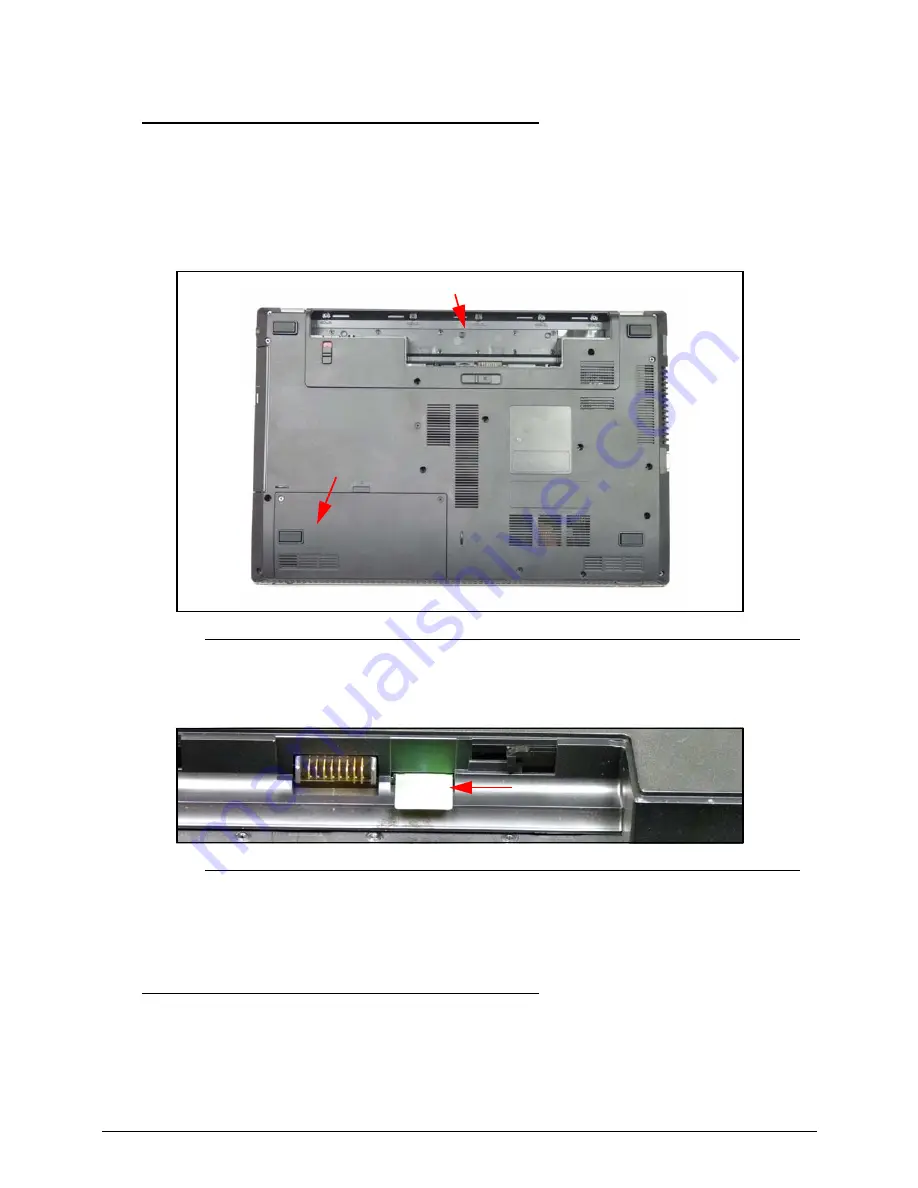
Locate 3G card slot in battery bay (A). (Figure 3-5)
Figure 3-5.
Lower Cover Overview with Base Door
2.
Push in 3G card (C) to release it from spring latch. (Figure 3-6)
Figure 3-6.
3G Card
3.
Remove 3G card.
3G Card Installation
0
1.
Insert 3G card (A) into card slot. (Figure 3-6)
2.
Push card until spring latch locks.
3.
Install battery pack.
A
B
C
Summary of Contents for TravelMate 5760
Page 1: ...TravelMate 5760 5760G SERVICE GUIDE ...
Page 10: ...x ...
Page 11: ...CHAPTER 1 Hardware Specifications ...
Page 14: ...1 4 ...
Page 62: ...1 52 Hardware Specifications and Configurations ...
Page 63: ...CHAPTER 2 System Utilities ...
Page 81: ...System Utilities 2 19 Figure 2 19 InsydeFlash ...
Page 92: ...2 30 System Utilities ...
Page 93: ...CHAPTER 3 Maintenance Procedures ...
Page 96: ...3 4 ...
Page 107: ...Machine Maintenance Procedures 3 15 ID Size Quantity Screw Type A M2 0x3 0Ni 4 ...
Page 151: ...CHAPTER 4 Troubleshooting ...
Page 178: ...4 28 Troubleshooting ...
Page 179: ...CHAPTER 5 Jumper and Connector Locations ...
Page 180: ...5 2 Jumper and Connector Locations 5 3 Clearing Password 5 6 BIOS Recovery by Crisis Disk 5 8 ...
Page 188: ...5 10 ...
Page 189: ...CHAPTER 6 FRU Field Replaceable Unit List ...
Page 190: ...6 2 Main Assembly 6 4 LCD Assembly 6 6 ...
Page 206: ...6 18 FRU Field Replaceable Unit List ...
Page 207: ...CHAPTER 7 Model Definition and Configuration ...
Page 208: ...7 2 TravelMate 5760 7 3 TravelMate 5760G 7 6 ...
Page 215: ...CHAPTER 8 Test Compatible Components ...
Page 216: ...8 2 TravelMate 5760 5760G 8 4 ...
Page 227: ...CHAPTER 9 Online Support Information ...
Page 228: ...9 2 Introduction 9 3 ...
Page 230: ...9 4 Online Support Information ...


