15
8. Low Blue Light: Filters out blue light to protect your eyes by adjusting how much blue
light is shown -- Standard, Level 1, Level 2, Level 3 or Level 4.
‑‑‑‑‑‑‑‑‑‑‑‑‑‑‑‑‑‑‑‑‑‑‑‑‑‑‑‑‑‑‑‑‑‑‑‑‑‑‑‑‑‑‑‑‑‑‑‑‑‑‑‑‑‑‑‑‑‑‑‑‑‑‑‑‑‑‑‑‑‑‑‑‑‑‑‑‑‑‑‑‑‑‑‑‑‑‑‑‑‑‑‑‑‑‑‑‑‑‑‑‑‑‑‑‑
Note:
A higher value allows more blue light to pass through, so in order to
achieve the best protection, please select a lower value, of which 50% is in the
best state and has been tested by TÜV Rheinland and meet the requirements of
TÜV Rheinland's “Low Blue Light Content” standard.
9. ACM: Turn ACM on or off.
Note:
Set to "On", will be based on the current screen to dynamic contrast adjustment.
10. Super Sharpness: Turn the Super Sharpness On or Off. Super Sharpness technology
can simulate high-resolution images by boosting the pixel density of the original
source to make images sharper and clearer.
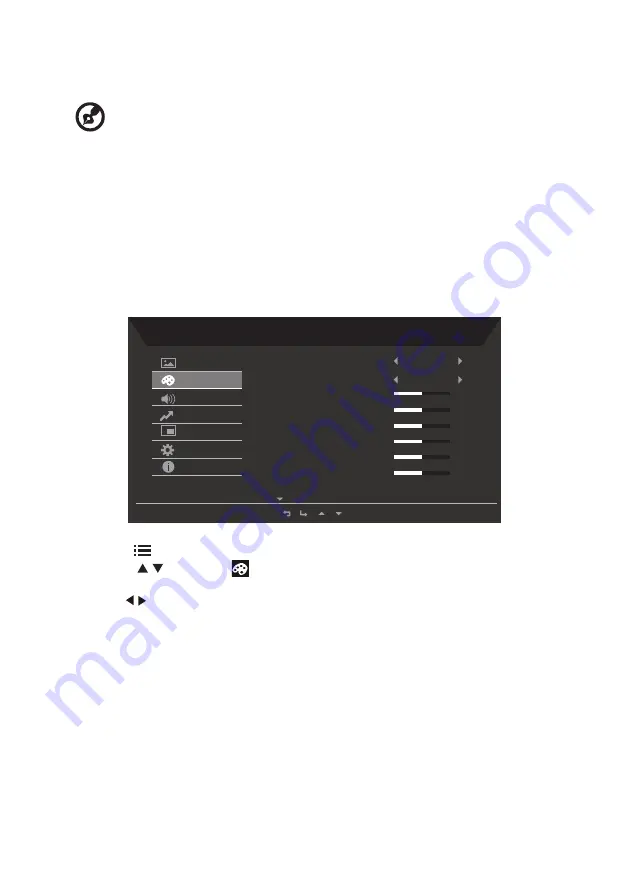
Adjusting the Color setting
Mode - Standard
Warm
Picture
Color
Audio
Performance
OSD
System
Information
Gamma
Color Temp
.
R Gain
50
G Gain
50
B Gain
50
R Bias
50
G Bias
50
B Bias
50
2.2
1. Press the
key to bring up the OSD.
2. Using the / keys, select
Color from the OSD menu. Then navigate to the feature
you wish to adjust.
3. Use the / keys to adjust the sliding scales.
4. The Color menu can be used to adjust the current Gamma, Color Temp. Mode, sRGB
Mode, Grayscale Mode and other color-related qualities.
5. Color temperature: Default is warm. You can choose Cool, Normal, Warm, Bluelight or
User.
6. Modes: To choose scenario mode.
7. sRGB: Default is off. You can turn sRGB on or off to better color match with peripheral
devices, such as printers and digital cameras.
8. Grayscale Mode: To choose Grayscale mode.
9. 6-axis Hue: Adjust the red, green, blue, yellow, magenta and cyan hue.
10. 6-axis Saturate: Adjust the red, green, blue, yellow, magenta and cyan saturation.


