background image

8.  DDC/CI: Allows the monitor settings to be set through the software on the PC. 

-----------------------------------------------------------------------------------------------------------

Note: 

DDC/CI, short for Display Data Channel/Command Interface, which allows 

monitor controls to be sent via software.

9. 

HDMI Black level: Select to set HDMI1.4 black level.

10.  Quick start mode: Select Off or On. Turn on to speed up boot speed.

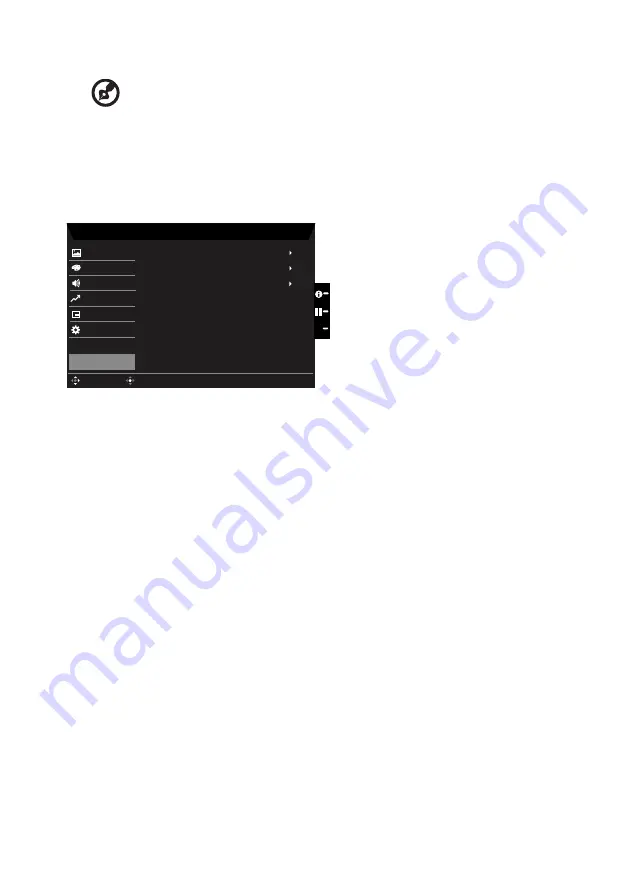
Save Setting to…(User mode only)

Mode - User

System

Mode: Reading

Picture

Color

Mode: sRGB

Audio

OSD

Mode: Darkroom

Enter

Move

X

Save setting to...

Performance


1. 

Press the MENU key to open the OSD.

2.  Toggle the joystick to the up or down to select "Save Setting to..." from the OSD.Then 

toggle to the right to


navigate to the element you wish to adjust and press the joystick 

to enter it.

3. 

Save Setting to Game mode: There are three user-defined profiles available. When 

you have decided what settings suit you, save them and system will be able to recall 

the settings in the future when you turn on gaming mode .

Summary of Contents for CB242Y

Page 1: ...Acer LCD Monitor User Guide...

Page 2: ...provided below The serial number and model number are recorded on the label affixed to your computer All correspondence concerning your unit should include the serial number model number and purchase...

Page 3: ...ind slightly uneven brightness on the screen depending on the desktop pattern you use The LCD screen has 99 99 or more effective pixels It may include blemishes of 0 01 or less such as a missing pixel...

Page 4: ...g These openings must not be blocked or covered The openings should never be blocked by placing the product on a bed sofa rug or other similar surface This product should never be placed near or over...

Page 5: ...tric shock and or injury Note The grounding pin also provides good protection from unexpected noise produced by other nearby electrical devices that may interfere with the performance of this product...

Page 6: ...rticles such as grain dust or metal powders Additional safety information Your device and its enhancements may contain small parts Keep them out of the reach of small children IT Equipment Recycling I...

Page 7: ...the risk of physical injury Incorrect computer usage may lead to carpal tunnel syndrome tendonitis tenosynovitis or other musculoskeletal disorders The following symptoms may appear in the hands wrist...

Page 8: ...nd or contrast to a comfortable level for enhanced text readability and graphics clarity Eliminate glare and reflections by placing your display in such a way that the side faces the window or any lig...

Page 9: ...escribed above is in conformity with the relevant Union harmonization legislations as below Directive and following harmonized standards and or other relevant standards have been applied EMC Directive...

Page 10: ...tion The following local Manufacturer Importer is responsible for this declaration Product LCD Monitor Model Number SKU Number x 0 9 a z or A Z Name of Responsible Party Acer America Corporation Addre...

Page 11: ...Finding your comfort zone vii Taking care of your vision viii Developing good work habits viii Declaration of Conformity ix Federal Communications Commission Declaration of Conformity x Unpacking 1 A...

Page 12: ...resent when you unpack the box and save the packing materials in case you need to ship or transport the monitor in the future LCD monitor Quick start guide USERGUIDE DP Cable Optional HDMI1 4 cable Op...

Page 13: ...ght tilt of the monitor Height Adjustment After pressing the top of the monitor then you can adjust the height of the monitor 2 1 120mm Tilt Please see the illustration below for an example of the til...

Page 14: ...swivel the monitor for the most comfortable viewing angle Monitor Pivot Before rotating the display lift it to the top position and then push it back to the utmost degree Rotate clockwise or counter c...

Page 15: ...plug rated 10 A 125 V For units using 220 240 V AC Use a cord set consisting of H05VV F cord and plug rated 10 A 250 V The cord set should have the appropriate safety approvals for the country in whi...

Page 16: ...informs the host system about its capabilities for example supported resolutions and corresponding timing The monitor supports the DDC2B standard 20 pin color display signal cable PIN No Description...

Page 17: ...0 10 TMDS Clock 11 TMDS Clock Shield 12 TMDS Clock 13 CEC 14 Reserved N C on device 15 SCL 16 SDA 17 DDC CEC Ground 18 5V Power 19 Hot Plug Detect 15 pin color display signal cable 1 5 6 10 11 15 PIN...

Page 18: ...66 66Hz 3 VESA 720x400 70Hz 4 SVGA 800x600 56Hz 5 SVGA 800x600 60Hz 6 XGA 1024x768 60Hz 7 XGA 1024x768 70Hz 8 VESA 1152x864 75Hz 9 SXGA 1280x1024 60Hz 10 VESA 1280x720 60Hz 11 WXGA 1280x800 60Hz 12 W...

Page 19: ...port on the computer with the audio cable 5 Insert the monitor power cable into the power port at the back of the monitor Connect the power adapter and power cord to the monitor then to a properly gro...

Page 20: ...select scenario mode or game mode 4 Function key X a Press to view Main page Press again to enter Input select function b When the Function Menu is active this button will quit the OSD 5 Function key...

Page 21: ...andard Brightness 80 Input HDMI Menu 1 Hot Key1 Modes Brightness Volume Gamma Contrast Blue Light Over Drive 2 Hot Key2 Modes Brightness Contrast Volume Gamma Blue Light Over Drive 3 Hot Key3 Input Sw...

Page 22: ...just and press the joystick to enter it 3 Toggle the joystick to the left or right to adjust the sliding scales Information Hot Key Show Monitor Information and Reset control function Modes Hot Key To...

Page 23: ...ue light to protect your eyes by adjusting how much blue light is shown 80 70 60 or 50 Note A higher value allows more blue light to pass through so in order to achieve the best protection please sele...

Page 24: ...rom the OSD Then toggle to the right to navigate to the element you wish to adjust and press the joystick to enter it 3 Toggle to the left or right to adjust the sliding scales 4 Gamma mode allows you...

Page 25: ...cy OSD Lock Enter Move X Performance 1 Press the MENU key to open the OSD 2 Toggle the joystick to the up or down to select OSD from the OSD Then toggle to the right to navigate to the element you wis...

Page 26: ...oystick to the up or down to select System from the OSD Then toggle to the right to navigate to the element you wish to adjust and press the joystick to enter it 3 Toggle to the left or right to contr...

Page 27: ...r System Mode Reading Picture Color Mode sRGB Audio OSD Mode Darkroom Enter Move X Save setting to Performance 1 Press the MENU key to open the OSD 2 Toggle the joystick to the up or down to select Sa...

Page 28: ...ness and contrast to maximum or reset to their default setting Off Check the power switch Check if the AC power cord is properly connected to the monitor Amber Check if the video signal cable is prope...

Reviews: