3 System upgrades
28
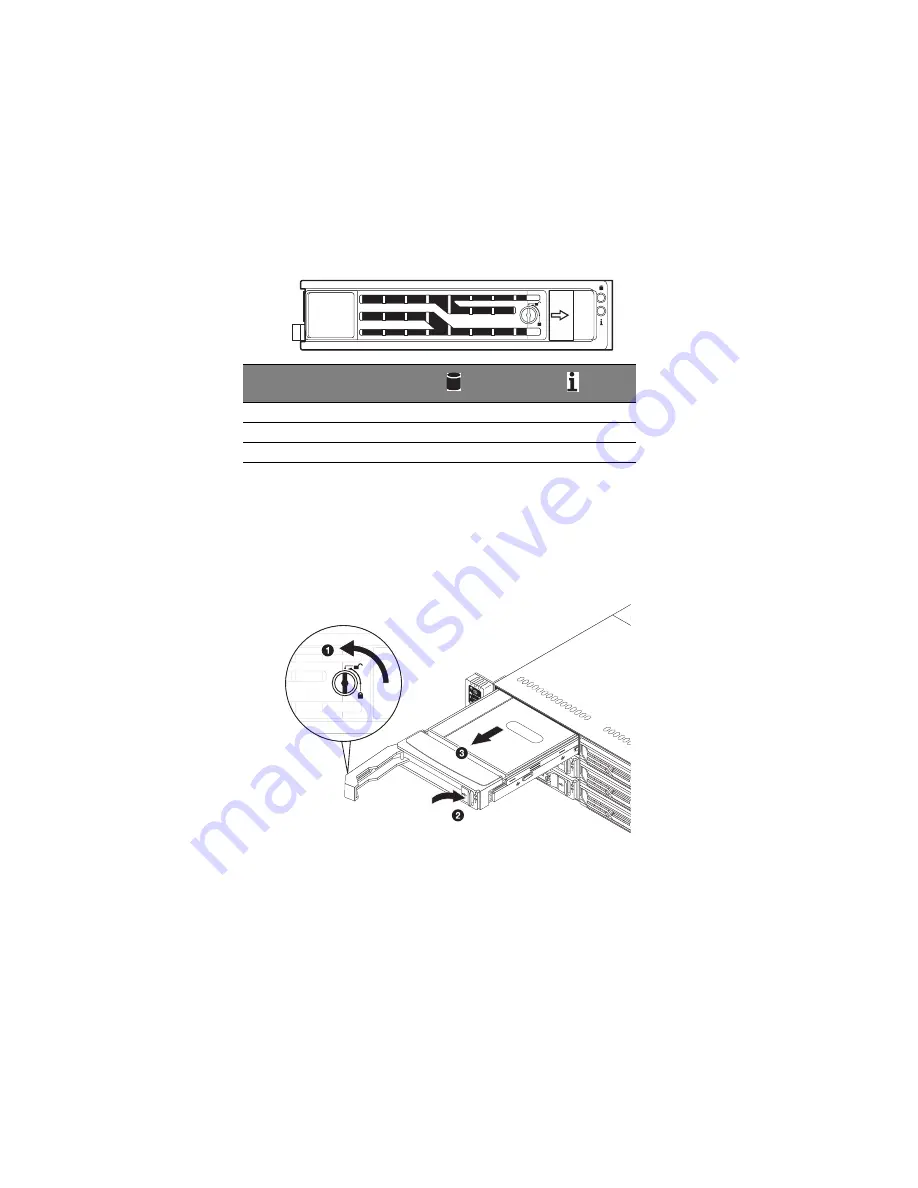
Hot-plug HDD carrier LED indicators
Removing a hard disk drive with carrier
1
Observe the ESD precautions described on page 24.
2
Remove the carrier with failed HDD.
(1) Unlock the HDD carrier latch.
(2) Slide the HDD carrier latch to release the lever.
(3) Pull the lever and slide the carrier from the chassis.
3
Observe the post-installation instructions described on page 25.
Description
Blue
Red
HDD present no access
Off
Off
HDD access
Blink
Off
Summary of Contents for AW2000h-AW170h
Page 1: ...AW2000h Series User Guide AW170h F1 AW170hd F1 AW170hq F1 ...
Page 16: ...xvi ...
Page 17: ...1 System tour ...
Page 30: ...1 System tour 14 ...
Page 31: ...2 System setup ...
Page 38: ...2 System setup 22 ...
Page 39: ...3 System upgrades ...
Page 70: ...3 System upgrades 54 ...
Page 71: ...4 System BIOS ...
Page 99: ...5 System troubleshooting ...
Page 109: ...Appendix A Server management tools ...
Page 114: ...Appendix A Server management tools 98 ...
Page 115: ...Appendix B Rack mount configuration ...
Page 126: ...Appendix B Rack mount configuration 110 ...
Page 127: ...Appendix C Acer Smart Console ...
Page 156: ...Appendix C Acer Smart Console 140 ...
Page 160: ...150 ...


