209
Appendix A
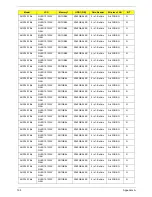
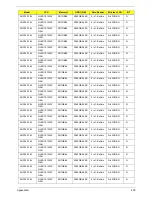
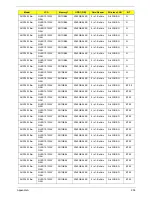
AOD150-1BGw
NLED10.1WSV
GAG
SO1GBII6
N160GB5.4KS
5 in 1-Build in
3rd WiFi BG
BT 2.0
AOD150-0BGw
NLED10.1WSV
GAG
SO1GBII6
N160GB5.4KS
5 in 1-Build in
3rd WiFi BG
BT 2.0
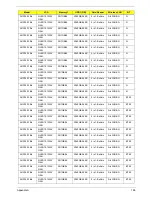
AOD150-0BGw
NLED10.1WSV
GAG
SO1GBII6
N160GB5.4KS
5 in 1-Build in
3rd WiFi BG
BT 2.0
AOD150-1BGw
NLED10.1WSV
GAG
SO1GBII6
N160GB5.4KS
5 in 1-Build in
3rd WiFi BG
BT 2.0
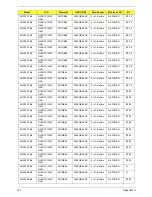
AOD150-0BGw
NLED10.1WSV
GAG
SO1GBII6
N160GB5.4KS
5 in 1-Build in
3rd WiFi BG
BT 2.0
AOD150-0BGw
NLED10.1WSV
GAG
SO1GBII6
N160GB5.4KS
5 in 1-Build in
3rd WiFi BG
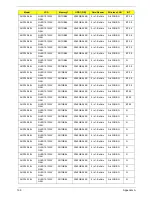
N
Model
LCD
Memory 1
HDD 1(GB)
Card Reader
Wireless LAN
BT
Summary of Contents for Aspire One AOD150
Page 6: ...VI ...
Page 10: ...X Table of Contents ...
Page 28: ...18 Chapter 1 ...
Page 42: ...32 Chapter 2 5 Flash is complete when the message Flash programming complete displays ...
Page 55: ...Chapter 3 45 4 Lift the Memory cover up to remove 5 Lift the WLAN cover up to remove ...
Page 67: ...Chapter 3 57 7 Lift the Upper Cover clear of the computer ...
Page 78: ...68 Chapter 3 4 Lift the USB Board clear of the computer rear edge first ...
Page 80: ...70 Chapter 3 4 Turn the Bluetooth Module over and disconnect the Bluetooth cable ...
Page 83: ...Chapter 3 73 9 Turn the Mainboard over and disconnect the Power Cable ...
Page 85: ...Chapter 3 75 5 Remove the Speaker Module from the Lower Cover ...
Page 110: ...100 Chapter 3 4 Secure the Speaker Module cable in place with the adhesive strips ...
Page 220: ...Appendix A 210 ...
Page 228: ...218 Appendix C ...

