Chapter 6
153
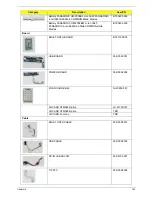
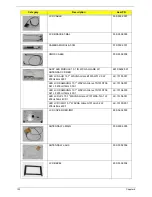
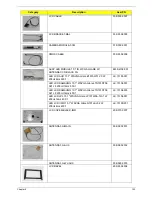
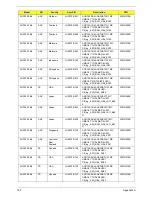
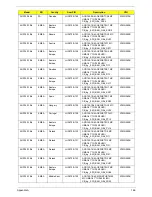
LCD CABLE
50.S5502.007
LCD BRACKET-R&L
33.S5502.003
CAMERA MODULE-0.3M
57.S5502.001
CMOS CABLE
50.S5502.008
ASSY LED MODULE 10.1 IN. WXGA GLARE W/
ANTENNA CCD BLACK 3G
6M.S6102.001
LED LCD AUO 10.1" WSVGA Glare B101AW01 V0 LF
200nit 8ms 500:1
LK.10105.001
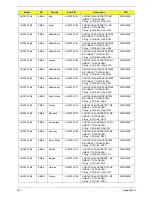
LED LCD SAMSUNG 10.1" WSVGA Glare LTN101NT02-
A01 LF 200nit 16ms 500:1
LK.10106.001
LED LCD SAMSUNG 10.1" WSVGA Glare LTN101NT02-
A01 LF 200nit 16ms 400:1
LK.10106.003
LED LCD LPL 10.1" WSVGA Glare LP101WSA-TLA1 LF
200nit 16ms 400:1
LK.10108.001
LED LCD CMO 10.1" WSVGA Glare N101L6-L02 LF
200nit 8ms 400:1
LK.1010D.001
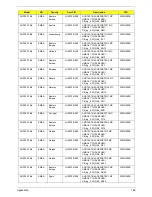
LCD COVER-BLACK-IMR
60.S5702.007
ANTENNA 3G-MAIN
50.S5802.001
ANTENNA 3G-AUX
50.S5802.002
ANTENNA 3G-WL/AUX
50.S5802.003
LCD BEZEL
60.S5502.004
Category
Description
Acer PN
Summary of Contents for Aspire One AOD150
Page 6: ...VI ...
Page 10: ...X Table of Contents ...
Page 28: ...18 Chapter 1 ...
Page 42: ...32 Chapter 2 5 Flash is complete when the message Flash programming complete displays ...
Page 55: ...Chapter 3 45 4 Lift the Memory cover up to remove 5 Lift the WLAN cover up to remove ...
Page 67: ...Chapter 3 57 7 Lift the Upper Cover clear of the computer ...
Page 78: ...68 Chapter 3 4 Lift the USB Board clear of the computer rear edge first ...
Page 80: ...70 Chapter 3 4 Turn the Bluetooth Module over and disconnect the Bluetooth cable ...
Page 83: ...Chapter 3 73 9 Turn the Mainboard over and disconnect the Power Cable ...
Page 85: ...Chapter 3 75 5 Remove the Speaker Module from the Lower Cover ...
Page 110: ...100 Chapter 3 4 Secure the Speaker Module cable in place with the adhesive strips ...
Page 220: ...Appendix A 210 ...
Page 228: ...218 Appendix C ...


