


26
Chapter 1
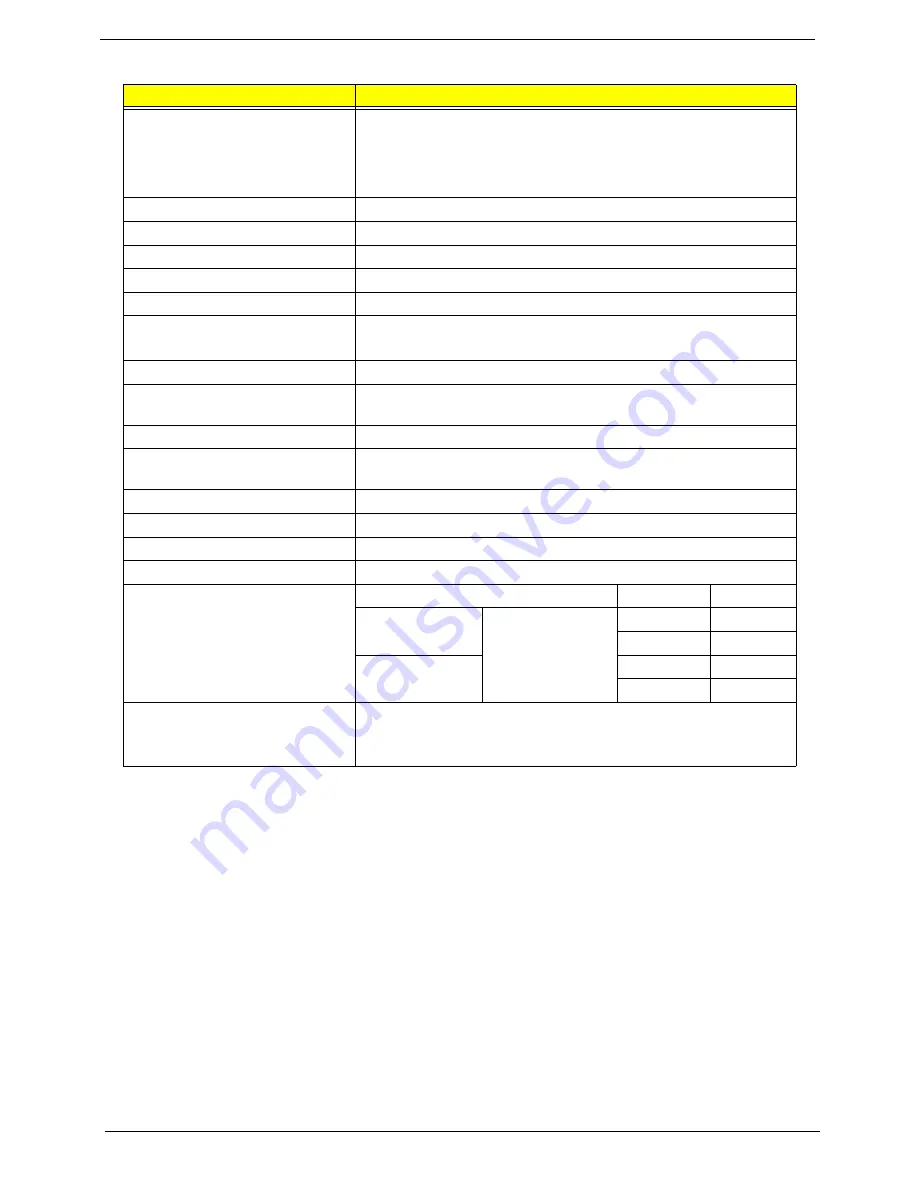
LCD 14”
Item
Specification
Vendor/model name
•
Samsung LTN140AT01-G01
•
AUO B140XW01
•
LG LP140WH1
•
CMO N140B6 - L02
Screen Diagonal (mm)
355.6 (14.0”)
Display Area (mm)
309.399(H) X 173.952(V)
Display resolution (pixels)
1366 x 768
Pixel Pitch
0.2265(H) x 0.2265(V)
Display Mode
Normally white
Typical White Luminance (cd/m
2
)
(also called Brightness)
220 (typ.)
Contrast Ratio (typical)
500
Response Time (Optical Rise
Time/Fall Time) msec
8 (typ.)
Input Voltage
3.3V ±0.3V
Typical Power Consumption
(watt)
5W (max.)
Weight
375g (max.)
Physical Size (mm)
324.0(H) x 192.5(V) x 5.2(D)
Electrical Interface
LVDS
Support Color
262,144
Viewing Angle (degree)
Min.
Typ.
Horizontal
CR => 10
40
45
40
45
Vertical
10
15
25
30
Temperature Range (°C)
Operating
Storage (shipping)
0 to 50°C
-20 to 60°C
Summary of Contents for Aspire 4937
Page 6: ...VI ...
Page 10: ...X Table of Contents ...
Page 60: ...50 Chapter 2 ...
Page 68: ...58 Chapter 3 7 Carefully open the HDD Cover ...
Page 95: ...Chapter 3 85 5 Remove the TouchPad Bracket from the Upper Base ...
Page 100: ...90 Chapter 3 5 Lift the USB Board clear of the casing ...
Page 104: ...94 Chapter 3 7 Lift the mainboard right side first to remove from the base ...
Page 112: ...102 Chapter 3 4 Lift the bezel away from the panel ...
Page 115: ...Chapter 3 105 4 Lift the LCD Panel out of the casing as shown ...
Page 122: ...112 Chapter 3 13 Ensure that the securing pin is properly located ...
Page 130: ...120 Chapter 3 7 Insert the cable through the casing to the top side as shown ...
Page 143: ...Chapter 3 133 13 Replace the two securing screws ...
Page 148: ...138 Chapter 3 4 Turn the computer over and replace the six securing screws as shown ...
Page 154: ...144 Chapter 3 ...
Page 193: ...Chapter 6 183 ...
Page 240: ...230 Appendix C ...
Page 243: ...www s manuals com ...