background image


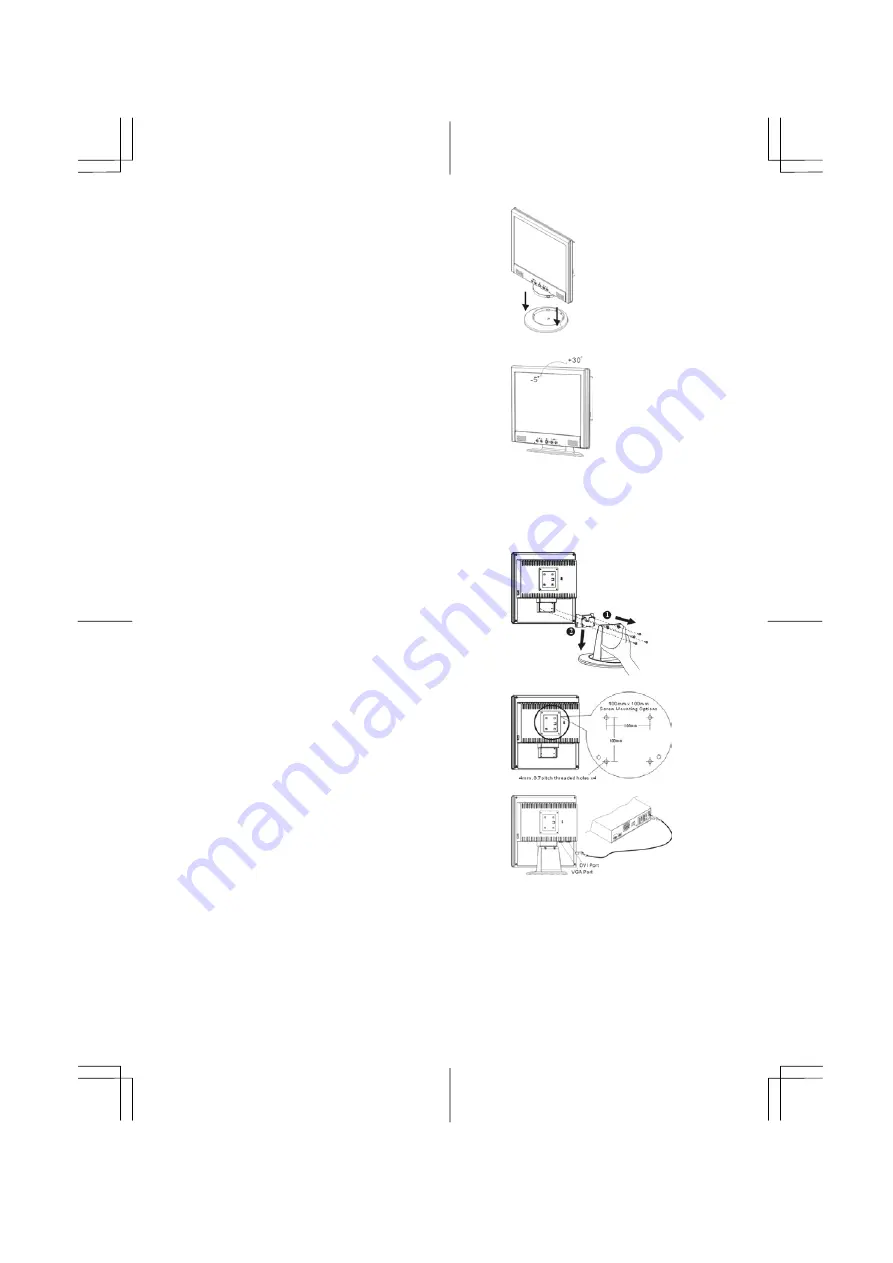
Connecting the LCD Monitor and Base 

When you open the box to take the base and put on the 
desk first. Then connect the LCD Monitor and base 
please.(See fig.1-1 ) 


Figure 1-1 

Viewing Angle Adjustment   

The LCD Monitor is designed to allow users to have a 
comfortable viewing angle. The viewing angle can be 
adjusted from -5°to +30°.(See fig. 1-2) 


Figure 1-2


3


Warning 

Do not force the LCD Monitor over its maximum viewing angle settings as stated above. Attempting


this will result in 

damaging the Monitor and Monitor stand.   

Detaching LCD Monitor from Its Stand


Unscrew screws 

n

 the swivel base support column and pull 

down

o

 the hinge to release.


Figure 1-3 

Interface for Arm Applications   

Before installing to mounting device, please refer to Fig.1-3. 
The rear of this LCD display has four integrated 4 mm, 0.7 pitches 
threaded nuts, as well as four 5 mm access holes in the plastic covering 
as illustrated in Figure 1-4. These specifications meet the 

VESA Flat 

Panel Monitor Physical Mounting Interface Standard

 (paragraphs 

2.1 and 2.1.3, version 1, dated 13 November 1997).


Figure 1-4 

Connecting the Display 


1. 

Power off your computer.   

2. 

Connect one end of the signal cable to the LCD Monitor’s VGA 
port or DVI port.(For AL712/AL713)(See Fig 1-5)   

3. 

Connect the other end of the signal cable to the VGA port or 
DVI port on your PC. 

4. 

Make sure connection are secure.


Figure 1-5 

Attention: 

This device must be connected to an off-the-shelf video cable in order to comply with FCC regulations. 

A ferrite-core interface cable is included in the LCD Monitor package.


This device will not be in compliance with FCC regulations when a non-ferrite-core video cable is used.   

Summary of Contents for AL715

Page 1: ...heselimitsaredesignedtoprovidereasonableprotectionagainstharmfulinterferenceinaresidentialinstallation This equipmentgenerates uses andcanradiateradiofrequencyenergy andifnotinstalledandusedinaccordancewiththeinstruction maycauseharmfulinterferenceto radiocommunications However thereisnoguaranteethatinterferencewillnotoccurina particularinstallation Ifthisequipmentdoescauseharmfulinterferencetorad...

Page 2: ...d into LCD Monitor or the monitor has been exposed to rain LCD Monitor or the case is damaged 7 A certified line is required to connect this device to a power outlet For a nominal current up to 6A and a device weight above 3 kg a line not lighter than H05VV F 3G 0 75 mm2 must be used Chapter 1 Installation Unpacking Before unpacking the LCD Monitor prepare a suitable workspace for your Monitor and...

Page 3: ...e refer to Fig 1 3 The rear of this LCD display has four integrated 4 mm 0 7 pitches threaded nuts as well as four 5 mm access holes in the plastic covering as illustrated in Figure 1 4 These specifications meet the VESA Flat Panel Monitor Physical Mounting Interface Standard paragraphs 2 1 and 2 1 3 version 1 dated 13 November 1997 Figure 1 4 Connecting the Display 1 Power off your computer 2 Con...

Page 4: ...n 1 0 Power Management guidelines The VESA DPMS provides four power saving modes through detecting a horizontal or vertical sync signal When the LCD Monitor is in power saving mode the monitor screen will be blank and the power LED indicator will light yellow Chapter 2 Display Controls User Controls A brief description and the location of all LCD Monitor function controls and indicators Figure 2 1...

Page 5: ...ctions shown on OSD menu designed for easy user viewing environments OSD Function Menu To access OSD Main menu simply press one of the Function Select control buttons and the menu diagram will pop up on the screen as shown on Fig 2 2 Continue pressing the Function Select buttons to scroll through the entire menu items then press Adjustment Control buttons to adjust content of selected item Figure ...

Page 6: ...moves the OSD menu window horizontally OSD V Position This function moves the OSD menu window vertically Graph Text Because the H and V Frequencies of both 640 x 400 70Hz and 720 x 400 70Hz are the same this function let s you manually select either 640 x 400 graphics mode or 720 x 400 text mode Recall The recall function will return all adjusted parameters to factory preset values Language Five O...

Page 7: ...tive Negative 0 0 7 0 05 Vp Horizontal Frequency 24 80 KHz Vertical Frequency 56 75 Hz Control Power switch hard and soft types On Off switch with LED indicator OSD Brightness Contrast Horizontal Position Vertical Position Phase Clock Display Mode Setup OSD Format Digital Digital Digital Digital Digital Digital Use EEPROM to save settings in memory 20 characters x 9 rows Power Management Mode Powe...

Page 8: ...oltage Single phase 100 240VAC 50 60 Hz Input Current 1 2 A maximum Size and Weight Dimensions 374 W x 394 5 H x 204 D mm Net Weight 5 0 3 kg Gross Weight 7 0 3 kg Pin Assignment Signal Signal PIN Description PIN Description 1 5 6 10 11 15 1 2 3 4 5 6 7 8 Red Green Blue Digital GND Digital GND Red Rtn Green Rtn Blue Rtn 9 10 11 12 13 14 15 5V Hot Plug Detect NC SDA H Sync V Sync SCL For Digital DV...

Page 9: ...GA card is selected Attention This LCD Monitor Supports Multiple VGA Modes Refer to the Standard Timing Table for a listing of modes supported by this LCD Monitor PROBLEM Picture is unclear and unstable The picture is unclear and unstable please perform the following steps 1 Enter PC to Shut Down Windows status while you re in MS Windows environment 2 Check the screen to see if there s any black v...

Page 10: ...10 Input Signal ...

Reviews: