background image

Adjustment of Screen 

Function 
Definition 


Primary 

Directory 

Symbol


Secondary 

Directory 

Symbol


Secondary 

Directory 

Items


Description


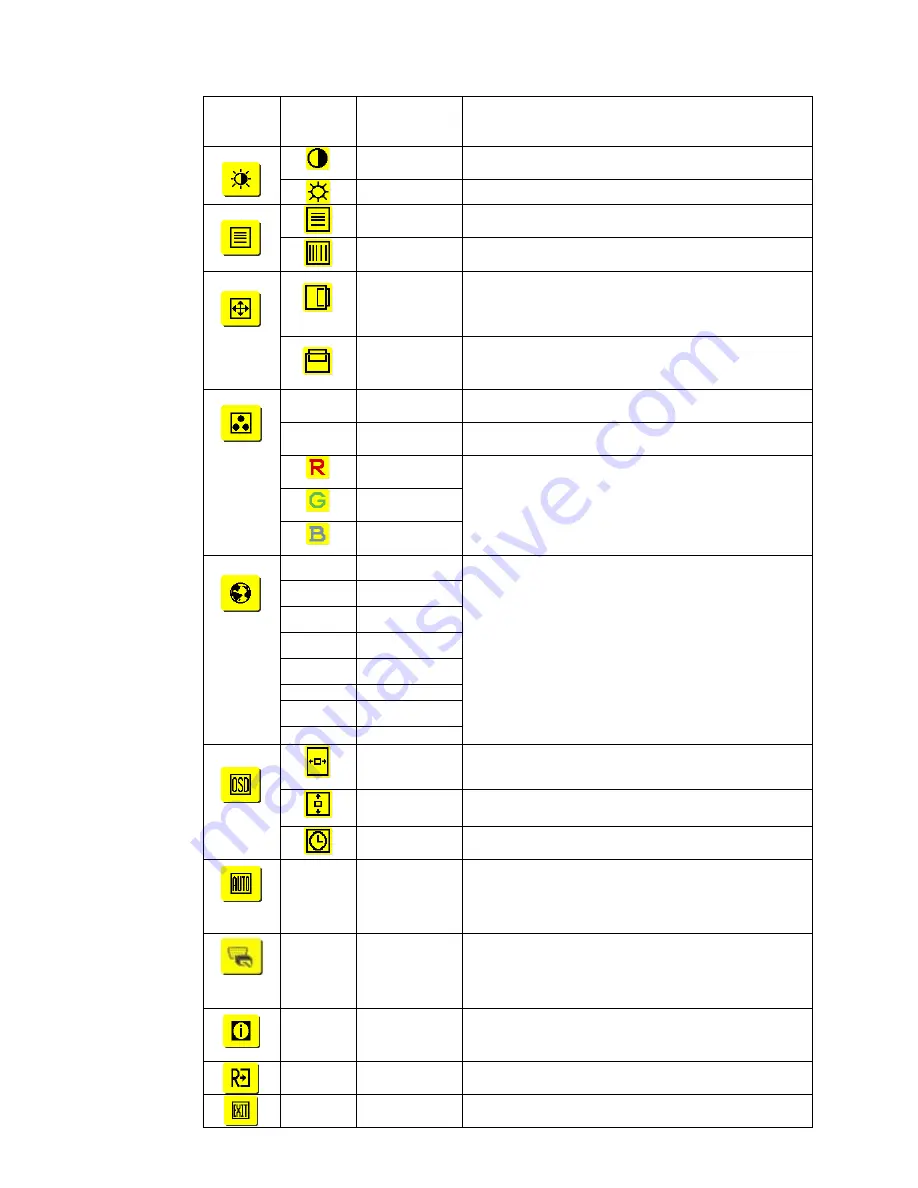
Contrast


Adjust the contrast between the foreground and 
background of an image on the screen


Brightness


Adjust the background brightness of the screen


Phase


Adjust the focus of the image (for analog input 
adjustment only)


Clock Pulse


Adjust the clock pulse of the image (for analog input 
adjustment only)


Horizontal


Move the image left and right on the screen (for analog 
input adjustment only)


Vertical


Move the image up and down on the screen (for analog 
input adjustment only)


N/A 

Warm Color 
Temp.


Set up the color temp. to be warm white color


N/A 

Cold Color 
Temp.


Set up the color temp. to be cold white color


User 
Definition/Red


User 
Definition/Green


User 
Definition/Blue


Adjust red/green/blue gain


N/A 

English 

N/A 

繁體中文


N/A 

Deutsch 

N/A 

Français 

N/A 

Español 

N/A 

Italiano 

N/A 

简体中文


N/A 

日本語


Select the language you want


Horizontal


Move OSD left and right


Vertical


Move OSD up and down


OSD Time 
Display


Adjust OSD time display settings


N/A 

Auto 
Adjustment


Set up horizontal, vertical, sequence and focus 
automatically (for analog input only)


N/A 

Analog         
Digital 

Select the input source you want (for DVI Input only) 


N/A 

Message


Display resolution, H/V frequency and the input port 
used for current input timing function


N/A 

Restore


Restore to factory settings


N/A 

Exit


Close the OSD window and save changes


Summary of Contents for AL1913

Page 1: ...y 1 Cleaning Safety 1 SPECIAL NOTES ON LCD MONITORS 1 Components and Accessories 2 Usage 2 Installation Guide 2 Adjustment of Display 3 Operation 4 Adjustment of Screen 6 Attachment 6 Plug and Play 7 Power Saver 7 Troubleshooting 7 Technical Specifications 8 Display Mode 9 ...

Page 2: ...c shock or dropping Secure your LCD firmly or explain the safety rules to children if required When installing your LCD display or adjusting its angle attention shall be paid to the loading capability and leveling of the display Cleaning Safety Don t spray or pour cleanser or water onto your LCD display or its case directly When cleaning your LCD display make sure that no liquid permeates into the...

Page 3: ...of the display protect your eyes and ensure premium quality don t install your LCD display near windows or with backlight Keep the display away from your eyes at least by 30 cm The upper edge of the display should be a little higher than your sight Adjust the front and back dip angles of the display based on your visual angle so that you can view the display comfortably Quick Installation Complete...

Page 4: ... Cable Optional Z DVI Signal Cable Optional D Sub Signal Cable Adjustment of Display Key Definition 1 Power Source Power On Off Green indication Power is on and normal Orange indication Sleep status in the energy saving mode Colorless indication Power off 2 Menu OSD Menu Press this button to enter OSD Press it again to exit OSD 3 Plus 4 Minus Press this button for selection or adjustment when OSD ...

Page 5: ...ure 2 Click or to select the function to be adjusted as shown in the following figure 3 Click the MENU to select the function to be adjusted 4 Click or to change current settings 5 To exit OSD select to close the OSD window and save changes To change other settings repeat steps 2 4 Analog Bright Contract Adjustment Phase Clock pulse Adjustment Horizontal Vertical Adjustment Color Temp Adjustment L...

Page 6: ...ure 2 Click or to select the function to be adjusted as shown in the following figure 3 Click the MENU to select the function to be adjusted 4 Click or to change current settings 5 To exit OSD select to close the OSD window and save changes To change other settings repeat steps 2 4 Digital Bright Contract Adjustment Phase Clock pulse Adjustment Horizontal Vertical Adjustment Color Temp Adjustment ...

Page 7: ...rm Color Temp Set up the color temp to be warm white color N A Cold Color Temp Set up the color temp to be cold white color User Definition Red User Definition Green User Definition Blue Adjust red green blue gain N A English N A 繁體中文 N A Deutsch N A Français N A Español N A Italiano N A 简体中文 N A 日本語 Select the language you want Horizontal Move OSD left and right Vertical Move OSD up and down OSD ...

Page 8: ...an set up this function from your computer The LCD display is compatible with EPAENERGY STAR NÜTEK when used with VESA DPMS To save power and extend the life of the product turn off the LCD display power supply when it is not used or when remaining idle for a long time Troubleshooting Power LED does not light Check that the power switch is turned on Make sure that the power cable is connected Icon...

Page 9: ...video frequency 0 7 Vpp 75Ω separate SYNC and composite SYNC SYNC Frequency Horizontal 30kHz 82kHz x Vertical 56Hz 76 Hz Input Signal Max Pixel Clock 135MHz Image D Sub 15 PIN VESA DVI D Optional Input Terminal Audio Phone Jack d 3 5mm Optional Power Transformer AC100 240Volts 50 60Hz Power Consumption 65W Standby 3W Temperature 5 35 operation 20 55 storage Environmental Conditions Humidity 20 80 ...

Page 10: ...rt Frequency Hz Pixel Frequency MHz SYNC Polarity H V VESA VGA 640x480 31 469 59 940 25 175 37 861 72 809 31 500 37 500 75 000 31 500 SVGA 800x600 35 156 56 250 36 000 37 879 60 317 40 000 48 077 72 188 50 000 46 875 75 000 49 500 XGA 1024x768 48 363 60 004 65 000 56 476 70 069 75 000 60 023 75 029 78 750 SXGA 1152x864 67 500 75 000 108 000 SXGA 1280x1024 63 981 60 020 108 000 79 976 75 025 135 00...

Reviews: