background image

EN-49

User’s Manual >>

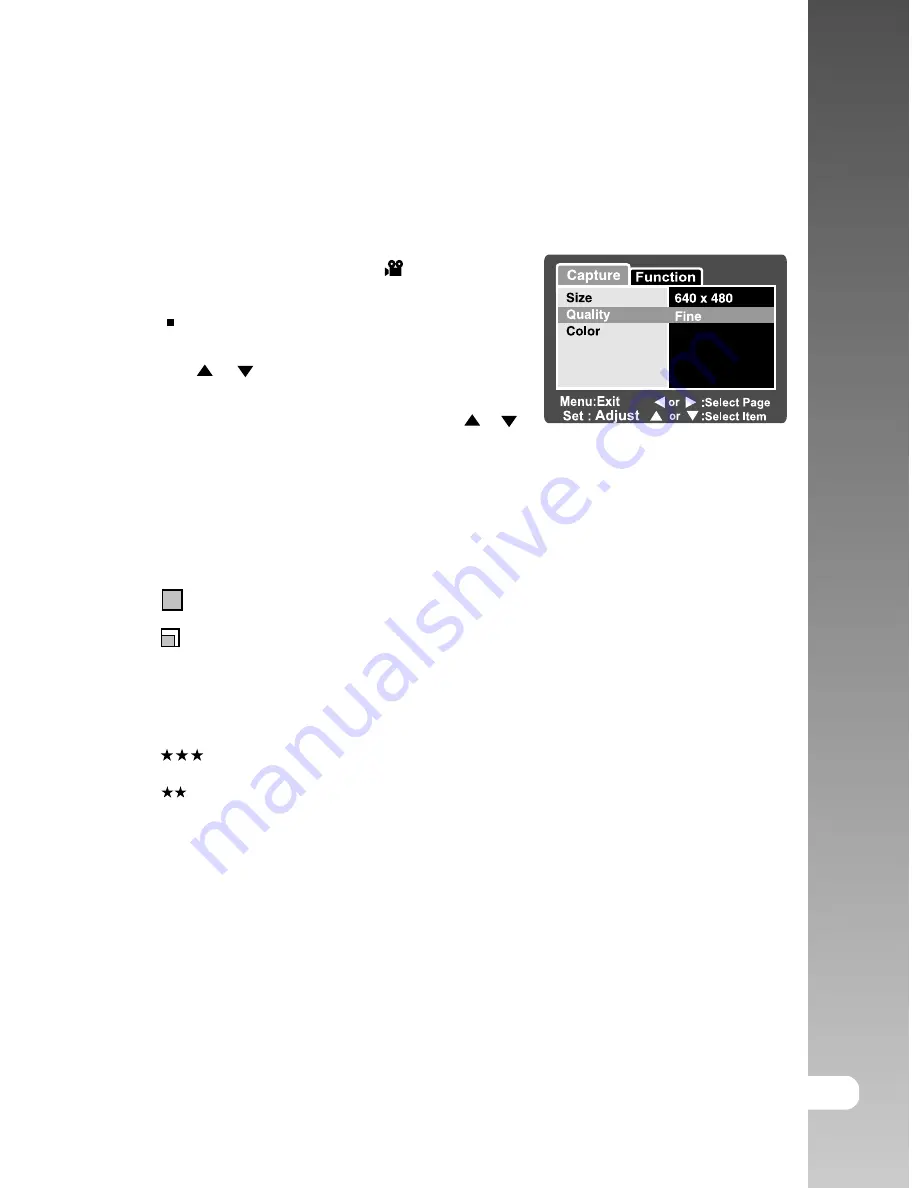
Video Menu (Capture tab)

This menu is for the basic settings to be used when recording video clips.

1. Slide the mode switch to [ 

 ].

2. Press the 

MENU

 button.

  [Capture] menu is displayed.

3. Select the desired [Capture] option item with

the

 / 

 buttons, and press the 

SET

button to enter its respective menu.

4. Select the desired setting with the 

 / 

buttons, and press the 

SET

 button.

5. To exit from the menu, press the 

MENU

button.

Size

This sets the size of the image that will be photographed.

*

[

 ] 640 x 480

*

[

 ] 320 x 240

Quality

This sets the quality (compression rate) at which the image is captured.

*

[

 ] Fine

*

[

 ]

Normal

Color

Refer to the section in this manual titled “

Photography Menu (Capture)

” for

further details.

Normal

Summary of Contents for 8.28

Page 1: ...an SD Card Optional Accessory 15 Setting the Date and Time 16 Choosing the Display Language 17 Formatting an SD Memory Card 18 Setting Image Resolution and Quality 19 PHOTOGRAPHY MODE 19 Auto Mode 21 Using the Digital Zoom 22 Setting the Flash 23 Setting the Focus 24 Setting the Self timer 25 Exposure Compensation Backlight Correction 26 P Program Automatic Exposure Photography Mode 27 Tv Shutter ...

Page 2: ...mages 40 Deleting Images 42 DPOF Settings 43 Resizing an Image Resize 44 Compressing an Image Quality Change 45 MENU OPTIONS 45 Photography Menu Capture tab 47 Photography Menu Function tab 49 Video Menu Capture tab 50 Video Menu Function tab 51 Playback Menu 52 Setup Menu Basic tab 53 Setup Menu Custom tab 54 EDITING SOFTWARE NSTALLATION 54 Installing NTI Photo Suite 55 CAMERA SPECIFICATIONS ...

Page 3: ... 8 28 Mega pixels CCD this camera is capable of capturing images with a resolution of up to 3296 x 2472 pixels Package Contents Carefully unpack your kit box and ensure that you have the following items Digital Camera A V cable USB cable User s manual Camera strap Optional Accessories SD memory card AC power adapter Rechargeable lithium ion battery Software CD ROM Camera pouch Accessories may vary...

Page 4: ...o frame the subject of the image 7 Self timer LED Blinks green during Self timer mode until the image AF auxiliary light is captured 8 USB or A V OUT terminal Allows you to connect a USB cable or an A V cable to the camera Allows you to connect an AC power adapter to 9 DC IN 5V 3A terminal operate the camera without battery or to charge rechargeable lithium ion battery 10 Lens 3x optical zoom lens...

Page 5: ...o position Zoom out button Zooms the lens to wide angle position 6 MENU Menu button Toggles On Screen Display OSD menu on and off 7 Delete button Allows you to delete an image 8 Speaker For playback or recorded audio 9 Display button Turns the LCD monitor display and live view on and off 10 Strap holder Camera strap attachment 11 Multi selector button Allows you to scroll through menus and images ...

Page 6: ...button Scrolls right Flash button Allows you to choose the appropriate flash setting T button Scrolls downwards 4 Self timer button Allows you to toggle the self timer on and off selects the desired self timer mode W button Scrolls left Exposure Allows you to toggle the exposure compensation 5 compensation backlight correction on and off Backlight correction button Multi selector button 1 2 3 4 5 ...

Page 7: ...era sets the corresponding aperture value 4 Av Aperture priority You may specify the aperture value while the camera sets the corresponding shutter speed 5 M Manual photography For full manual control over exposure aperture and other settings 6 Portrait To photograph a person and defocus blur the background 7 Sports For photographing fast moving subjects 8 Night scene For photographing evening or ...

Page 8: ...epending upon what the camera is doing During connection to a PC System ready Accessing files in progress Color Green Red State On On Off Flashing During power off Battery charging in progress The completion of battery charge During photography Ready for shot When the image is not in focus Accessing files in progress Flash charging in progress ...

Page 9: ... 3 Voice memo 4 Battery condition Full battery power Medium battery power Low battery power Virtually no battery power 5 Flash mode A Automatic Red eye Reduction Forced Flash Flash Off 6 Main focus area 7 Capture mode icon Blank Single Continuous AEB Auto Exp 8 Image resolution 3296 x 2472 2560 x 1920 1600 x 1200 640 x 480 9 Available number of shots 15 Metering Blank Average Spot 16 White balance...

Page 10: ...e 6 Histogram 7 Main focus area 8 Capture mode icon 9 Image resolution 10 Available number of shots 11 Image quality 12 Self timer icon 13 Date and time 14 Long exposure time warning icon potential for hand shake blur 15 Exposure compensation Backlight correction 16 Metering 17 White balance 18 Focus setting 19 Aperture 20 Shutter speed 00356 10S 1 2 3 4 5 7 8 9 10 12 11 13 14 15 16 17 18 6 Tv 0 0...

Page 11: ...ing Playback mode Still image playback 1 Mode icon 2 File number 3 Folder number 4 Protect icon 5 Voice memo 6 DPOF icon 7 Battery condition Playback mode Video playback 1 Video status bar 2 Elapsed time 3 File number 4 Folder number 5 Protect icon 6 Mode icon 7 Play mode 8 Total time 10 13 13 09 01 06 2005 10S 1 2 3 4 5 7 6 8 9 100 00008 1 2 4 3 5 7 6 1 100 00011 3 5 4 6 Total Play 0 10 0 06 1 2 ...

Page 12: ... before inserting or removing the battery Inserting the Battery 1 Open the battery SD card cover in the direction of the OPEN arrow 2 Insert the battery in the correct orientation shown Tilt the battery lock lever in the direction of the arrow and then insert the battery 3 Close the battery SD card cover Removing the Battery Open the battery SD card cover and then release the battery lock lever Wh...

Page 13: ... to the ambient temperature and the status of battery This camera must be used with specified AC power adapter Damage caused by the use of an incorrect adapter is not covered under the warranty Always make sure that the camera is off before removing the battery The battery may feel warm after it has been charged or immediately after being used This is normal and not a malfunction When using the ca...

Page 14: ...the digital camera However you can also expand the memory capacity by using an optional SD card so that you can store more files Inserting an SD card 1 Open the battery SD card cover 2 Insert the SD card in the correct orientation shown Hold the SD card with its front side printed arrow facing the rear side of the camera and then insert the card as far as it can go There will be a distinct click a...

Page 15: ...set the mode dial to The setup menu is displayed 2 Select Custom with the W X buttons 3 Select Date Time with the S T buttons and press the SET button The Date Time setting screen will be displayed 4 Select the item s field with the W X buttons and adjust the value for the date and time with the S T buttons The date and time is set in the order year month day hour minute The time is displayed in 2...

Page 16: ...onitor 1 Slide the mode switch to and set the mode dial to The setup menu is displayed 2 Select Custom with the W X buttons 3 Select Language with the S T buttons and press the SET button The available OSD languages will be displayed 4 Select the displayed language with the S T buttons and press the SET button The setting will be stored ...

Page 17: ... displayed 2 Select Format with the S T buttons and press the SET button 3 Select Execute with the S T buttons and press the SET button To cancel formatting select Cancel You need to format an SD card before using it in this camera Formatting an SD card erases everything from the memory card including images videos and also non image data Before formatting make sure that all data is unnecessary Fo...

Page 18: ...the finest detail Lower resolution quality images take up less memory space and may be quite suitable for sharing images via e mail in a report or on a web page To change image resolution or image quality perform these steps below 1 Slide the mode switch to and set the mode dial to one of the photography modes 2 Press the MENU button Capture of the photography menu is displayed 3 Select Size with ...

Page 19: ...wfinder will conserve the battery power If the battery power is low it is recommended that you only compose images using the viewfinder Using the LCD monitor you can compose images more accurately but at the cost of the battery consumption Always use the LCD display for close up macro shots Using the Optical Viewfinder Make sure that the battery and SD card are inserted before capturing images 1 P...

Page 20: ...eing recorded onto the memory When the voice memo is set to On VOICE RECORDING will be displayed on the screen immediately after the image is captured and voice memo recording will start Press the shutter button one more time during recording or wait for 30 seconds VOICE RECORD END will be displayed and the recording will end A icon is displayed with images that have been recorded with a voice mem...

Page 21: ... a Press the MENU button b Select Function with the W X buttons c Select Digital Zoom with the S T buttons and press the SET button d Select ON with the S T buttons again and press the SET button e Press the MENU button to exit from the menu screen f To activate the digital zoom press and hold the button completely until the image on the LCD monitor expands 4 Press the shutter button to capture a ...

Page 22: ...he selected photography mode scene mode and capture mode 2 Toggle the button to select the desired flash mode Scene Mode Auto Panorama Portrait Landscape Sports Night Candlelight Macro Sunset Sunrise Splash Water Fireworks Single Continuous Capture Mode AEB Focus Mode Auto Marco Infinity A The available flash settings in different photography modes This table is for reference only and varies accor...

Page 23: ...the sequence and displays it on the screen The table below will help you choose the appropriate focus mode Focus mode Description Select auto focus for most occasions when you want the Blank Auto Focus camera to automatically determine the focus setting Using auto focus any object at a range of focus is 50 cm or greater can be in focus Select macro to capture close up images When the lens is zoome...

Page 24: ...e image will be captured after the preset time has elapsed The countdown is displayed on the LCD monitor To cancel the self timer during operation press the SET button The table below will help you choose the appropriate self timer mode Self timer mode Description s 10 sec The image is captured about 10 seconds after the shutter button is pressed s 2 sec The image is captured about 2 seconds after...

Page 25: ...the T button to decrease the value The setting range of the exposure compensation is as follows 2 0 1 7 1 3 1 0 0 7 0 3 0 0 3 0 7 1 0 1 3 1 7 2 0 The larger the value the brighter the image The smaller the value the darker the image The set value is displayed on the screen Effective Subjects and Set Values positive compensation Printed matter comprising black text on whitish paper Backlighting Bri...

Page 26: ...speed and the aperture to suit the brightness of the subject This allows you to capture image with ease just like when the mode is selected 1 Slide the mode switch to and set the mode dial to P 2 Compose the image press the shutter button down halfway then press it down fully Exposure compensation can be set ...

Page 27: ...button again the S T buttons return to focus setting self timer function 3 Set the shutter speed with the S T buttons Press the S button to select faster shutter speeds Press the T button to select slower shutter speeds The setting range of the shutter speed is as follows 1 1500 1 1250 1 1000 1 820 1 650 1 500 1 400 1 320 1 250 1 200 1 160 1 125 1 100 1 80 1 64 1 50 1 40 1 32 1 25 1 20 1 16 1 13 1...

Page 28: ...ple when capturing landscape images 1 Slide the mode switch to and set the mode dial to Av 2 Press the SET button 3 Set the aperture value with the W X buttons Press the X button to increase the value Press the W button to decrease the value The setting range of the aperture value is as follows F6 7 F5 6 F4 8 F4 0 F3 5 F2 8 The aperture value and corresponding shutter speed are displayed on the sc...

Page 29: ...fter pressing the SET button in M mode the buttons turns into W X buttons for adjusting aperture value Pressing the SET button again the S T W X buttons returns to focus setting self timer exposure compensation flash setting function 3 Set the shutter speed with the S T buttons 4 Set the aperture value with the W X buttons 5 Compose the image press the shutter button down halfway and then press it...

Page 30: ... scene mode Scene mode Description A Auto Camera automatically determines settings needed for the best picture Panorama To create 360 panoramic images Portrait To photograph a person and blur out the background Landscape To photograph mountains forests or other landscape scenery rich in color Sports To photograph fast moving objects Night To photograph scenes at night Candlelight Softer focus and ...

Page 31: ... a Press the MENU button b Select Scene Mode with the S T buttons and press the SET button c Select Panorama with the S T buttons and press the SET button 2 Shoot the first image The next image appears beside the previous image 3 Orient the camera so that the second frame overlaps a small portion of the photographic subject of the first image and press the shutter button to capture the next image ...

Page 32: ...ter button again will end the recording and save the video on the SD card The recording time depends on the storage size and the subject of the image to be recorded Zoom function can be used during video recording without audio You can record video clips with Audio freely but no zoom function at this condition When recording video clips the flash cannot be used While the image is being recorded in...

Page 33: ...ess of the button switches the information display state in the following order Pressing the S T buttons during image playback will rotate the image 90 degrees The T button rotates the image clockwise whereas the S button rotates the image counterclockwise A press of the button opposite to the direction in which the image was rotated will return the image to the normal display A icon is displayed ...

Page 34: ...ons A icon is displayed with the video data 3 Press the SET button to play back a video clip Pressing the X W buttons during playback initiates fast forward fast reverse To stop video playback press the T button This stops playback and returns to the start of the video clip To pause video playback press the SET button This pauses video playback To cancel pause press the SET button again Video clip...

Page 35: ...buttons 3 Press the shutter button VOICE RECORDING is displayed on the screen and recording starts 4 To stop recording voice memo during recording press the shutter button again VOICE RECORD END will be displayed and the recording will end A icon is displayed with images that have been recorded with a voice memo Playing back voice memo Pressing the SET button displays VOICE PLAYBACK and plays back...

Page 36: ...Press the button The images are displayed in the thumbnail display Images that have been selected with the S T W X buttons will be indicated by a green frame When there are ten or more images scroll the screen with the S T buttons 3 Press the S T W Xbuttons to select the image to be displayed at regular size 4 Press the SET button The selected image is displayed at its regular size As appropriate ...

Page 37: ...tton enlarges the image To return to normal magnification press the button The magnification factor is displayed on the LCD monitor The image is displayed enlarged and a white frame and green frame are displayed on the LCD monitor The white frame indicates the entire image while the green frame shows the location of the currently enlarged area 4 Press the S T W X buttons to select the area to enla...

Page 38: ...the S T buttons and press the SET button 4 Set the playback interval with the S T buttons then press the SET button 5 To stop the slide show during playback press the SET button The image is displayed on screen when you press the SET button The Auto Power Off function is disabled during a slide show All still images in the folder are automatically played back Video clips are displayed the first fr...

Page 39: ...to remove the image protection 1 Select Protect with the S T buttons from the playback menu and press the SET button 2 Select Single or All with the S T buttons and press the SET button 3 Select Cancel Protect with the S T buttons and press the SET button The image is no longer protected and the camera returns to playback mode Protecting multiple images 1 Select Protect with the S T buttons from t...

Page 40: ... to confirm the deletion To not delete select Cancel and press the SET button Deleting in Playback Mode Deleting a single image Deleting all images 1 Slide the mode switch to The last image will be displayed on the screen 2 Select the image you want to delete with the W X buttons 3 Press the button The deletion menu will be displayed 4 Select Single or All with the S T buttons and press the SET bu...

Page 41: ...eused or reassigned to another subsequently captured image Deleting selected images This deletes a number of selected images 1 Slide the mode switch to 2 Press the button The deletion menu will be displayed 3 Select Select with the S T buttons and press the SET button The images are displayed in the thumbnail display 4 Select the image you want to delete with the S T W X buttons and press the butt...

Page 42: ...ayed 4 Select DPOF with the S T buttons and press the SET button The DPOF setting screen is displayed 5 Select Single or All with the S T buttons and press the SET button Single Sets DPOF for each individual image All Sets DPOF for all images at once 6 Select Print Num with the S T buttons and press the SET button This displays the number of prints setting screen 7 Set the number of prints with th...

Page 43: ...to reduce the size of an image It is not possible to increase the size of an image or to restore size after it has been decreased 9 Select date to On or Off with the S Tbuttons and press the SET button On The date of the photograph will also be printed Off The date of the photograph will not be printed 10 Select Print Enable with the S T buttons and press the SET button 11 Select Execute with the ...

Page 44: ...nnot be resized Economy quality images Images captured with other camera Protected images Video clips Images cannot be changed quality when the SD card is write protected 1 Select the image that you want to change its quality 2 Press the MENU button 3 Select Quality Change with the S T buttons and press the SET button 4 Select the image size that you want to change with the S T buttons and press t...

Page 45: ... the MENU button The Capture tab of the photography menu is displayed 3 Select the desired Capture option item with the S T buttons and press the SET button to enter its respective menu 4 Select the desired setting with the S T buttons and press the SET button 5 To exit from the photography menu press the MENU button Scene Mode Refer to section in this manual titled Setting the Scene Mode for furt...

Page 46: ... Incandescent Fluorescent 1 Fluorescent 2 Daylight Cloudy M Manual Manual WB This manually sets the white balance and stores it Use of this is convenient when the white balance does not offer a good match Before select Execute determine the subject such as a white paper that will be used to set the white balance Cancel Execute ISO This sets the sensitivity for capturing images When the sensitivity...

Page 47: ...ns and press the SET button 5 To exit from the photography menu press the MENU button Capture Mode This sets the recording method at the time of capturing images Blank Single Capture an image at a time Continuous Permits continuous photography of 3 images max AEB AEB Permits 3 consecutive images in the order of standard exposure underexposure and overexposure compensation Voice Memo Refer to secti...

Page 48: ...nted directly on the still images This function must be activated before the image is captured On Off Real Time AF This sets the Real Time Focus function at image capture preview mode On Off LCD Bright Select a brightness level for the LCD monitor The LCD becomes brighter with the button and darker with the button The adjustment range is from 5 to 5 Digital Zoom This sets whether or not to use dig...

Page 49: ...tons and press the SET button to enter its respective menu 4 Select the desired setting with the buttons and press the SET button 5 To exit from the menu press the MENU button Size This sets the size of the image that will be photographed 640 x 480 320 x 240 Quality This sets the quality compression rate at which the image is captured Fine Normal Color Refer to the section in this manual titled Ph...

Page 50: ...pective menu 4 Select the desired setting with the buttons and press the SET button 5 To exit from the movie menu press the MENU button Audio This sets whether or not to record audio at the time of video recording On Off LCD Bright Refer to section in this manual titled LCD Bright in Photography Menu Function for further details Digital Zoom Refer to section in this manual titled Digital Zoom in P...

Page 51: ...titled DPOF Settings for further details Protect Refer to section in this manual titled Protecting Images for further details LCD Bright Refer to section in this manual titled LCD Bright in Photography Menu Function for further details Resize Refer to section in this manual titled Resizing an Image Resize for further details Quality Change Refer to section in this manual titled Compressing an Imag...

Page 52: ...able to the difference between binary base 2 and engineering base 10 methods of capacity calculation Fr No Reset This creates a new folder on your memory card From this point forward newly captured images are stored in the newly created folder starting with image number 0001 Cancel Execute Format This function reformats the SD card loaded in your camera and thereby erases all images as well as any...

Page 53: ...setting Date Time This sets the date and the time Refer to the section in this manual titled Setting the Date and Time for further details Sys Reset This returns all basic settings to the camera s default settings Note that the date and time setting will not be reset however Cancel Execute Language This sets the language that is displayed on the LCD monitor Refer to the section in this manual titl...

Page 54: ...ges ready and explore this amazing program To install NTI Photo Suite 1 Insert the CD ROM that came with the camera into your CD ROM drive The welcome screen appears 2 Click INSTALL NTI PHOTO SUITE Follow the on screen instructions to complete the installation To use NTI Photo Suite to edit and retouch your recorded images please refer to the on line help For Windows 2000 XP users please make sure...

Page 55: ...F 3x optical zoom lens Lens F no 2 8 Wide 4 8 Tele Focal length 7 5 mm 22 5 mm equivalent to 36 mm 108 mm on a 35 mm camera Wide Approx 5 cm to infinity in Macro mode Range of focus Tele Approx 30 cm to infinity in Macro mode Normal Approx 50 cm to infinity Shutter speed 1 2 1 1500 sec Digital zoom 4x Still image capture mode 2x and 4x enlargement Still image playback mode Flash effective range 0 ...

Reviews: