P.
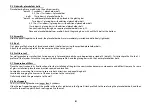
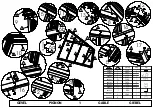
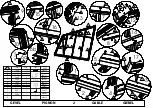
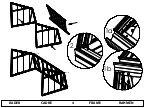
9 Glass in Roof
Work carefully and ensure the utmost safety for yourself and everyone around you!
-
Choose the positioning of the roof window, do not allow it to connect with a façade.
-
For now, do not add any glass or rubber in this roof window location.
-
In case of multiple roof windows: 2 roof windows cannot be placed side by side.
-
Place the glass on top of the sidewall and slide it upwards between the roof profiles until it no longer rests on the sidewall.
-
Pull the glass back down into the provided slot.
-
Fold the plate around glass pane A. Place the small glass pane atop the large glass pane and fold the plate back over.
-
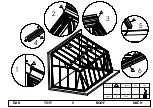
After the installation of all glass panes in the roof, rubber is added. The rubber is applied to all roof profiles and the top of the façade
to secure the glass. For now, do not apply rubber to the profiles next to the roof window.
-
The opening of the roof window is a convenient location to press down the rubber at the top.
-
A handy roll and press motion simplifies the operation.
-
The rubber is slid into the ridge and cut off at the bottom above the gutter, slightly below the bottom of the glass.
P.
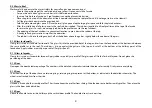
10 Glass in sidewalls
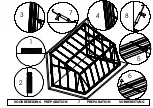
Clear glass is used as standard for sidewalls. The glass fits into the provided slot at the top, and rests on the foundation at the bottom in between
the same profiles as in the roof. The rubber is slid up against the gutter at the top, and cut off at the bottom at the halfway point of the
foundation. Apply rubber as quickly as possible!!! Per glass pane!!!
P.
11 Glass in façades
Clear glass is used as standard for façades. Apply rubber as quickly as possible!!! Per glass pane!!! Do this for both façades. Do not glaze the
positioning of the door.
P.
12 Door
Now open the door hardware package. The numbers in the detailed schematics indicate the order of assembly. Firmly secure everything.
P.
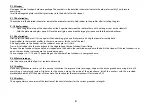
13 Door
The wheels on top of the door have no retaining rings, retaining rings are present at the bottom, as indicated in the detailed schematics. The
wheels are attached 5cm from the side.
P.
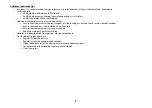
14 Door
Silicone is used on both assembly profiles. The silicone keeps the profiles from sliding. Slide the door onto both assembly profiles. Then place the
glass in the door and add rubber.
P.
15 Door
Attach the handle to the inside, halfway up the vertical door profile. The handle also acts as door stop.
C
Summary of Contents for MS3 H Series
Page 1: ...DBER05022019 Copyright A C D nv sa zwaaikomstraat 22 8800 Roeselare Belgium info acd be MS3 H...
Page 2: ......
Page 27: ...FRAME KADER CADRE 4 1a 1b 2 RAHMEN 2 1a 1b 1a 1b 2...
Page 29: ...2 A B 3 A DAK TOIT 6 A 1 Qty Fig Nr Art B DACH ROOF 4 B A 1 2 3 4 4 3 A B B 1 A 800249 L 155...
Page 36: ...3 1 2 4 DOOR DEUR PORTE 13 1 2 3 4 T R...
Page 38: ...1 2 15 DOOR DEUR PORTE T R 2 b 1 a 2X...
Page 47: ...ABDECKPLATTEN PLAQUETTES DE FINITION 23 COVER PLATES AFDEKPLAATJES...


