HPT 374 RAID Setup
4-5
User’s Manual
4-4. BIOS Setting Utility
Main Menu
Create Array
Reboot your system. Press <
CTRL
> and <
H
>
key while booting up the system to enter the
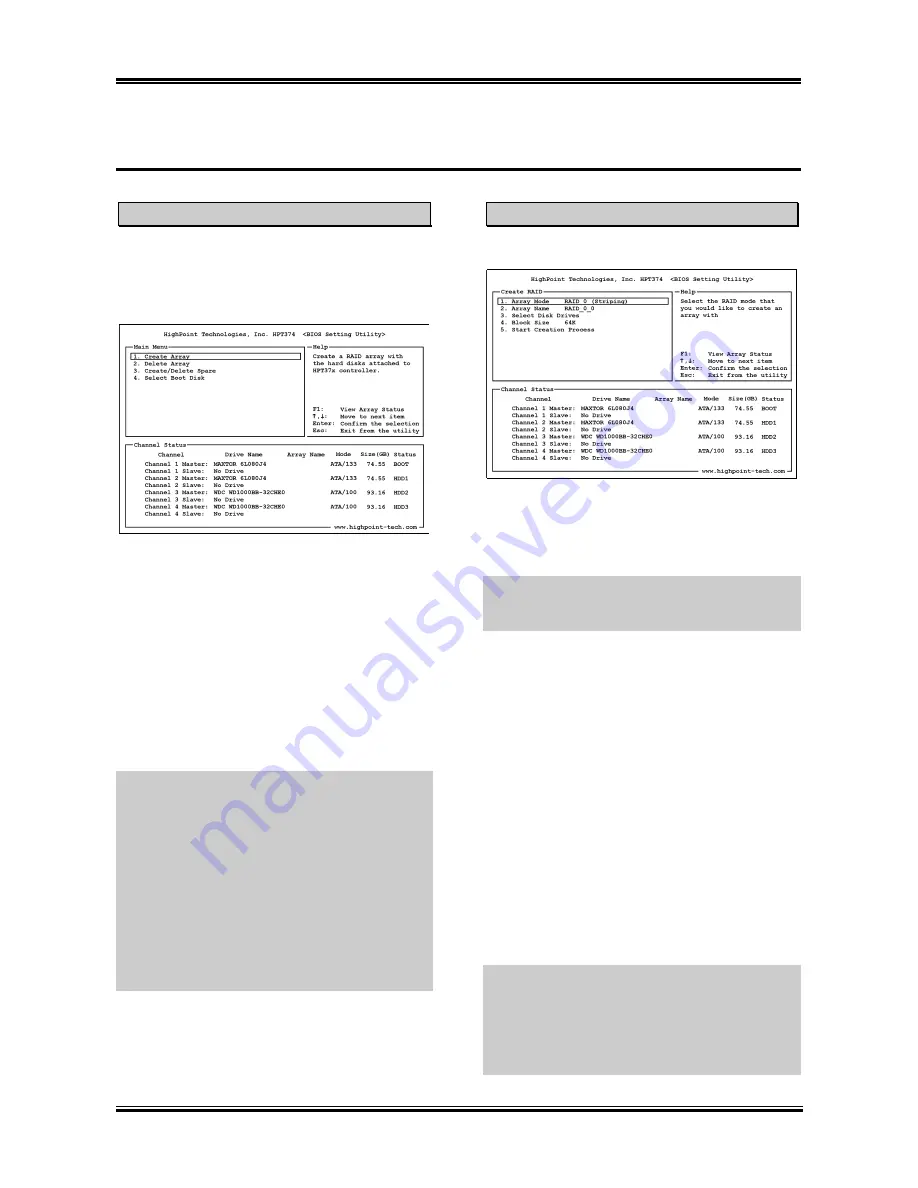
BIOS setting menu. The main menu of BIOS
Setting Utility appears as shown below:
This item allows you to create a RAID array.
1. Array Mode:
This item allows you to
select the appropriate RAID mode for the
desired array. There are four modes to
choose.
To select the option in this menu, you may:
NOTE:
It is highly recommended to attach hard
disks with the same model in reaching the
RAID performance.
•
Press <
F1
> to view array status.
•
Press <
↑↓
> (up, down arrow) to
choose the option you want to confirm
or to modify.
RAID 0 (Striping) for Performance:
This item
is recommended for
high performance
usage.
Requires at least 2 disks.
•
Press <
Enter
> to confirm the selection.
RAID 1 (Mirroring) for Data Protection:
This item is recommended for
data security
usage. Requires at least 2 disks.
•
Press <
Esc
> to return to top menu.
NOTE:
If you want to create a RAID 0 (striping)
array or RAID 0+1 array, all the data stored in
the hard disks will first be erased! Please
backup the hard disk data before starting to
create these RAID arrays.
If you want to create a RAID 1 (mirroring) array,
please make sure which hard disk is the source
disk and which one is the destination disk. If
you make a mistake, you may copy the blank
data to the source disk, which will result in both
hard disks becoming blank!
RAID 0/1 (Mirrored Striping):
This item is
recommended for
data security and high
performance
usage. Allows Mirroring with a
Strip Array. Require 4 disks.
JBOD (Volume):
This item is recommended
for
high capacity without redundancy or
performance
features usage. Requires at least 2
disks.
NOTE:
When you choose to create RAID 1,
and your source disk is not empty, you have to
Duplicate Mirror Disk
to copy data to
destination disk. Otherwise, it will only copy the
partition table to the destination disk, not the
physical date.
Summary of Contents for IT7-MAX2
Page 2: ......
Page 31: ...Introduction 1 3 1 2 Layout Diagram User s Manual ...
Page 32: ...1 4 Chapter 1 IT7 MAX2 ...
Page 92: ...E 2 Appendix E IT7 MAX2 ...
Page 100: ...G 4 Appendix G IT7 MAX2 ...


