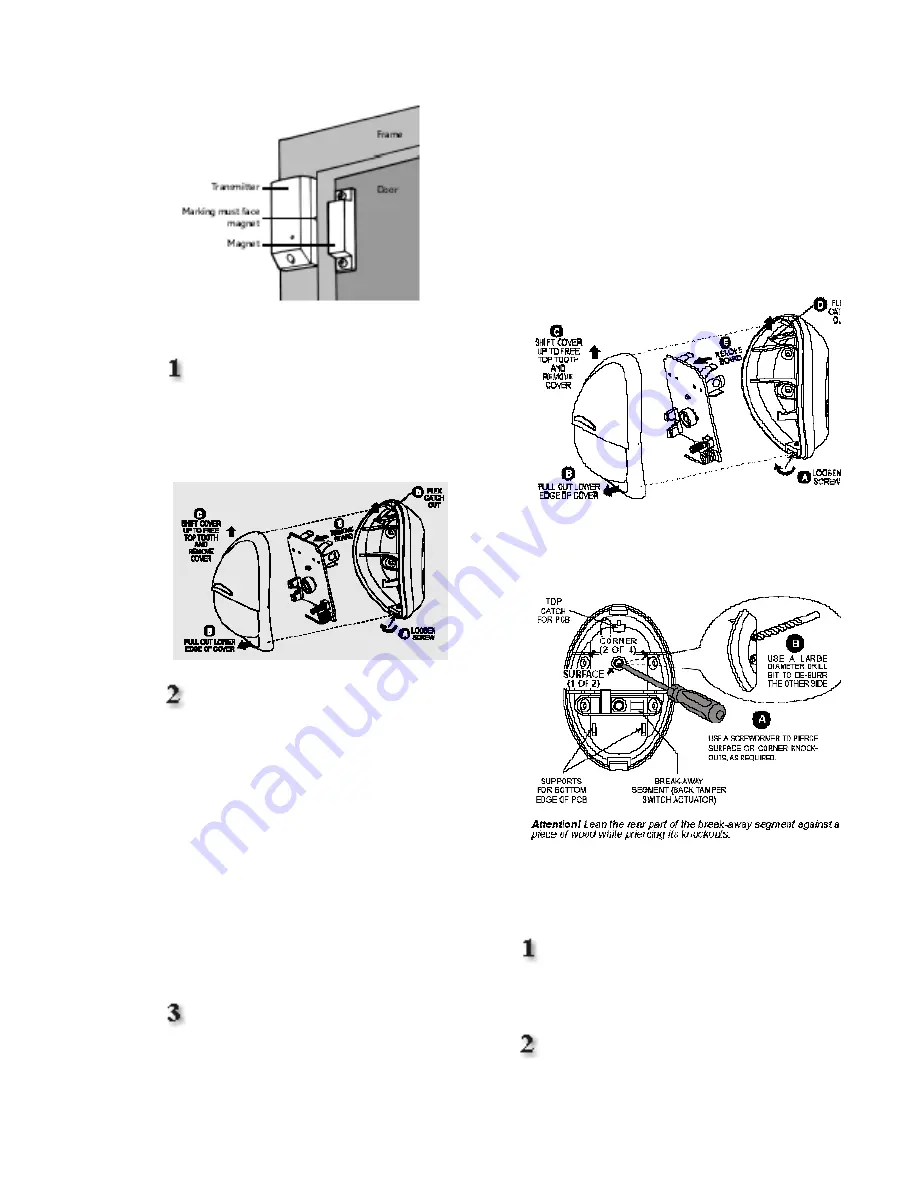
Installing the Motion Sensor
Activate the battery by removing the
front cover of the sensor, using a
screwdriver. Remove the red tag from the
battery and check that the LED flashes.
Replace the cover and tighten the screw.
Install the Motion Sensor on a solid
interior surface only, between a height of
6’ and 8’. Do not aim it at sources of heat,
expose it to drafts, or place it in direct
sunlight.
The Motion Sensor is pre-programmed
with the name LIVING ROOM and has
the HOME & AWAY response type. This
means that as soon as any activity is
sensed when your system is activated in
the AWAY mode, an alert will be
triggered and the siren will sound. In the
HOME mode, the sensor is inactive. You
can change both these settings later if
you desire.
Quick and easy press and stick
mount:
You can install Movement
Detectors using the included adhesive
pads, or by screwing it to the wall. Note
that the adhesive tape is very strong.
Simply peel the tape and press on the
device, then press in place at the location
of your choice. The bond will strengthen
over time, and set completely after 72
hours. To attach with screws, you must
open the Motion Sensor and remove the
circuit board by gently flexing the catch at
the top of the board out towards the top
of the housing.
Use the casing to mark drill holes. Insert
the wall plugs and screw the case to the
wall. Replace the circuit board and cover.
Installing the Keychain Remote
Control
The Keychain Remote Control is
supplied with the battery already installed
and is pre-programmed as USER 1.
Press the STAR button. Check that
the Keychain Remote Control LED
Summary of Contents for Home Control
Page 19: ...NOTES...


