Operation Manual / Power2 850-M / High-pressure stage
9 Disassembly and assembly / 9.9 Measuring axial clearance A
© Copyright 2022 ABB. All rights reserved.
HZTL4063_EN
Rev.F
March 2022
9.9
Measuring axial clearance A
CAUTION
Clearances outside the tolerance
Serious damage to engines or property can be caused by clearances outside
the tolerance and excessively worn parts.
u
Have the components assessed and, if necessary, replaced by a Turbo
Systems service station.
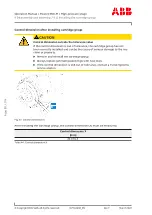
Fig. 32: Measuring axial clearance A
The axial clearance (A) must be measured after removal and before installation of the cart-
ridge group.
u
Measure and note axial clearance (A).
Axial clearance A
[mm]
0.36 ... 0.48
Table 41: Axial clearance A
Page
76
/
104
Summary of Contents for PT004165
Page 2: ......


