I.L. 40-386.12
2-4
2
TABLE 2-2
FRONT PANEL RECLOSING AND SYNCH-CHECK LED INDICATOR CHART
RECLOSING IN SERVICE
ON
when dc power is on, recloser is passing self-check test and re-
closing is enabled by setting choice
LOCKOUt
ON
when reclosing logic is in the lockout state. LOCKOUT output
contact is also operated.
FAILED RECLOSE
ON
after a failed reclose. Can be cleared by depressing “RESET”
push-button or via remote “EXTERNAL RESET”. FAIL RECL/
OUT 2 is also operated.
SYNCHRONISM
(*)
ON
when Bus & Line voltages are in Synchronism.
HBDL
(*)
ON
when Bus is Live and Line is Dead.
HLDB
(*)
ON
when Line is Live and Bus is Dead.
(*)
The 3 lower LEDs are present only with the Synch-check Option. They are operational when the “SYNC SET” setting has been enabled.
2. 5
RECLOSING OPTION FRONT PANEL OPERATION
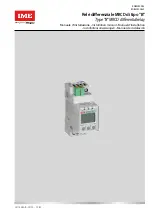
The front panel display is divided into three fields: Function, Value, and Mode.
The seven modes of operation, are shown at the top right of the display and are explained in
Table 2-3. The 4 push-buttons labeled SELECT, LOWER, RAISE, and ENTER, are used to in-
terface with the REL 301/302 mode display selection, scrolling within a selected mode and ac-
cepting relay settings.
The display default mode is automatically returned to when no push-button has been depressed
for 2 minutes. The display default mode is defined in Table 2-3.
By keeping the SELECT push-button depressed, the list of modes is scrolled in the sequence
shown in Table 2-3, at approximately a one second rate. For each selected mode, the corre-
sponding functions can be scrolled through with the LOWER and RAISE push-buttons (except
for default mode).
2.5.1
Ready Mode
Under normal conditions, the relay is in “READY” state, ready to start a reclosing sequence as
soon as the reclosure 1 (Recl 1) initiation condition is detected. See Table 2-5.
When a reclosing cycle starts, the recloser goes through the selected logic until either back to
“READY” state, in case of successful reclosing, or to LOCKOUT” state, if for any reason, no fur-
ther reclosing can be attempted.
2.5.2
Settings Mode (SET)
Change the mode to SET using the SELECT push-button. Table 2-6 lists all available settings
with their associated ranges which can be scrolled through forwards and backwards using the
LOWER and RAISE push-buttons. The current setting appears on the upper left of the display,
Function
Value
Mode


