AAton CANTAR X3 User Manual Download Page 45

STOP

Stop Menu is while the Main Selector is at the 9 o'clock position. 
This position is a low-power position.

Pict. 78

I. Media Free Space

The remaining free space on each media is displayed. By pressing the Up or Down buttons, it is 
possible to toggle between remaining space and remaining time which is calculated according 
to the recording configuration used on each media (“N.A” is displayed if the media is not used, 
and “--” if the media is not present).
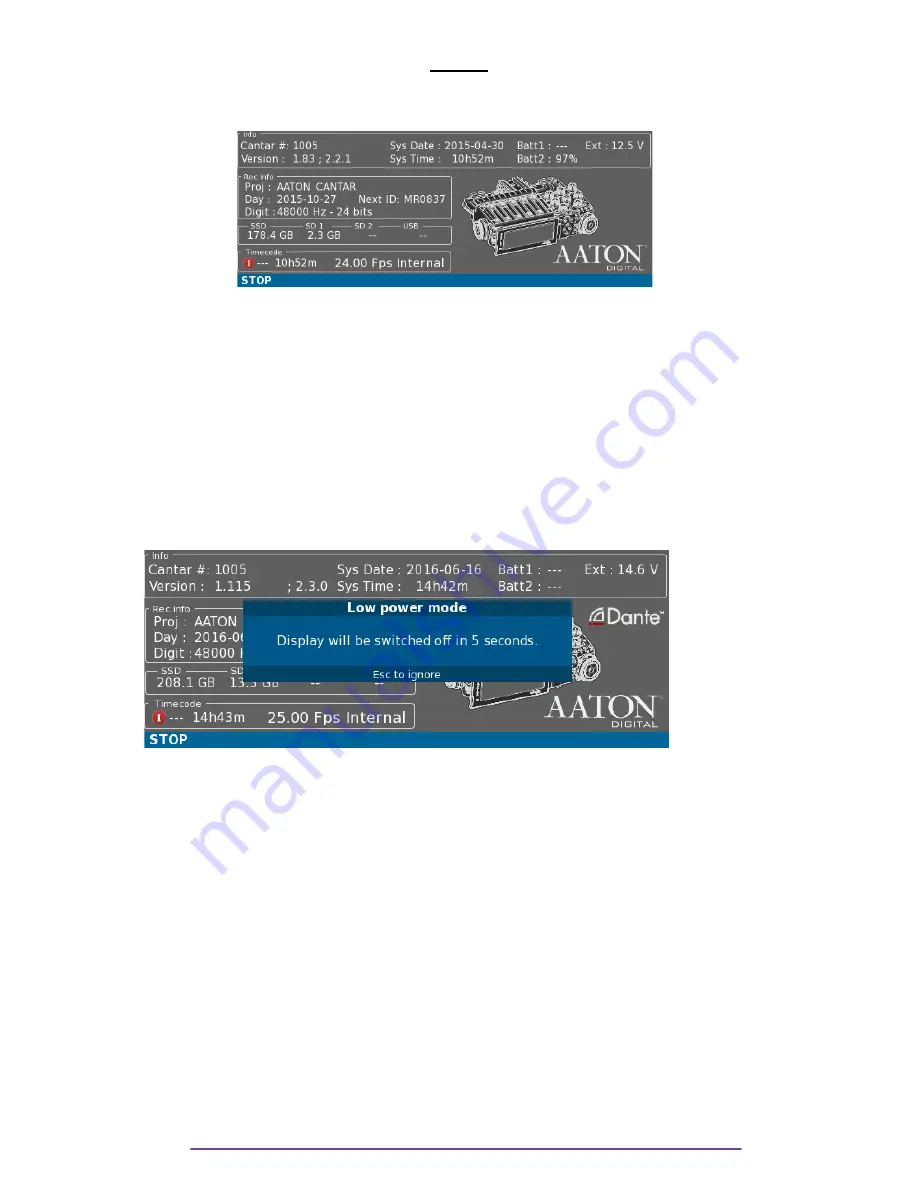
II. Low Power Mode

While the Main Selector is in the Stop position, if the low power option was activated in the 
Technical Menu, according to the time set up, the Cantar will go in low power mode.
5 seconds before engaging the low power mode, a message is displayed.

Pict. 79

In that mode, in order to save energy many things are powered-off:

 Inputs and outputs: Mic, Lines, Dante, Aes, Aes42 

 The screen

While being “asleep” the Cantar, in order to signal that it is still alive, have the F1 to F3 buttons 
alternatively lit.

To get out of the low power mode, either press the Power or the F1 or the F2 or the F3 buttons 
or simply change the Main Selector's position.

III. Power On/Off

1. Power ON

Press the Power ON/OFF button to power up your Cantar. A few LEDs should be illuminated 
symbolising the startup sequence.

Cantar X3

                                                                                                                                                                                             45

Summary of Contents for CANTAR X3

Page 1: ...CANTAR X3 User Manual Software v 1 113...

Page 2: ...PUTS 16 Outmaps 16 DANTE OUTPUTS optional 17 Outmaps 17 Module Configuration 17 IN GRID ROUTING 18 Current Ingrid 18 Name 18 Inputs 18 Inputs to Tracks 18 Pan Pot to Mixdown 19 Track settings 20 Decla...

Page 3: ...tarem 36 Cantarem II 36 Timecode 37 State 37 Internal Source Timecode Method 37 External Source 39 RECORD 40 Medias State 40 Solo 40 Metadata 40 Sync Points 40 Slate Detection 40 User Marker 41 Levels...

Page 4: ...epth 56 Pre Record Length 56 Timecode Settings 56 LTC Out Generator 56 LTC Out Level 56 LTC Rate 56 Timecode Source 56 Timecode User bits 56 Timecode Fudged 57 Operator TC 57 Record Run TC 57 Clap Det...

Page 5: ...tenuation 60 Light 60 Backlight 60 LED 60 Low Power in stop 60 External voltage limit 61 Keyboard layout 61 File Network access 61 Tech support 61 IP Adress 61 Diagnostic 61 Save Load settings 62 Save...

Page 6: ...c Jack 3 5mm 72 Cantarem Lemo 8 73 Timecode Lemo 5 F 73 Power XLR 4 M 73 Mic XLR 3 F 73 Mic XLR 5 F 73 Line In XLR 5 F 74 AES 42 TA 3 F 74 AES In Out Dsub 25 74 Analog Output Dsub 25 74 Hi Rose 74 Can...

Page 7: ...ilable by pressing three times the Shift button This help box is available in the Record Pre Record Test Play Browse Outmaps Ingrid Menus Each item may be selected by pressing the Up and Down buttons...

Page 8: ...t to the Left and or Right Ear The Left Ear is represented in RED The Right Ear is represented in GREEN You can navigate through the input grid with the direction buttons Left Right Up Down or using t...

Page 9: ...may be mapped Post fade in an Outmap to cycle throught the Left Right and Center mapping press the Shift F5 buttons IV Other Main Selector Positions When the Main Selector is in the Test 10 o clock P...

Page 10: ...the F3 button again will display the AES Outmap panel Pict 06 Pict 10 Pict 11 Each row represents a Line Output On a row five parameters may be setup the Attenuation Level the Delay applied to the Ou...

Page 11: ...h represents nearly 910 ms with a 48kHz sample rate Using the Left and Right buttons or the Jog wheel move the light blue selection box to the second item of the wanted row and press the OK button to...

Page 12: ...ossible to select an Outmap using the Left and Right buttons or the Jog wheel in order to move the light blue selection box to the fifth item of the wanted row and press the OK button to display the O...

Page 13: ...LineOut 3 but not to LineOut 4 Pressing Talk 2 will send the Slate Mic to LineOut 4 but not to LineOut 3 NB Pressing the Shift Talk buttons routes the audio to the Outputs and to the Tracks NB Quick...

Page 14: ...ing the Record position Pict 17 NB Using the Left Crown to select the Outmap placed before the Muted Outmap calls II Output Levels Outputs levels can be modified while the Main Selector is in the 10 o...

Page 15: ...ctor Positions When the Main Selector is in the Test 10 o clock Pre Record 11 o clock or Record 12 o clock positions it is also possible to modify the Line Outmaps by pressing the F2 key and then the...

Page 16: ...hared AES Outmap a is the same as Line Outmap a Outmaps can be modified while the Main Selector is in the 6 o clock position In that position Headphone Outmaps are displayed but by pressing F3 button...

Page 17: ...application It is available for Windows and Mac Os X please visit Audinate s web site to download it NB While setting up your Dante network please verify a few things In the Dante Controller tab Cloc...

Page 18: ...K buttons to modify it III Inputs The InGrid represents the 24 Tracks with 24 columns In each column 8 inputs can be routed represented by 8 rows In each row can be routed the corresponding input numb...

Page 19: ...st the input number PostFade N is the output of the track N through the attenuation applied to this track Be careful the PostFade has a delay of 1 sample Refer to Annex to see the Cantar Audio Chain i...

Page 20: ...decoding into Mix For MS pair only 4 PanPot positions are available M is sent to the Left and S is not sent to Mixdown M is sent to the Right and S is not sent to Mixdown M S are not sent to Mixdown M...

Page 21: ...Pict 26 In this example the external Mixdown is sent to the Cantar using the Line inputs 3 4 Cantar X3 21...

Page 22: ...matically turned off in order to save power If a configuration number is changed and an unused inputs become used it will be turned on automatically II Global Screen presentation Pict 27 This screen i...

Page 23: ...oactive symbol a phase symbol f a fn symbol with n being the number of the filter or an EQ symbol If more than one input is routed to a track each symbol is replaced by a plus sign III Media States Gr...

Page 24: ...that repeat from one take to the next one Take note that apply only to the next Take and is cleared at the end of the Take Changing the Scene resets the Take Number to one 1 The Take Number is automat...

Page 25: ...on or new entries may be added press the F1 button It is also possible to activate or deactivate the Track Completion feature by pressing the F3 button Once deactivated the completion list is not disp...

Page 26: ...om Power ON OFF Enable or disable the Limiter or the Phase Inversion Set the Preamp parameters Pre Attenuation Mic Level Line level High level Filter Set the Digital filter parameters Pict 33 i Phanto...

Page 27: ...gh Level or Line Level automatically cuts off Phantom Power vi Link For linked inputs it indicates whether it is a master of other mics or it is linked to a master For slaved inputs Limiter Phantom Po...

Page 28: ...etween High Level Low Level with the Shift Up or Down buttons Low Level default for all line inputs High Level a 20dBu attenuator is applied iii Filter Change Filter with the Up or Down buttons betwee...

Page 29: ...ng Solo by rotating the Jog wheel 4 AES The solo of an AES input is obtained by pressing the Solo button of the actuator assigned to the input If the input has no actuator assigned open the Solo panel...

Page 30: ...41 If the AES 42 input can communicate using the AES 42 standard the Cantar retrieves information about its capabilities Accordingly Limiter status Mute status Mic gain Pre Attenuation Low cut Filter...

Page 31: ...ter 1 Mics In order to compare 2 Mic inputs it is possible to have a double Solo It is obtained by pressing and holding both Solo buttons of the Mic inputs desired The firstly pressed button will dete...

Page 32: ...eter representing the phase between the 2 tracks The left side represents a phase of 180 and the right 0 3 Phase meter In the regular Pre Record or Record or Test or Play menu the Phase meter may be d...

Page 33: ...ositions Tracks gain can be displayed as soon as it is changed This feature can be enabled or disabled in the Technical Menu item Display Trcks Att If Dedicated Panel is selected metadata and timecode...

Page 34: ...ed and the headphone symbol blinks in red during 3 seconds Pict 54 Pict 55 IX Locking Panels While the Main Selector is in the Pre Record and Test positions Potentiometer and Mixer panels can be locke...

Page 35: ...to any Outmap Line AES AES 42 Dante where the corresponding Talk function is routed Pressing the Shift Talk buttons also sends the Talk stream to the Tracks XII Assignation Any slider of the Mixer Ca...

Page 36: ...tarem if connected To open the Assignation panel press and hold the Shift diamond button Slider Solo buttons on the Cantarem To go to next or previous actuator rotate the Left Crown or press the appro...

Page 37: ...ed At startup the Timecode icon is red This is to remind you to verify the Timecode state 2 Internal Source Timecode Method i Internal Free Run master clock The internal TCXO 1ppm Sync Clock keeps the...

Page 38: ...beginning of each audio file Cantar will stamp a start TC incremented by two seconds later than the preceding Take s end TC This clocking called Record Run produces audio files which appear as if the...

Page 39: ...is usually in the Record position before the camera so it monitors the LEMO 5 for incoming LTC and grabs it when coherent TC is received That is why the Timecode icon keeps blinking orange indicating...

Page 40: ...data During Record only the Take Type can be modified by pressing the F5 button IV Sync Points 1 Slate Detection This is the most precise and simplest method ever invented to sync images and sounds In...

Page 41: ...M10 on wind clicks boom noise dialogue slip etc V Levels Please refer to the Pre Record section VI Tone Generator Please refer to the Pre Record section VII Talk Please refer to the Pre Record section...

Page 42: ...1 Group 6 Line 3 A master can be linked to the superior inputs e g M 3 can be linked to M 4 to M 8 NB Stereo pairs 1 2 3 4 5 6 7 8 Surround 1 2 3 4 5 Double M S 1 2 3 4 5 Phantom Limiter and filter ar...

Page 43: ...e value entered on the late sound input to all other inputs NB The value specified in the delay field for an input is the delay of this input no need to calculate the delay according to other inputs C...

Page 44: ...e process will be displayed in green above the media icon End will be displayed when the process is finished The process will be automatically interrupted when exiting from the Test Menu The unfinishe...

Page 45: ...er option was activated in the Technical Menu according to the time set up the Cantar will go in low power mode 5 seconds before engaging the low power mode a message is displayed Pict 79 In that mode...

Page 46: ...sed for more than 10 seconds IV Dante According to the presence of the Dante option a Dante icon if displayed in the top right corner of the Cantar picture V Rescue Mode In case of a wrong shutdown Po...

Page 47: ...on Scroll in file rotate the Jog wheel Next Previous file press the Up or Down buttons Go to next previous sync point press the Left or Right buttons Change Headphone Mode rotate the Left Crown View c...

Page 48: ...wn Tracks Tracks will be routed Mono to both left and right ears NB On top of the Vumeters is displayed Track s attenuation If no actuator is assigned to a played Track its attenuation can still be ch...

Page 49: ...holding the Shift button press rotate the Jog wheel This mode is symbolized on the Headphone Outmap grid by playback Tracks being active at the side designated in the Outmap Tracks are labelled accord...

Page 50: ...Headphone Outmap grid by playback Tracks being active at Center Tracks are labelled according to the chosen monitoring mode P to emphasize the PostFader property or T for PreFader mode Pict 91 To add...

Page 51: ...ync Points Sync points are displayed on the timeline as vertical dotted lines White Slate sync point Black User marker To go to the previous or next sync point press the Left or Right buttons Cantar X...

Page 52: ...ct one file with the Up and Down buttons In the top part select EDIT field and press the OK or the F4 buttons to open the Edit panel Pict 96 Select the appropriate field with the Left and Right button...

Page 53: ...y holding the Shift button and pressing the Up or Down buttons In the top part select the EDIT field and press the OK button OR press the F4 button Pict 97 The fields are filled with Metadata from the...

Page 54: ...nto the current Day folder Pict 101 III Snap Report In the Audio Browser menu the Audio Sound Report is generated by pressing the F6 button 1 Simple Snap The Snap Report process for each media detecte...

Page 55: ...rocess may scans through all the days present in the current Project by opening the Snap Report dialog box by pressing the Shift F6 buttons Pict 104 2 Export Snap The Snap Report process may also be s...

Page 56: ...esponds to the resolution of each sample III Pre Record Length Audio buffering duration in seconds when the Cantar is in the Pre Record position IV Timecode Settings 1 LTC Out Generator Enable or disa...

Page 57: ...60 ms To prevent trouble this choice is not saved at power off 7 Operator TC The Operator entered TC becomes the next recording session reference OTC is displayed as timecode flag 8 Record Run TC Rec...

Page 58: ...gle jack 3 5 slate mic biais Power ON or OFF Set to ON for electret mics 4 Talk full duplex Select how the talkback activation impacts the headphones if ON during a talkback the current headphone moni...

Page 59: ...d by one character Scene two digits followed by one character space A to Z a to z 0 to 9 Take Type t time sync p pick up w wild take a announce n no good keeps the take for the next file r rehearsal g...

Page 60: ...ch is used for syncing picture and audio V Display Levels Attenuation 1 Inputs Levels In Record Ppr and Test positions inputs levels can be displayed as soon as a change occurs replacing temporarily t...

Page 61: ...thernet plug Disks are accessed by On a Mac computer Connecting to the adress smb CANTARX3_NN with NN being the Cantar Number On a Windows computer Connecting to the adress CANTARX3_NN with NN being t...

Page 62: ...ag followed by the date and time but it can be personalized by selecting the Name field with the Up and Down buttons and then pressing the Ok button Press the F5 button to save the whole configuration...

Page 63: ...115 XIII Load firmware Access to the firmware loading Window 1 Get the latest Cantar X3 firmware version from the Aaton Support web site http www aaton com software updates 2 The firmware file extensi...

Page 64: ...ate field and press the OK button to edit it Pict 116 I Record Parameters 1 Project i Select a project Pict 117 Selects the current recording Project through a List built from the first enabled record...

Page 65: ...named as XXnnnn SSSSSSSStNN _TT wav XXnnnn Cantar s unique FileTag Separator can be or _ according to file naming parameter in the Technical menu SSSSSSSStNN Scene and Take Type _ Track Number Separa...

Page 66: ...is protected by the need to enter the Cantar number with the Up and Down buttons Pict 122 4 Compressed Proxy In addition to the main recording processes Monophonic Stereo Mixdown Polyphonic a compres...

Page 67: ...it or TC Fps a new page is added Use the direction buttons to select a cell and press the OK button to edit it Pict 89 Some data types are 2 cells wide for example Prod Title etc other only 1 NB While...

Page 68: ...ne can have up to 16 columns given the first column is necessarily the Take index on the current page and the second column of the first line of the Take is the FileID Circled takes may also be report...

Page 69: ...hen press the OK button to edit it NB A full Project can be selected in the Day Folder field at the top of the list of days Pict 94 A project report if enabled is generated at the end of the backup Th...

Page 70: ...Take is also on the target list it is automatically highlighted The backup process can be started into two modes Copy by pressing the F4 button Overwrite by pressing the F6 button In Copy mode if a T...

Page 71: ...Cantar X3 71...

Page 72: ...ES 6 Out 13 AES 6 Out 14 15 V Batt 16 LTC Out 21 World clock In 22 Ground 24 Power On Off 25 AES 5 Out 26 AES 5 Out Other pins reserved for future use do not connect 2 Headphone Jack 6 35mm Slate Mic...

Page 73: ...Pin 3 of MDR 4 Timecode Lemo 5 F Lemo 5 wiring 1 Ground 2 LTC In 3 Ascii 4 N C 5 LTC Out 5 Power XLR 4 M External power 13 to 18 V 4 Amps 1 Ground 2 NC 3 NC 4 Batt 6 Mic XLR 3 F Symmetrical transform...

Page 74: ...ES Inputs AES Outputs Channel Pairl Hot Cold Gnd Channel Pairl Hot Cold Gnd 1 2 24 12 25 1 2 18 6 19 3 4 10 23 11 3 4 4 17 5 5 6 21 9 22 5 6 15 3 16 7 8 7 20 8 7 8 1 14 2 11 Analog Output Dsub 25 Outp...

Page 75: ...l menu At restore step Cantar user can select between all Ingrid Outmap Low power is available in stop position The duration before starting the low power mode can be adjusted into technical settings...

Page 76: ...some situations interface crash while modifying the Pdf Header or at startup Going from customisable field to single not customisable one was leaving the custom text version 1 103 May 02 2016 Compatib...

Page 77: ...ignore the message press OK to disable external input power and switch to internal battery if there is a battery To enable external power just unplug or switch off the external power source a few seco...

Page 78: ...exiting from TEST position if idle mode is enabled Confict between level display panel during metadata edit in PPR AES gain adjustement using jog Short audio file names are created instead of long nam...

Page 79: ...sion 1 84 November 03 2015 Free media size is displayed in stop position pressing the Up or down buttons Remaining time on each media is displayed according to the current record configuration Bug fix...

Page 80: ...15 AES42 control KMD of internal digital mic parameters Digital gain on AES42 inputs inf 36dB Digital gain on AES3 inputs inf 12dB Please note 2 version of the input are available for IN GRID a1 origi...

Page 81: ...r edition from play screen using F4 Bug fix on New management of lazy external media SD USB Line Aes Dante out are included into reset factory configuration Balance lock are saved when power off Displ...

Page 82: ...ility on track name into bext for numbers over 9 At start up with new day accepted Tape id is automatically setup as MMDD month day In edit fields SHIFT Left arrow erase filed content without confirma...

Page 83: ...Cantar X3 83...

Page 84: ...Cantar X3 84...

Page 85: ...Cantar X3 85...

Reviews: