


15
Ethernet to CAN Gateway YAV90090 620090E06
7. On the
Action
page, select Allow the connection and then click next.
8. On the
Name
page, type a name and a description and then click
Finish
.
2.6.2 Establishing the connection
1. Connect the RJ-45 connector of the YAV90090 via a LAN cable, directly to the
computer.
2. Connect the CAN cable to power up the module.
Power supply input voltage
V
B
8
24
30
V
DC
Current consumption at voltage input @+24VDC
I
B
260
85
72
mA
3. Wait until the YAV90090 is ready (RUN led is blinking green).
4. To check if there is connection, open the command prompt and ping the YAV90090
IP address. For example:
ping 192.168.18.55
.
2.6.3 Prepare Phi6 Explorer
2.6.3.1 UDP Unicast connection
1. Locate the 6TL folder. It should be in the following directory:
“C:\Users\Public\Documents\6TL”.
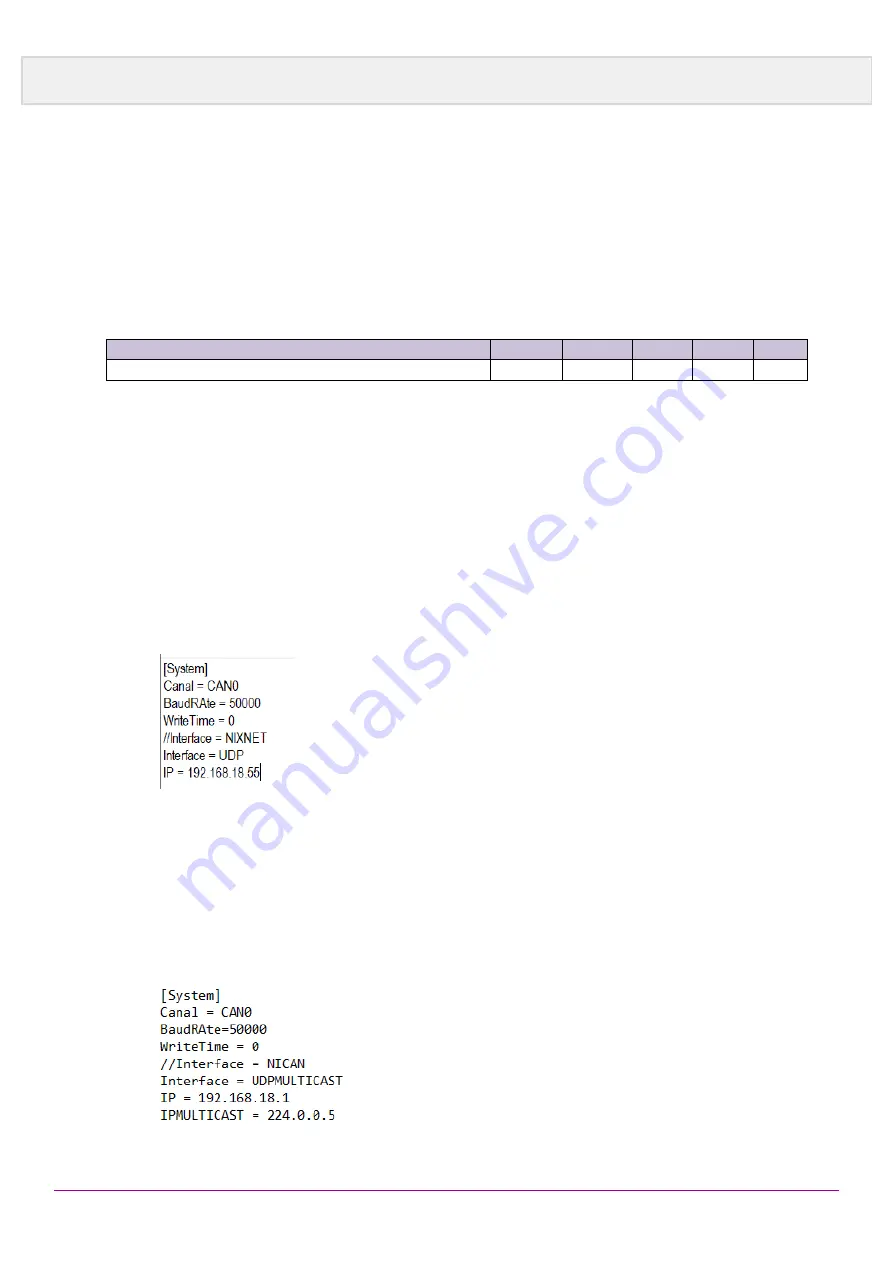
2. Edit the
“Phi6Config.ini”
file. Add
“//”
fifth line and remove it from the sixth and
seventh line.
3. Write in the
IP
field your
Default Gateway
.
2.6.3.2 UDP Multicast connection
1. Locate the 6TL folder. It should be in the following directory:
“C:\Users\Public\Documents\6TL”.
2. Edit the
“Phi6Config.ini”
file. Add
“//”
fifth line and remove it from the sixth and
seventh line.
3. Write in the
IP
field your
own IP address
. And write in the
IPMULTICAST
field the
IP multicast group configured by the switches.


