ASSEMBLY– VENTILATION INSERT AND INDOOR ROOM COVER
Questions? Email: [email protected] | Call: 800-995-6329
OPERATION
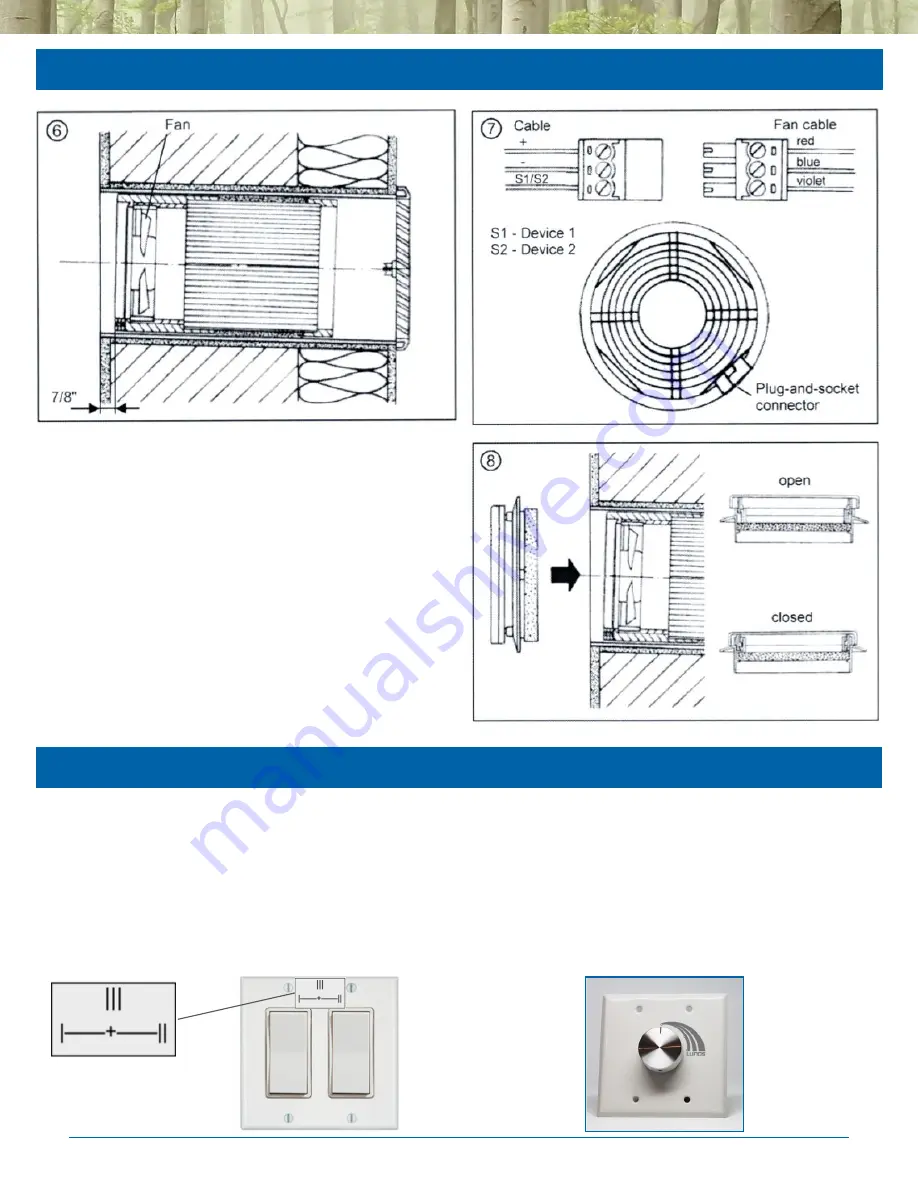
6
Remove interior protection lid cover, insert heat
exchange unit into the installation pipe, ensure there is
a ⅞" gap on interior of pipe. Motor/fan faces interior.
The loop on fan unit can be used to pull unit for
maintenance.
Connect wiring to plug. Connect plug into socket and
set them into the recess of the heat exchanger casing.
Insert interior cover with filter casing, snap the interior
blind into place in open position (¼” off wall).
If cover completed covered, lift cover and rotate 180°.
Installation is now complete.
When operating the Lunos e
2
using a double-rocker
switch, apply the provided sticker to the switch plate
as shown. The markings on the sticker correspond to
the following:
●
Both W1 + W2 OFF
= Level 0
●
Switch W1 ON
= Level I
●
Switch W2 ON
= Level II
●
Both W1 + W2 ON
= Level III
When operating the Lunos e
2
with the optional 475
Rotary Switch, the switch positions correspond to
the following (assume a clock face):
●
12:00 (position 0)
= Level 0
●
1:00 (position 1)
= Level I
●
2:00 (position 2)
= Level II
●
3:00 (position 3)
= Level III
W1
W2
Sticker placement


