


VISIX Camera Quick Start Guide |
VX-2A-B-IWD (R)
10225 Westmoor Drive, Suite 300, Westminster, CO 80021 | www.3xlogic.com | (877) 3XLOGIC
8
10225 Westmoor Drive, Suite 300, Westminster, CO 80021 | www.3xlogic.com | (877) 3XLOGIC
8
5
View Video on Camera Web Interface
Once the device’s proper IP address has been identified, type the IP into a web browser URL (Microsoft Internet
Explorer/Edge required for ActiveX control) to view the camera’s web interface and video stream images. The
default username and password is
admin/12345.
After initial access, an ActiveX control installation pop up may
deploy. ActiveX is required for viewing video in the browser.
5.1
Installation of ActiveX Control
Steps:
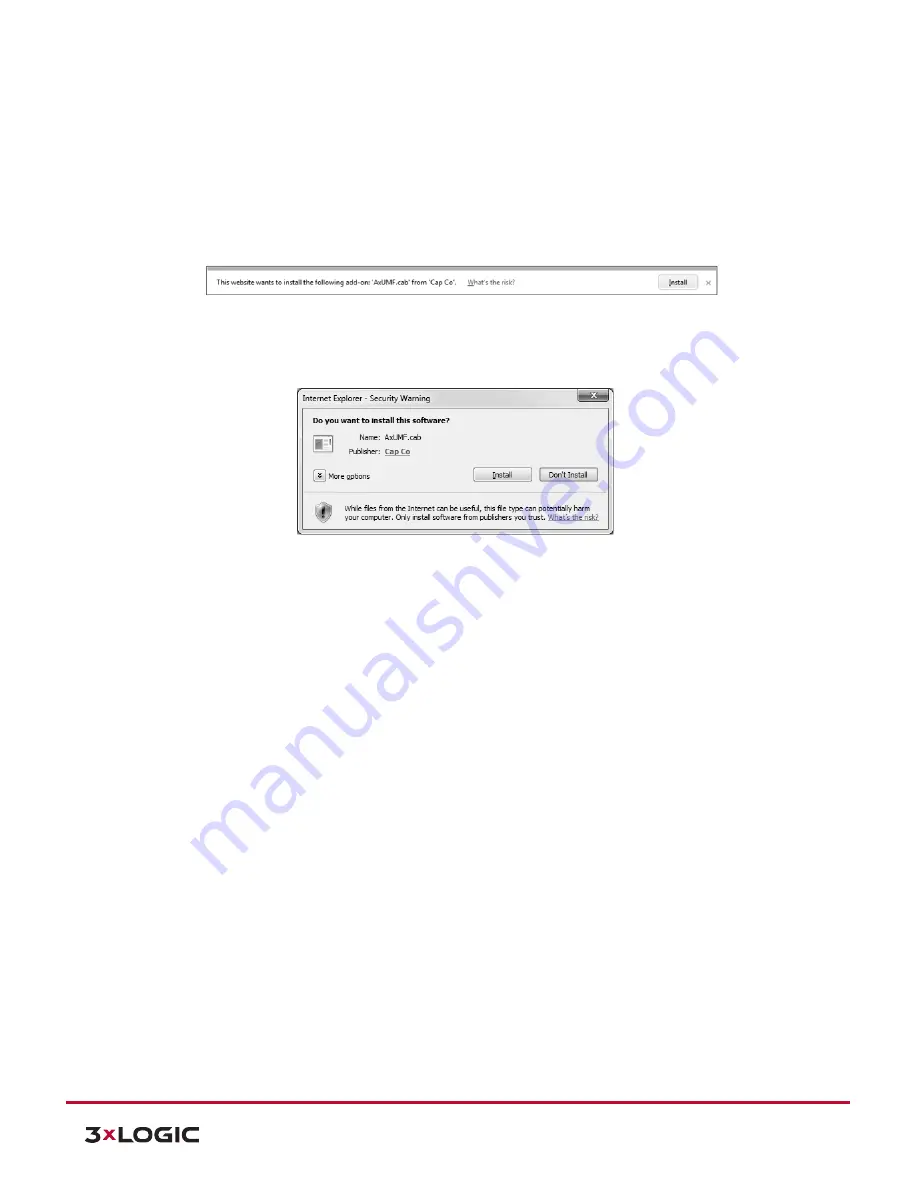
1).
When the browser asks to install the AxUMF software, click Install to proceed.
2).
When the setup installation pop-up window appears, click
Install
to proceed with rest of installation.
NOTE:
Depending on system OS and Internet Explorer version, installation experience may differ from one another.
Figures described above are from Windows 7, Internet Explorer 9 environment.
Upon completion, the camera’s web interface will be fully accessible for video viewing and settings
configuration.
6
Reboot
Perform the following procedures to reset your device:
Steps:
1).
Press the Reset button, and hold it for 2 seconds while the device is in use.
2).
Wait for the system to reboot.
CAUTION:
Please do not hold the reset button for more than 2 seconds. Otherwise, the camera may be switched to its
Factory Default settings.
-Or-
3).
Open the 3xLOGIC Camera Setup Utility.
4).
Select your device.
5).
Open Advanced Settings.
6).
Click
Reboot.