


VISIX Camera Quick Start Guide |
VX-2A-B-IWD (R)
10225 Westmoor Drive, Suite 300, Westminster, CO 80021 | www.3xlogic.com | (877) 3XLOGIC
7
10225 Westmoor Drive, Suite 300, Westminster, CO 80021 | www.3xlogic.com | (877) 3XLOGIC
7
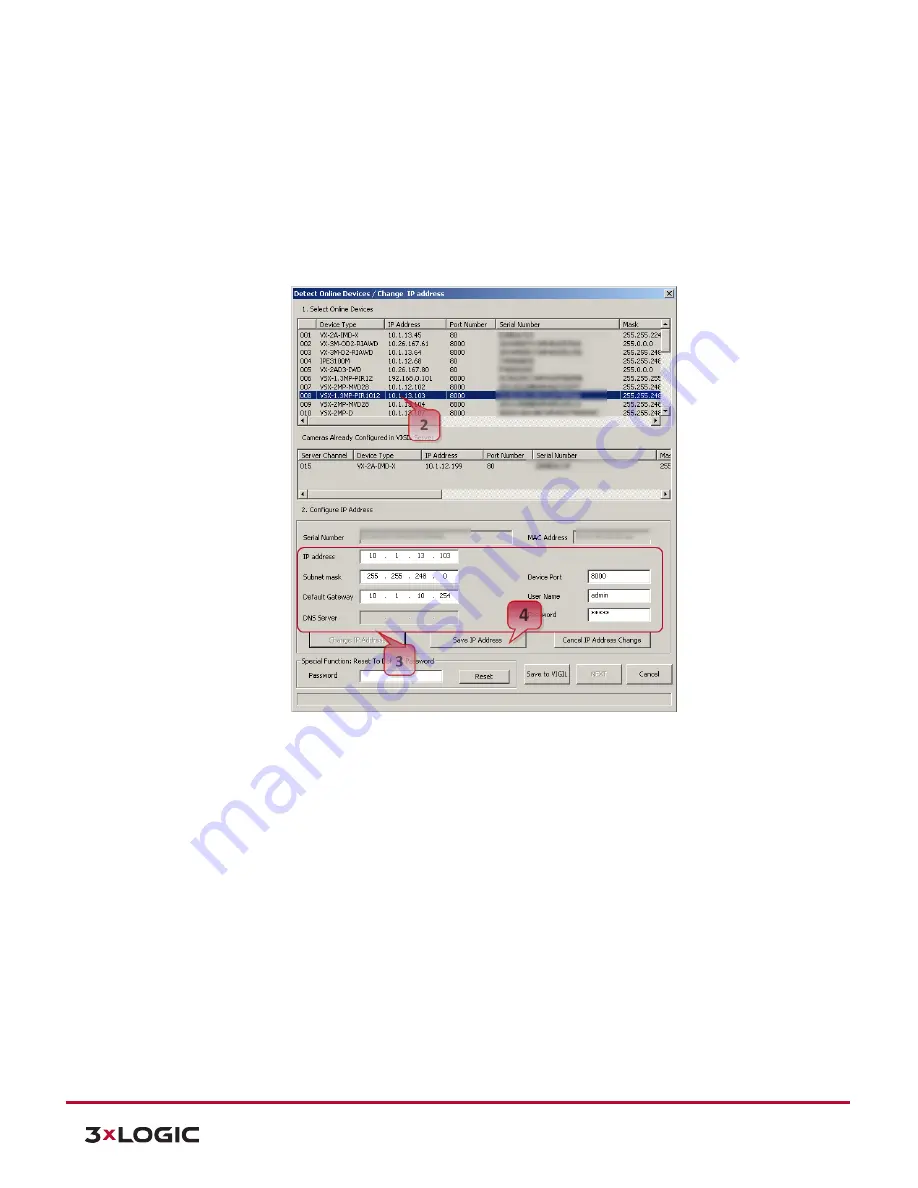
After clicking
Detect Online Devices/ Change IP Address
on the main page you will be taken to the Online
Devices window. A list of all VISIX devices discovered on your network will be visible.
2).
To select a device, click on the desired device in the generated menu under the
Select Online Devices
area.
3).
To change an IP address for a selected VISIX camera in the
Detect Online Devices Window,
select the
desired camera, click on the
Change IP Address
button. The fields under the
Configure IP Address
area
will un-grey to allow for manual editing of camera IP addresses as well as other settings.
4).
When you have finished editing the settings, click
Save IP Address
to save new changes.
5).
Start the Microsoft® Edge/Internet Explorer web browser and enter the address of the device.
6).
Web streaming and device configurations are supported through ActiveX program. When the ActiveX
installation window appears, authorize and install the ActiveX.