3xLogic V Series Quick Start Manual Download Page 4

VISIX Camera Quick Start Guide |


VX-2A-B-IWD (R) 


10225 Westmoor Drive, Suite 300, Westminster, CO 80021 | www.3xlogic.com | (877) 3XLOGIC


4
 

10225 Westmoor Drive, Suite 300, Westminster, CO 80021 | www.3xlogic.com | (877) 3XLOGIC


1.1


Installation 

There is only one type of mounting explained in this manual. Refer to the device’s installation guide for more 
various mounting types. 


CAUTION: 

Sealing gaps is recommended as gaps may appear after the camera installation. Gaps may cause problems such 
as  moisture,  water  leakage  and  etc.,  which  negatively  affects  the  operation  of  the  camera  if  gaps  remain 
unsealed. 
 

CAUTION: 

To prevent products from damage, place the camera on stable and non-vibrating surfaces If the stability is in 
doubt, consult safety personnel for reinforcements, and then proceed with the installation. 
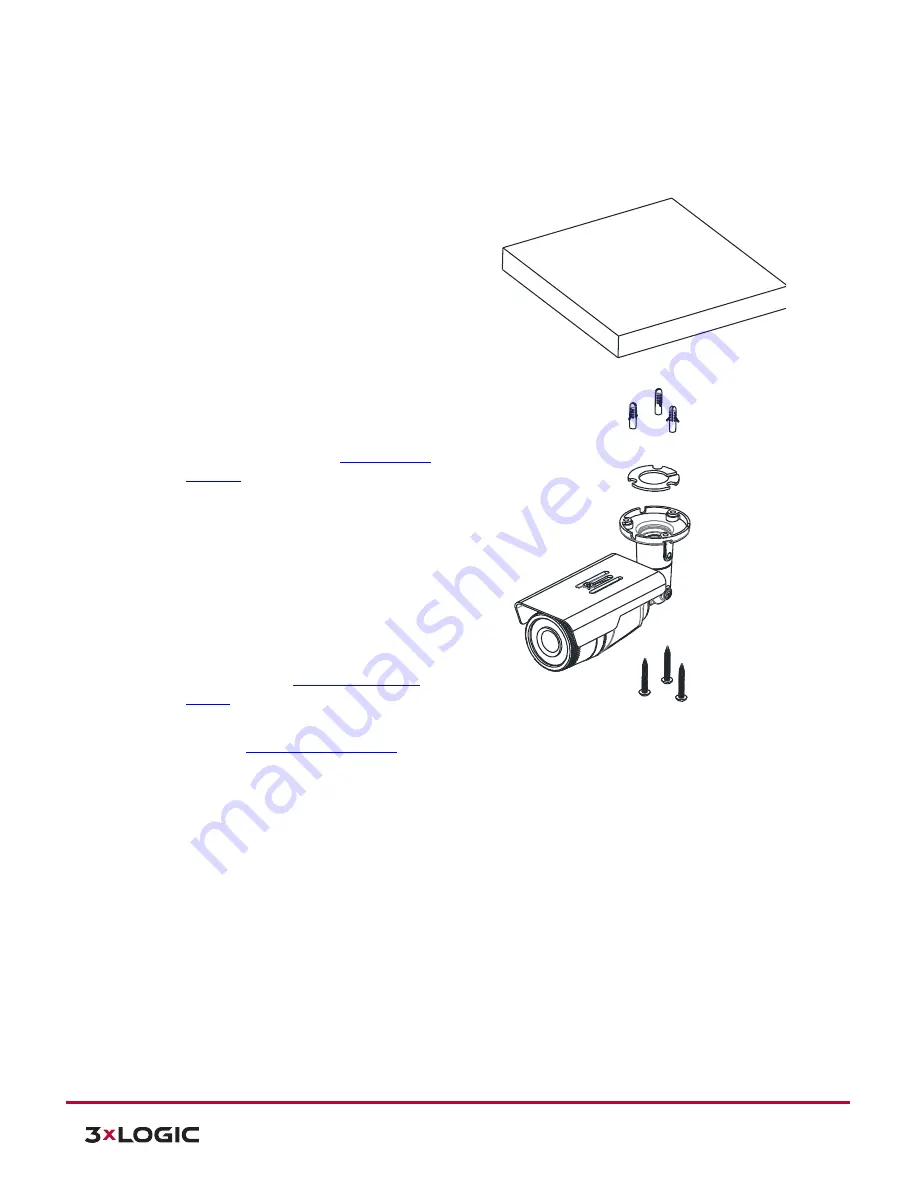


Steps: 

1).


Place the installation template (paper) 
included in the package on the desired 
installation surface. 

2).


Drill three holes in correct positions based on 
the template paper, and insert the anchor 
blocks into the holes.  

3).


Attach the silicon waterproof band included in 
the package to the camera’s mounting surface 
by aligning it with the three alignment holes.


4).


Connect the required cables including a power 
cable and a LAN cable (or PoE cable) to the 
device. Refer to 

Section 1: 

Part Names and 

Positions


for more details. 

5).


Place the camera body to match the three 
alignment holes with the three anchor blocks, 
and hold the camera against the surface where 
the camera will be mounted. 

6).


Tighten the anchor blocks with the screws 
(M4x30). 

7).


Adjust the heading direction of the camera 
with the provided hex wrench (3mm). Please 
refer to 

Section 2: 

Adjusting Angle of the 

Camera

 for more details.


8).


Adjust zoom and focus of the camera. Refer to 

Section 3: 

Adjusting Zoom and Focus

 for more 

details. 

9).


Attach the lens cover on the main body by 
rotating it clockwise. 


Summary of Contents for V Series

Page 1: ...Camera Quick Start Guide VX 2A B IWD R 10225 Westmoor Drive Suite 300 Westminster CO 80021 www 3xlogic com 877 3XLOGIC 1 VISIX V Series All in One Cameras VX 2A B IWD VX 2A B RIWD Quick Start Guide v0...

Page 2: ...cus 5 5 Accessing Camera Settings and Video 6 5 1 MANUALLY LOCATE CAMERA IP ADDRESS MAC ADDRESS HEX CONVERSION 6 5 2 AUTOMATICALLY DETECT CAMERA IP ADDRESS WITH 3XLOGIC CAMERA SETUP UTILITY 6 6 View V...

Page 3: ...ositions of each part with the following image CAUTION Make sure the polarity is correct Incorrect connection may cause malfunction or damage the IP device Power Adaptor Connector DC 12V Model design...

Page 4: ...e on the desired installation surface 2 Drill three holes in correct positions based on the template paper and insert the anchor blocks into the holes 3 Attach the silicon waterproof band included in...

Page 5: ...and Focus Steps 1 Unscrew the zoom puller and the focus puller counter clockwise 2 Adjust the zoom and the focus of the lens 3 Tighten the zoom puller and the focus puller again by turning it clockwi...

Page 6: ...e network environment where IP address 192 168 XXX XXX are used the following procedure can be used to identify a device s IP address Steps 1 Convert the device s MAC address to the IP address Refer t...

Page 7: ...o change an IP address for a selected VISIX camera in the Detect Online Devices Window select the desired camera click on the Change IP Address button The fields under the Configure IP Address area wi...

Page 8: ...click Install to proceed 2 When the setup installation pop up window appears click Install to proceed with rest of installation NOTE Depending on system OS and Internet Explorer version installation e...

Page 9: ...8 0 1 User ID admin Password 12345 8 Configure the Camera s VIGIL Connect Alias VIGIL Connect allows VIGIL VMS users to remotely connect to a VIGIL Server V Series All in One camera using the system s...

Page 10: ...ick Add This will deploy the Add Edit VIGIL Server window 3 Enable the Use VIGIL Connect option If connecting using traditional network connection criteria is desired enter the cameras IP Address DNS...

Page 11: ...an be added to the VIGIL Client viewer in the same manner as VIGIL Server cameras Simply extend the camera s drop down menu and double click the icon to add it to the viewer Alternatively a user can d...

Page 12: ...0D 13 32 50 57 87 7C 124 A1 161 C6 198 EB 235 0E 14 33 51 58 88 7D 125 A2 162 C7 199 EC 236 0F 15 34 52 59 89 7E 126 A3 163 C8 200 ED 237 10 16 35 53 5A 90 7F 127 A4 164 C9 201 EE 238 11 17 36 54 5B 9...

Page 13: ...877 3xLOGIC www 3xlogic com 2016 3xLOGIC Inc All rights reserved Information in this document is subject to change without notice 3xLOGIC and the 3xLOGIC logo are trademarks of 3xLOGIC Inc all other t...

Reviews: