


Bullet Network Camera
- 20 -
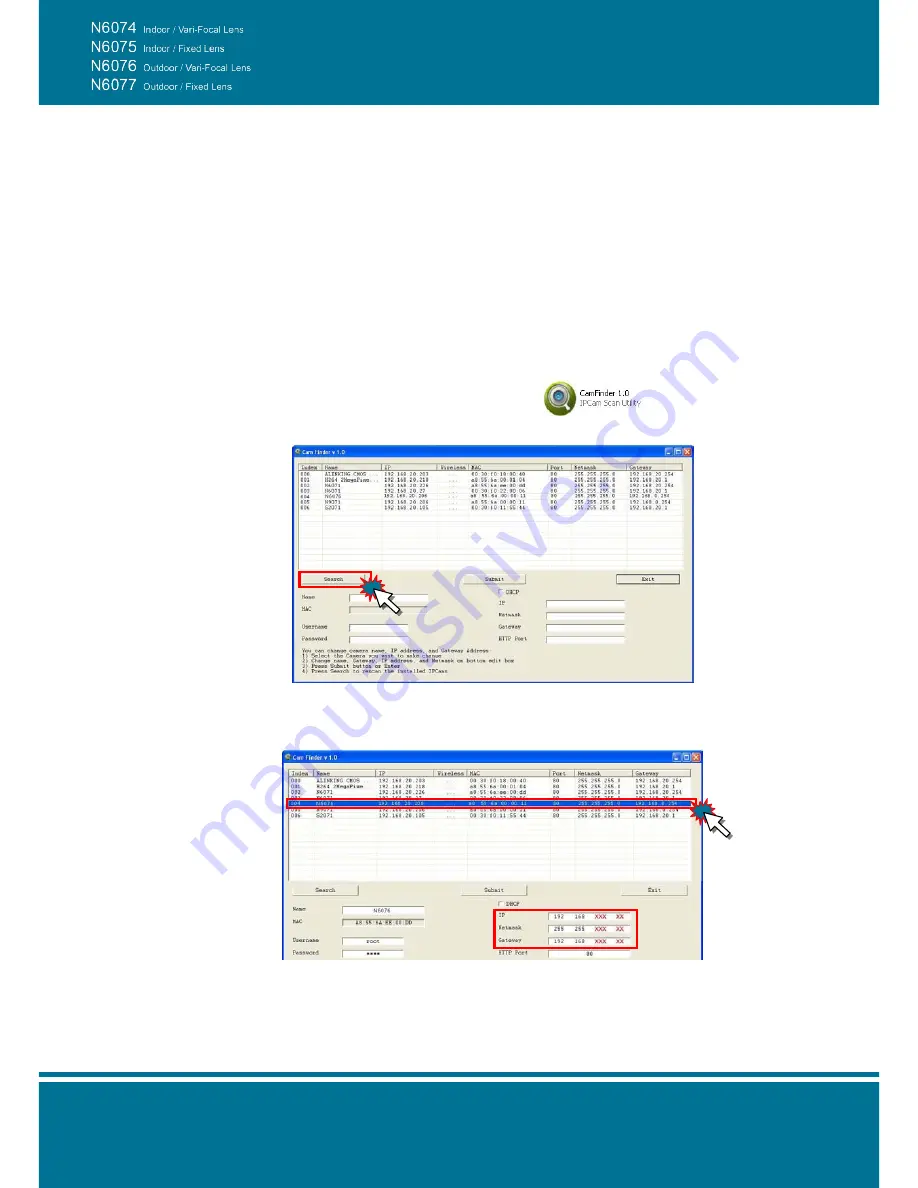
Software Installation
After the hardware has been installed, insert the installation CD into the CD-ROM driver and
run the “Cam Finder.exe” following the steps below to search and change the IP address of
the Bullet Network Camera.
NOTE
:
If the network environment has the router, please make reference to the chapter of
Appendix:
Set up the Router Setting with IP Camera
for different environment description.
1. Start the Camera Setting.
Run the
Cam Finder.exe
from the installation CD.
2. Set the IP address of the Network Camera.
Click
Search
to find the IP Camera on the LAN, the factory IP setting
192.168.0.20
appears on the screen.
3. Change the IP address and related settings for the network environment.
When you find the camera, click it and the settings will appear on the right side. You can
change the settings for the new network environment as you need.
NOTE:
Enter new settings in the field of the
IP
, Netmask and Gateway fields and keep the
settings in other fields unchanged.
Summary of Contents for N6074
Page 1: ......
Page 9: ...Bullet Network Camera 9 N6076 Vari Focal Lens N6077 Fixed Lens...
Page 10: ...Bullet Network Camera 10 Inner View Rear Panel Vari Focal Lens Fixed Lens...
Page 56: ...Bullet Network Camera 56...
Page 67: ...Bullet Network Camera 67 address is assigned from the DHCP server...
Page 71: ...Bullet Network Camera 71...
Page 73: ...Bullet Network Camera 73...
Page 79: ...Bullet Network Camera 79...
Page 85: ...Bullet Network Camera 85...
Page 94: ...Bullet Network Camera 94 Recording List Use this setting to management the recording list...
Page 98: ...Bullet Network Camera 98 1...
Page 119: ...Bullet Network Camera 119...


