


Attention before mounting:
Don't place or install the device in area near water or
moist, keep the relative humidity of the device
surrounding between 5%~95% without condensation.
Before power on, first confirm the supported power
supply specification to avoid over-voltage damaging the
device.
The device surface temperature is high after running;
please don't directly contact to avoid scalding.
【
Rack-mounting the Device
】
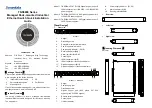
Step 1
Select the device installation location to reserve
sufficient size.
Step 2
Adopt screws to install the mounting lugs in the
device position as figure below.
Step 3
Place the device in the rack; adopt 4 screws to
install the mounting lugs on the left and right side in
the rack.
Step 4
Check and confirm the product is firmly installed on
the rack, then mounting ends.
【
Rack-mounting Device Disassembling
】
Step 1
Power off the device.
Step 2
Unscrew the fixing screw of mounting lug on the
rack.
Step 3
Remove the device from the rack, disassembling
ends.
Note:
Power ON operation: first connect power line to the
connection terminal of device power supply, then power
on.
Power OFF operation: first unpin the power plug, then
remove the power line, please note the operation order
above.
【
Power Supply Connection
】
Model I
Model I provides 3-Pin 5.08mm pitch power
supply terminal blocks. Power supply range:
110VAC/DC (100-240VAC/DC).
Model II Model III
Model II model III provide 7-Pin M23 power
supply port. Pin 1 and Pin 2 are power
supply P1(Pin 1 is V+,Pin2 is V-); Pin 3 and
Pin 4 are power supply P2(Pin 3 is V+,Pin 4
is V-);Pin 6 is ground. Model II power supply
range: 110VAC/DC
(
100~240VAC/DC
)
,
Model III power supply range: 24VDC.
【
Relay Connection
】
Model I
This device provides 3-Pin 5.08mm pitch
relay terminal blocks. Relay terminal blocks
is a pair of normally open contacts of
device alarm relay. They are open circuit in normal non alarm
state, closed when any alarm information occurs. Such as: it's
closed when power off, and send out alarm. This series
switches support 1 channel relay alarm information output,
support DC power alarm information or network abnormal
alarm output, it can be connected to alerting lamp, alarm
buzzer, or other switching value collecting devices for timely
warning operating staffs when alarm information occurs.
Model II Model III
Model II Model III provide 7-Pin M23 port in
which Pin 5 and Pin 7 are relay pins. Relay is
a pair of normally open contacts of device
alarm relay. They are open circuit in normal
non alarm state, closed when any alarm
information occurs. Such as: it's closed when
power off, and send out alarm. This series switches support 1
channel relay alarm information output, support DC power
alarm information or network abnormal alarm output, it can be
connected to alerting lamp, alarm buzzer, or other switching
value collecting devices for timely warning operating staffs
when alarm information occurs.
Communication Interface Connection
M12 100M Copper Port
Model I provides 8 10/100Base-T(X) ports. The
interface type is M12 D-Coded 4-Pin slot (female).
The pin definitions of M12 are as follows:
No.
Definition
Description
1
TD+
100M Ethernet transmitted signal
Positive
2
TD-
100M Ethernet transmitted signal
Negative
3
RD+
100M Ethernet received signal
Positive
4
RD-
100M Ethernet received signal
Negative
M12 Gigabit Copper Port
Model I provides 4 10/100/1000Base-T(X)
interfaces. The interface type is M12 A-Coded
8-Pin slot (female) and its pin definitions are
as follows:
No.
Definition
Description
1
D0+ (DA+)
The first group of bi-directional data
of Gigabit Ethernet positive


