background image


Issue Date: 12/4/2012 


Enrollment 
 

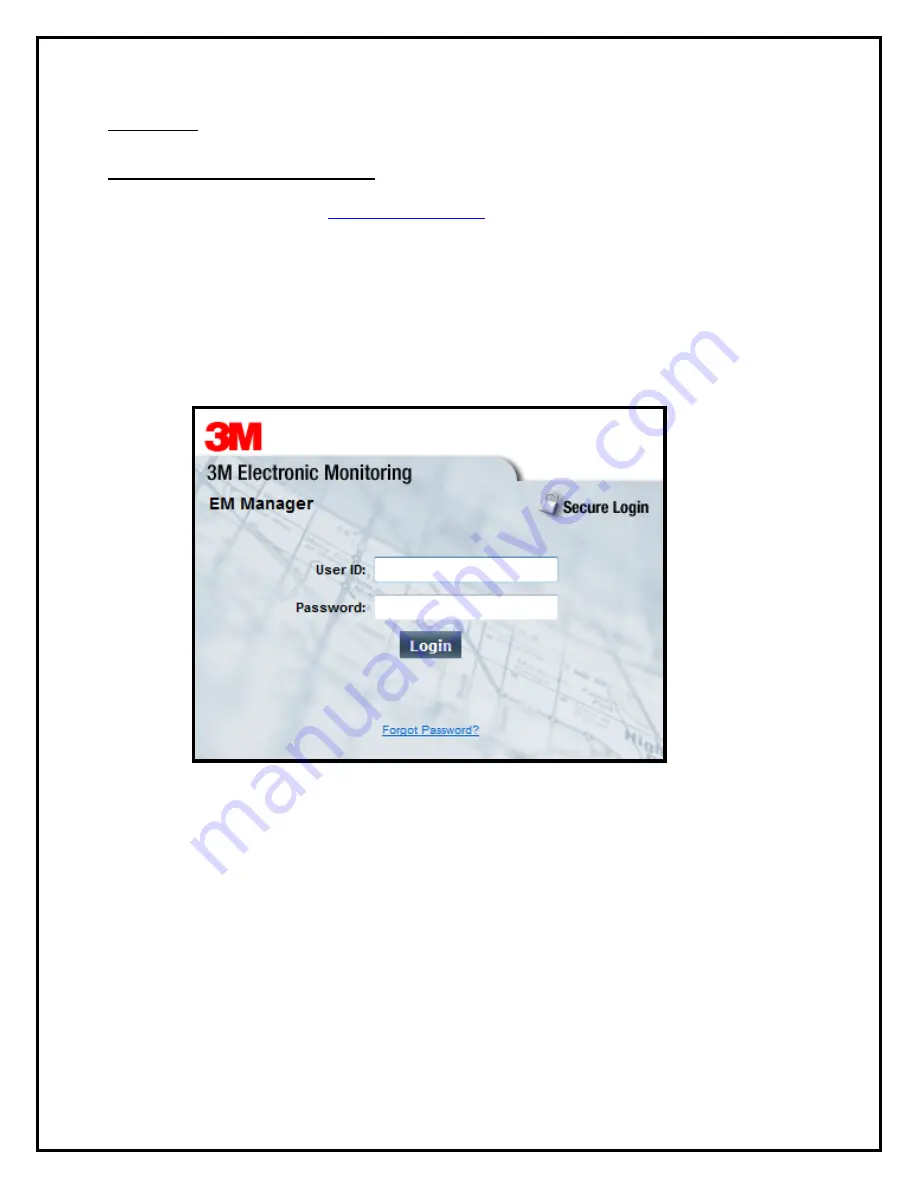
EM Manager (Smart View) Log In 

 
To access the secure website, go to 

https://smartview.ptm.com. 

You will be required to enter a user ID and 

password.  When using EM Manager (Smart View) for the first time, you will create your own password.  Enter your 
User ID (often your three initials and last four digits of your social security number), the temporary password that was 
emailed to you, and click OK.  The next screen will tell you that your password has expired.  Create your password, 
(

the password you select must contain at least 8 characters

), and click OK.  You will now be logged into EM Manager 

(Smart View). 
 

Note: If you forget your password, click the Forgot your Password link. A new temporary password will be 
emailed to you. To create your new password, follow the instructions contained within the email. 


Summary of Contents for X1044V

Page 1: ... 3M 2011 All Rights Reserved 3M Two Piece GPS Offender Tracking System XT User Manual ...

Page 2: ...ll an Offender 14 Supervision Level 15 Map Offender s Address 18 Offender General Information Page 19 Create Schedule for Home Inclusion Zone 20 Create Exclusion Zone 23 Attaching the Bracelet 27 Activating the 2 Piece XT with the Base Unit 2000 30 Deactivating Hardware 34 Removing the Bracelet 38 Accessing the Officer Menu 40 Accessing the Offender Menu 41 Appendix 42 Rule Definitions 42 XT Statu...

Page 3: ...lled and used in accordance with the instructions may cause harmful interference to radio communications However there is no guarantee that interference will not occur in a particular installation If this equipment does cause harmful interference to radio or television reception which can be determined by turning the equipment off and on the user is encouraged to try to correct the interference by...

Page 4: ...es as an electronic tether to the 2 Piece XT 2 Piece XT A 6 oz device approximately the size of a Blackberry The 2 Piece XT receives transmitted information from GPS Satellites and 3M Electronic Monitoring s ankle bracelet and then uses its modem to transmit the data to 3M Electronic Monitoring by using the cellular network Base Unit 2000 A stationary device used to recharge the 2 Piece XT and tra...

Page 5: ...al is once every hour while in compliance The 2 Piece XT will call 3M Electronic Monitoring as soon as a violation occurs Passive Mode The standard 2 Piece XT call in interval is once every six hours The 2 Piece XT will not call 3M Electronic Monitoring when a violation occurs The officer will only be made aware of violations when they view the GPS maps or the Daily Violation Summary Report DVSR t...

Page 6: ...n acknowledged Speaker Officers can choose to enable the speaker feature to alert the offender of alarms and or messages that need to be acknowledged Automatic Redial If the 2 Piece XT is unable to communicate with 3M Electronic Monitoring because of poor cellular coverage it will continue to try to call and download its information until it is successful Carrying Pouch Accessory In order to maint...

Page 7: ...Issue Date 12 4 2012 6 2 Piece XT Features ...

Page 8: ...a fiber optic cable designed to prevent tampering Tamper Detection If an offender interrupts the infrared light located inside of the fiber optic cable inside of the bracelet strap an alarm will occur Vibration The bracelet will vibrate three times consecutively if it has been out of range of the 2 Piece XT for four consecutive minutes This indicates that the offender has one minute to move closer...

Page 9: ...nsmit the 2 Piece XT data to 3M Electronic Monitoring Note When the 2 Piece XT is docked or undocked from the Base Unit 2000 the Base Unit 2000 will transmit the most recent data to 3M Electronic Monitoring Caller ID Feature The Base Unit 2000 notifies the assigned officer if an offender s Base Unit 2000 makes a call from a telephone number that differs from the offender s home number Adjustable R...

Page 10: ...d last four digits of your social security number the temporary password that was emailed to you and click OK The next screen will tell you that your password has expired Create your password the password you select must contain at least 8 characters and click OK You will now be logged into EM Manager Smart View Note If you forget your password click the Forgot your Password link A new temporary p...

Page 11: ...ee below It is here that you will enter the officer s information name address phone number etc report types and default notification settings 1 Click the Enroll Contact link on the left side of the Home page 2 You will be redirected to the Enroll Contact page see below Enter all Contact information 3 Click Save ...

Page 12: ...Issue Date 12 4 2012 11 Enroll a Contact cont ...

Page 13: ... will be sent 3 Choose Daily Violation Summary Report and or Case Management Activity Report Default Notification Options 4 Select the type of Notification you would like to be your default method The notification method is dependent upon the information that you enter into the Notification Email or Text Message fields Pager Fax E mail Text Message Finish Enrollment 5 When you have completed the f...

Page 14: ...see below Here you can edit the contact information as well as disable the contact 1 To edit the contact information move your mouse cursor over the Contact Functions dropdown menu and left click Edit 2 To disable the contact move your mouse cursor over the Contact Functions dropdown menu and left click Disable Contact ...

Page 15: ...Issue Date 12 4 2012 14 Enroll an Offender The Enroll Offender link is located on the left side of the Home page see below 1 Click the Enroll Offender link ...

Page 16: ...sion Level Clicking on the Enroll Offender link will redirect you to the Level of Supervision page see below 1 Click on the Level of Supervision drop down menu 2 Select your Level of Supervision see below 3 Click the Continue button ...

Page 17: ...the Level of Supervision you will be redirected to the Enroll Offender page see below It is here that you will select an Assigned Officer enter the Offender s Information select the Notification Contact and Method Assign Hardware and select the Basic Rule Setup ...

Page 18: ...he serial number on the device s 7 Click on the drop down menu and select that serial number for the device Basic Rule Setup 8 Click the box next to Create Default Home Zone from Home Address For information on how to edit the schedule for the Home Rule refer to page 19 9 Choose the appropriate Contact from the Notification Contact drop down list The selected Contact will be notified for all rules...

Page 19: ...p button on the Offender Enrollment screen will generate a map that displays a pushpin at the offender s residence Ensure that the pushpin location is correct and click the Submit button It is also possible to edit the location by clicking the Edit Pushpin button ...

Page 20: ...Page When Enrollment has been completed you will be redirected to the Offender General Information page see below Here you can Edit Offender Information Disable the Offender View GPS Points Deactivate Hardware Edit Rules Send Messages and Download Points ...

Page 21: ...Issue Date 12 4 2012 20 Create Schedule for Home Inclusion Zone 1 Click on the Home Rule see below ...

Page 22: ...Issue Date 12 4 2012 21 Create Schedule for Home Inclusion Zone cont 2 Move your mouse cursor over the Rule Functions dropdown menu and left click Edit ...

Page 23: ...Issue Date 12 4 2012 22 Create Schedule for Home Inclusion Zone cont 3 You will be redirected to the Edit Rule page Scroll down to the Permanent Rule Schedule ...

Page 24: ...e increment of time Left click and drag the cursor along the blocks during the times that the offender is required to be home As you move the cursor the blocks will turn blue The white blocks that remain equal the times that the offender is allowed to be out of the home see below 5 Click the Save button ...

Page 25: ...n Zone You can create an Exclusion Rule to ensure that the offender is not entering areas which are forbidden such as schools playgrounds and victims residences 1 Move your cursor over the Rule Functions menu see below 2 Left click Add Zone ...

Page 26: ...Issue Date 12 4 2012 25 Create Exclusion Zone cont 3 Choose a Zone Shape 4 Choose Exclusion as the Zone Type 5 Click the Continue button ...

Page 27: ...f you want to notify the offender upon violation 9 If you selected Yes to notify the offender upon violation type the message you want displayed on the 2Piece XT screen in the Offender Message field 10 Choose the appropriate Contact from the Notification Contact drop down list The contact s default notification method will appear selected 11 Click the Add button 12 Click the Map button ...

Page 28: ...lusion Zone cont 13 Ensure that the address and zone size is correct 14 If you want to resize or move the zone click the Move Resize button 15 If you move or resize the zone click the Finish Move Resize button 16 Click the Submit button ...

Page 29: ... first After the left side has been secured press the right side of the tamper plug down Step 2 Place the pin tray on a flat surface such as a desk and push one end of the strap into the pin tray until it is level with the lip of the pin tray Ensure that there is no gap between the end of the strap and the edge of the pin tray Attaching the 2 Way Bracelet ...

Page 30: ...Bracelet until it snaps in place Attaching the 2 Way Bracelet Step 4 Place the Bracelet on the offender s leg just above the ankle bone Step 5 Wrap the strap around the offender s leg and measure to the line shown above so that it allows approximately inch of space between the offender s leg and the strap to ensure comfort ...

Page 31: ...n completed Step 8 Place the Bracelet on the offender s leg just above the ankle bone and insert the strap with attached pin tray into the bracket until it snaps in place Once in place gently pull on strap to ensure that device is secured around offender s ankle Step 7 Place remaining pin tray on a flat surface and insert measured end of the underneath side the bottom of the strap into the pin tra...

Page 32: ...t 2000 where 12VDC is located The green power light will light up on the front of the unit STEP 3 If offender has a phone line A Disconnect telephone line from the wall jack and plug into the back of the Base Unit 2000 marked PHONE This will connect the telephone to the Base Unit 2000 B Take provided phone cord and plug one end into the wall jack and the other end into Base Unit 2000 marked LINE ...

Page 33: ...le machine B Plug facsimile phone line into the Base Unit 2000 Base Unit 2000 Violation Status Lights Power The Base Unit 2000 has lost power Line The phone line has been disconnected Curfew The 2 Piece XT is not in the Base Unit 2000 when the schedule is in effect Message N A Activating the 2 Piece XT with Base Unit 2000 ...

Page 34: ... Press the Activate button center button Step 3 Press the Scroll button bottom button to select Using Wireless to activate using the cellular network Press the center button to accept your choice and to begin dialing If activating via the Base Unit 2000 select which prefix if any the Base Unit 2000 must dial to complete a call Press the center button to accept your choice and to begin dialing Acti...

Page 35: ...o the bracelet and it the bracelet must be in range of the 2 Piece XT Once the XT recognizes the bracelet it will display Waiting for GPS on the screen Remove the 2 Piece XT from the Base Unit 2000 Step 5 Walk the 2 Piece XT outside holding it upright in an area with a clear view of the sky Once GPS has been acquired the 2 Piece XT will beep and display the message Activation Successful Click the ...

Page 36: ...Issue Date 12 4 2012 35 Deactivating Hardware 1 Move your mouse cursor over the Hardware Functions dropdown menu and left click Deactivate ...

Page 37: ...ate 12 4 2012 36 Deactivating Hardware cont 2 Click the checkbox next to the 2 Piece XT Bracelet and Base Unit 2000 see below 3 Click on the drop down menu and select a reason for deactivation This is required ...

Page 38: ...Issue Date 12 4 2012 37 Deactivating Hardware cont 4 Click the Save button A popup will generate with a warning that the deactivation is immediate 5 Click OK ...

Page 39: ... will be returned to the Offender Information page where the hardware will be pending deactivation The device is now required to call 3M Electronic Monitoring and transmit its final data The hardware will only be unassigned once this final call has occurred ...

Page 40: ...acelet Step 1 Cut the strap by using the strap cutters and remove the Bracelet from the offender s leg Step 2 Using a 3M Electronic Monitoring flathead screwdriver push on the tamper plugs to break them Step 3 Use the screwdriver to remove the tamper plugs from the brackets ...

Page 41: ...l the strap with the attached pin trays out of each bracket Discard the tamper plugs and straps Note Do NOT reuse the tamper plugs Note Do NOT remove tamper plugs from the brackets of the Bracelet unless there is a strap with an attached pin tray inside the bracket Removing the 2 Way Bracelet cont ...

Page 42: ...olation They are programmed by the officer in the EM Manager Smart View software Phone Prefix Changes dialing prefix for Base Unit 2000 calls Beep Volume Changes volume of alert tone Time Format Changes the way the time is displayed Firmware Ver Displays current version of software in 2 Piece XT Bracelet Test Displays the receipt of the signal from the bracelet Set Brac S N Allows you to temporari...

Page 43: ...knowledgement button Messages Displays messages sent to the device Vibrate Beep Changes 2 Piece XT alert mode ID Numbers Displays ID numbers of assigned hardware Alarm Set Accesses alarm clock function Call List Displays the officer defined phone numbers that the offender is allowed to dial using the 2 Piece XT Icon Glossary Displays the icons that will appear with each alarm if the offender is se...

Page 44: ...ce it will apply after five minute buffer has passed For example if a one minute grace is set the bracelet will have to be out of range for 6 minutes before notifications are sent out Bracelet Strap The bracelet strap has been compromised or removed from the bracelet In Charger The 2 Piece XT is NOT in the assigned Base Unit 2000 or attached to the wall charger when the In Charger schedule is in e...

Page 45: ...e Unit 2000 has not called 3M Electronic Monitoring in 6 5 hours 2 Piece XT Battery The 2 Piece XT battery is low and needs to be charged The offender receives the automatic message Battery Low Place in Charger 2 Piece XT Tamper The 2 Piece XT has been compromised and or tampered with 2 Piece XT Unable to Connect The 2 Piece XT has a defined call in interval that is determined by the contract If t...

Page 46: ...ix 2 Piece XT Status Icons When an offender generates a violation the 2 Piece XT will display the violation information along with an icon The icons are as follows Exclusion Zone Inclusion Zone Motion No GPS In Charger Bracelet Gone ...

Page 47: ...dry cloth to clean the 2 Piece XT and Base Unit 2000 Do not spill or place any liquid on or in proximity of the 2 Piece XT or Base Unit 2000 Do not connect the A C Power to the 2 Piece XT or Base Unit 2000 while in or near any water Place the Base Unit 2000 on a solid surface Do not place the Base Unit 2000 on an unstable surface stand or table Do not place the 2 Piece XT or Base Unit 2000 on any ...

Reviews: