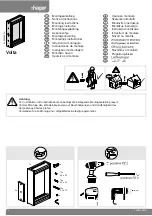
3M
™
Cross-Connect Cabinets 4220 and
4230 with 3M
Self-Strip Blocks 4320
and 3M
Quick Connect System (QCS)
2810 Blocks
Instructions
March 2011
78-8122-3169-0-F
3
Page 1: ...3M Cross Connect Cabinets 4220 and 4230 with 3M Self Strip Blocks 4320 and 3M Quick Connect System QCS 2810 Blocks Instructions March 2011 78 8122 3169 0 F 3...
Page 2: ...nting Pads for Cabinets 10 6 0 3M Cross Connect Cabinet Installation 13 7 0 Cable Port Sealing 14 8 0 Shield Bonding 18 9 0 Cable Termination to the 3M Self Strip Blocks 4320 18 10 0 Identification of...
Page 3: ...t Maximum Pair Capacity Cabinet Pair Count Provided Connector on the end of stub of the Block Cabinet Color Almond Cabinet with 3M Quick Connect System QCS 2810 Blocks 4220V G SSHCTO 3600 1800 GBM A C...
Page 4: ...9 3 4 X X 4220EE 1800 2 SS9 36 1 2 x 18 x 49 3 4 X X 4220ET 1350 1 SS1350 36 1 2 x 18 x 64 3 4 X X 4220EET 2700 2 SS1350 36 1 2 x 18 x 64 3 4 X X Cabinets with 3M Quick Connect System QCS Blocks Block...
Page 5: ...1 2 x 26 x 64 3 4 X X 4230K 5400 6 SS9K 57 1 2 x 26 x 64 3 4 X X 4230KT 5400 6 SS9K 57 1 2 x 26 x 68 3 4 X X 4230T 3600 4 SS9K 44 x 26 x 68 3 4 X X Cabinets with 3M Quick Connect System QCS 2810 Bloc...
Page 6: ...26 x 49 3 4 X X Cabinets with 3M Quick Connect System QCS 2810 Blocks Cabinet Product Max Pair Count QCS 2810 Max of Frames QCS 2810 Frame Number Dimensions Width Depth Height Single Sided Double Sid...
Page 7: ...s Connect Cabinets D DD F G Series 3M Frame SS9 for use in 3M Cross Connect Cabinets E EE Series 3M Frame SS9K for use in 3M Cross Connect Cabinets KF K KT T and LF L Series 3M Frame SS6N for use in 3...
Page 8: ...D F G cabinets b 3M Chamber Cover 4246 K for 3M Quick Connect System QCS Covers empty frame positions in KF K LF L cabinets 3 2 3M Mounting Rings To anchor cabinets onto the concrete slab a 4256 D DD...
Page 9: ...10 Blocks 3 7 3M Self Strip Replacement Caps 4320 100 tan 100 orange 3 8 Caps for 3M Quick Connect System QCS 2810 Blocks 3 9 3M Priority Circuit Caps 4324 For protecting priority circuits 4324 R 4324...
Page 10: ...24 AWG orange white jumper wire 4069 250 24AWG orange white jumper wire 4368 800 22 AWG red white jumper wire 4369 250 22 AWG red white jumper wire 4368 800 22 AWG red white jumper wire 4369 250 22 A...
Page 11: ...odules 4 2 3M 710 Uni Presser 25 Pair Cutter Presser For splicing 3M 710 Connectors 4 3 3M Self Strip Pair Pocket Test Probe 4327P 4 4 3M Self Strip Pair Probe and Dish 4327 A 3M Self Strip Pair Probe...
Page 12: ...es the anchor bolts Figure Model A B Used With Cabinets 1 4256 D DD 26 19 D DD Series 1 4256 E EE 41 19 E EE ET EET Series 2 4256 F G 62 19 F G KF K MF M LF L KT Series Cable duct location markers Ope...
Page 13: ...he bottom of the mounting ring with bolts anchors and bolts provided with ring Note Anchors can be located for either internal or external attachment to the cabinet Note Side of mounting ring can be c...
Page 14: ...t internal or external attachment to cabinet Model Overall Pad W x D Cable Ducts Sweeps Entry Location Concrete Anchor Location Number A B C D E F G H J K 4220 D DD Internal 38 60 9 19 26 7 11 16 25 1...
Page 15: ...rames to minimize weight c Remove top and front access panels front cable port plate and lower frame support Note If a lift boom truck is used reposition the two side lifting straps for attachment of...
Page 16: ...Position 6 6 Reverse the doors and removable back panel to install a 3M Cross Connect Cabinet 4220 D E F KF KT or 4230 MF or LF against a wall or obstruction Note Mounting pad requirements are the sa...
Page 17: ...sealant tape a Remove cable sheath b Clean and scuff cable in location of cable ports c Install shield connectors and attach bond straps making sure that the straps will reach the bond plate Sheath re...
Page 18: ...larger than the inside diameter of the ports f Slide the tape bundle down into the port openings Leave a 1 2 of space between the tape and the top of the ports for foam expansion Tighten all bolts g M...
Page 19: ...he front plate from the flexible port entry kit Install the port body onto the threaded studs f Place cables into port and install the front plate Wrap each cable with at least one layer of foam tape...
Page 20: ...c Fill sleeve with Re enterable Encapsulant 8882 Pedestal Base Sealant 4411 or Encapsulating and Blocking Compound 4407 Note Carefully follow safety health and environmental information on the produc...
Page 21: ...connector s and the cabinet bond plate 8 2 Identify cable bond straps on bond log label in the cabinet 9 0 Cable Termination to the 3M Self Strip Blocks 4320 9 1 Break feeder and distribution field c...
Page 22: ...ies 3M Cross Connect Cabinets E EE Series ET EET Series Cabinets in 3M Cross Connect Cabinets F G Series KF K Series Cabinets in 1 300 D I S T R I B U T I O N 301 600 D I S T R I B U T I O N 601 900 D...
Page 23: ...r company procedure d Cable tie groups creating adequate slack to lower frames Cable Frame Support 9 5 Cable slack storage in the frame optional a Dress field cable to complete an up and down loop of...
Page 24: ...the same method as the frames h Splice the field conductors and block tails following your company practice i Complete the splicing and install the frame Attach the safety cable to the frame j Bundle...
Page 25: ...it port 11 3 With a screwdriver blade fully inserted into post slot rotate post 90 clockwise until the wire end cuts off The post slot should be horizontal Note The wire cut off is the indication that...
Page 26: ...aps test ports b Depress the clamps to allow clearance over cap heads Push probe forward until clamps snap behind cap head c 3M Self Strip Pocket Test Probe 4327P This probe is installed with the same...
Page 27: ...ur company procedure d Cable tie groups creating adequate slack to lower frames Cable Frame Support 13 4 Cable slack storage in the frame optional a Dress field cable to complete an up and down loop o...
Page 28: ...ompany practice i Complete the splicing and install the frame Attach the safety cable to the frame j Bundle the splices in the frame the same as the other frames k Secure all frames in the upright pos...
Page 29: ...y repeating the procedure described in steps 15 1 and 15 2 15 5 Terminate additional jumper wires by repeating the above procedure 15 6 To remove jumper wires open the cap and pull wires straight out...
Page 30: ...17 3 Standard 3M Cross Connect Frames SS6 or SS9K or narrow 3M Cross Connect Frames SS300N or SS450N can be mounted along side the equipment rack s for combined electronics fiber and cross connect ap...
Page 31: ...78 8122 3169 0 F 31...
Page 32: ...Warranty Limited Remedy Limited Liability This product will be free from defects in material and manufacture for a period of one 1 year from the time of purchase 3M MAKES NO OTHER WARRANTIES INCLUDIN...