background image

Pannoramic 1000 1.2 – User’s Guide

1.2.2 Hardware Options

1.2.2  Hardware Options

The configuration of the control computer and monitor can vary depending on the product order.

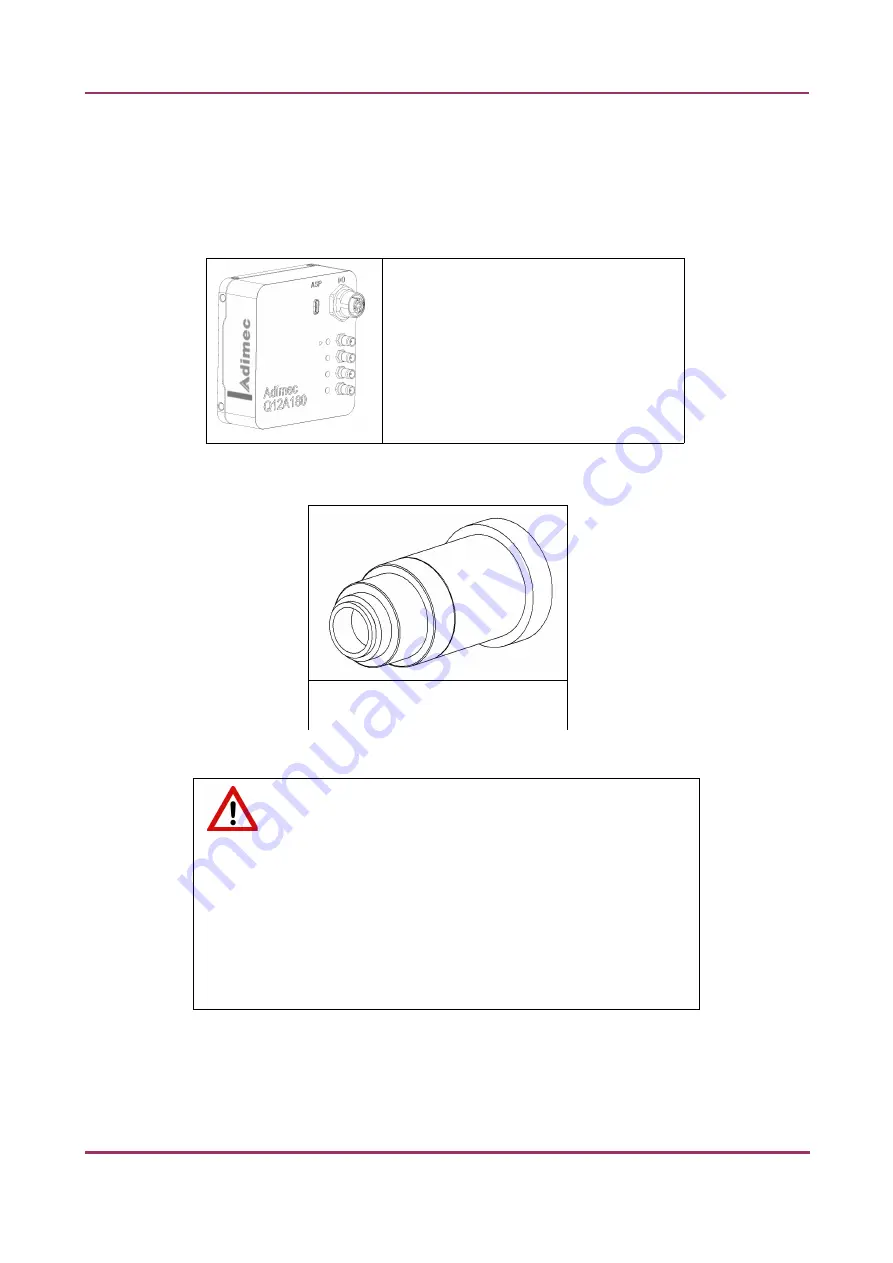
Camera


Adimec QUARTZ Q-12A180

1 CMOS camera for high-quality Brightfield 
applications allowing fast scanning

Camera adapter

1.6× adapter

  Warning!


The installation of the cameras in Pannoramic 1000 must be carried out

by trained professionals!

In any other case the warranty will be automatically voided.

The supplier or distributor is not liable for any damages caused by an 
installation carried out by an unauthorized person.

March 19, 2019 – Rev. 2

3DHISTECH Ltd.

20(78)

Summary of Contents for Pannoramic 1000

Page 1: ...Pannoramic 1000 1 2 User s Guide March 19 2019 Rev 2 ...

Page 2: ...annoramic 1000 system 19 1 2 2 Hardware Options 20 1 2 3 Control Software 21 2 Installation 22 2 1 Control computer ports 22 2 2 Connectors and cables 23 3 Preparing Slides and Magazines 24 3 1 Affixing Barcode Stickers to Slides 25 3 2 Preparing Magazines 26 4 Software and Work flow 30 5 Using Profiles 46 6 Troubleshooting and Maintenance 48 6 1 Safety Information 48 6 1 1 Cleaning the device 48 ...

Page 3: ...noramic 1000 57 8 1 Preparations 57 8 2 Main parts and their accessories 65 8 3 Packaging 67 8 3 1 Packing the P1000 scanner 67 8 3 2 Closing the package 70 8 3 3 Packing the accessories 70 8 4 Handling of the package 70 8 5 Construction of the wooden box 72 9 Technical Data 75 Index 78 March 19 2019 Rev 2 3DHISTECH Ltd 3 78 ...

Page 4: ...ture including but not limited to general or specific damage indirect damage consequential damage or incidental damage including the results of the analysis of the digitized slides for example change of health status related to erroneous diagnosis from the digitized slide s that stems from or is associated with use of Product digitized slides quality of staining quality of stained slides quality o...

Page 5: ...rther Information For the latest information on 3DHISTECH products and services please visit our website at the following URL http www 3dhistech com Company Address 3 Öv street 1141 Budapest HUNGARY March 19 2019 Rev 2 3DHISTECH Ltd 5 78 ...

Page 6: ...art 2 081 Particular requirements for automatic and semi automatic laboratory equipment for analysis and other purposes IEC 61010 2 101 2002 Safety Requirements for Electrical Equipment for Measurement Control and Laboratory Use Part 2 101 Particular requirements for in vitro diagnostic IVD medical equipment IEC 55011 2016 Group 1 Class B Industrial scientific and medical ISM equipment Radio frequ...

Page 7: ...or the Ctrl M key combination Example Cross references within this document or to other documents Warning It might cause irreversible damage or harm to the user of the product or the product itself if this instruction is not followed Caution It might cause the product to not work properly if this instruction is not followed and alerts to a potentially critical situation Note Calls attention to som...

Page 8: ...f any kind which is performed by other than authorized service personnel All claims for warranty and warranty services will be null and void in any such case Warning Use of this instrument in a dry environment especially if synthetic materials are present synthetic clothing carpets etc may cause damaging electrostatic discharges that may cause erroneous results Warning Insert the power cord plugs ...

Page 9: ...ess prompted accordingly by software When you open the door at any other time make sure not to reach with your hands into the instrument to avoid the risk of crushing your fingers Warning The front door is equipped with an interlock switch If the door is opened while a digitization process is running the process will be stopped instantly Warning A defective Pannoramic 1000 is not classified as dom...

Page 10: ...cepted in cases of natural wear notably wear and tear parts or improper product handling The Product Manufacturer will refuse any liability in the event of damage resulting from faulty operation negligence or unauthorized intervention into the product notably from the replacement of product parts or the usage of accessory parts from other manufacturers Any such case will void the user s claim for ...

Page 11: ...rtual Slide Slide A digital image of a thin glass plate on which specimens are mounted for microscopic study a dynamic interactive image that you can manage save magnify zoom name evaluate annotate mark and comment send to a colleague electronically for co operation or advice and so on March 19 2019 Rev 2 3DHISTECH Ltd 11 78 ...

Page 12: ...c result because of information loss Warning Any modification to a hardware or software component of the PC will highly affect the functionality of the scanner program Warning The Pannoramic 1000 device must be operated by a properly instructed person only Operating personnel must be fully aware of the potential dangers which a particular field of application involves The Pannoramic 1000 scanner i...

Page 13: ...et up to 1000 slides Fully automatic loading and scanning Fastest whole slide scanner on the market 2000 slides per day 20x objective 40x optical equivalent magnification 0 24 μm pixel resolution 15 x 15 mm single layer Innovative hardware design Anti vibration granite base for maximum stability and image quality Dual slide stage Robust construction for heavy duty use Automated slide handling Flex...

Page 14: ...er interface Direct scanning to CaseCenter server Advanced scanning profile features Multiple scanning profiles auto selection Temporary scanning profile option Advanced image management Batch preview function Multiple image compression options Multiple color profile and schemes Multiple image compensation options Automated tissue detection and coverslip detection 1D and 2D type barcode reading an...

Page 15: ...g and Information Labels The following figure contains the labels used on the Pannoramic 1000 main unit Figure 1 Warning and information labels NOTE The symbol refers to the possibility of exposure to biological hazards whenever handling slides March 19 2019 Rev 2 3DHISTECH Ltd 15 78 ...

Page 16: ...of the Device The following figure shows the main outer parts of the base unit Figure 2 Main outer parts of the base unit 1 Sliding door of slide compartment 2 Service door 3 Service door opener 4 Door openrequest button 5 Power ON OFF button March 19 2019 Rev 2 3DHISTECH Ltd 16 78 ...

Page 17: ...low image shows the main inner components of the base unit Figure 3 Main inner components of the base unit 1 Magazine compartment 2 Slide loader grabber 3 Preview unit 4 Camera 5 Objectives 6 Slide stage 7 Condenser 8 Pipetting unit March 19 2019 Rev 2 3DHISTECH Ltd 17 78 ...

Page 18: ...Pannoramic 1000 1 2 User s Guide 1 1 4 Main Parts of the Device Figure 4 Illumination component of the Pannoramic 1000 9 PAX 10 FLASHillumination unit March 19 2019 Rev 2 3DHISTECH Ltd 18 78 ...

Page 19: ...troller PC camera cable port HUB port 2 Mainpower inlet 3 Mainpower switch 4 Fuse box 1 2 System Overview The standard scope of delivery of the product includes the following hardware and software items 1 2 1 Pannoramic 1000 system The main components of the Pannoramic 1000 system are the following 1 Pannoramic 1000 base unit 2 Monitor 3 Mouse 4 Control computer 5 Keyboard March 19 2019 Rev 2 3DHI...

Page 20: ... for high quality Brightfield applications allowing fast scanning Camera adapter 1 6 adapter Warning The installation of the cameras in Pannoramic 1000 must be carried out by trained professionals In any other case the warranty will be automatically voided The supplier or distributor is not liable for any damages caused by an installation carried out by an unauthorized person March 19 2019 Rev 2 3...

Page 21: ...ange correction collar settings on 40 NA objective if you need it to be set contact customer service 1 2 3 Control Software Pannoramic Scanner control software Optional Barcode reader licensed feature Pannoramic Viewer software fully functional Optional CaseCenter Pannoramic Viewer TMA module 3D Reconstruction module QuantCenter HistoQuant NuclearQuant MembraneQuant and DensitoQuant modules TumorB...

Page 22: ...stallation carried out by an unauthorized person Only qualified service assistants are allowed to install the hardware and software The product is ready for use after installation 2 1 Control computer ports The following figure shows the location of the connectors in order to enable easier transportation of the product for a short distance by disconnecting cables and detaching hardware components ...

Page 23: ...puter Preview camera USB cable between scanner and control computer Adimec CoaXPress cables between Adimec camera and control computer Video cable between monitor and control computer Power supply cable between 230V 110V and monitor Power supply cable between 230V 110V and control computer Power supply cable between 230V 110V and power supply unit Warning Only connect external devices that are saf...

Page 24: ...corners Edges Ground or cut Warning Always wear personal protective equipment safety goggles gloves and coat when working with bio hazardous material or slides Warning Do not use a slide when it is broken or its edges are not properly cut or grounded Using such slides can lead to injury Warning Ensure that no part of the mounted coverslip protrudes from the edges of the slide Use slides with compl...

Page 25: ...hat a marginal space of 1 2 mm remains on all sides between the sticker and the label area outer limits It is vital for barcode identification Do not let barcode sticker protrude from slide edges or stick on the coverslip surface 3 The thickness of the barcode sticker on the slide must not exceed 0 4 mm Do not stick more than four barcode stickers over each other and the overall thickness must mus...

Page 26: ...ndard and large formats The capacity of a magazine when receiving standards slides is 20 and 5 when loading large slides so if the magazine compartment layout of the Pannoramic 1000 you are using is configured to receive both large and standard slides the maximum number of slides to be loaded may differ for devices configured to receive large slides only a total capacity of 200 slides can be reach...

Page 27: ...ting a large slide into a magazine Warning Make sure that placing the magazine by reading UP SIDE at the top when inserting standard or at the left of the magazine when inserting large slides The cover slip and the label area should be on the top with the label area pointing outwards March 19 2019 Rev 2 3DHISTECH Ltd 27 78 ...

Page 28: ... compartment door 2 by sliding it to the left 3 Insert the prepared magazine s to the desired magazine slot in the compartment 3 Make sure to push magazines into the dedicated slots until you hear a clacking sound A dedicated LED next to the magazine by standard slides above the magazine by large slides is lit in white if the magazine has been inserted correctly Locations of LED indicators are mar...

Page 29: ...void the risk of crushing your fingers Remove magazines 1 If the door opener button is lit green push the door opener button 1 2 Open the magazine compartment door 2 by sliding it to the left 3 Remove magazine s from their slots in the compartment 3 Grab the magazine firmly while removing it but so that the inserted slides do not fall out Note The magazine compartment door is equipped with an inte...

Page 30: ...unning or has just been completed thus the door can be opened for magazine loading or maintenance violet if the device is in standby mode press the door open button to move gripper arm to home position if the LED is lit in yellow press the button twice to finish the actual process and the door can be opened after the LED turns green Note None of the motors can be actuated while the door is opened ...

Page 31: ...ng you about the magazine column in which you should check and fix the error The system checks for misaligned slides repeatedly unless each of the slides are inserted properly so the device cannot be used if there is an error III Scanning destination By default scanning of slides is performed to local destination If you want to scan directly to the dedicated CaseCenter server if available first cl...

Page 32: ... be set and used for scanning to CaseCenter IV Magazine selection Select magazines and the required profile from the Profiles list It is advised to generate several different profiles in advance to create an inventory list from which you can select the matching profile for your slides If you modify a profile from the Profiles list it will become a temporal profile and displayed under Temporal Prof...

Page 33: ...hite Magazine has been inserted and checked for correctness Blue Magazine is inserted but it has not been checked yet Purple Magazine is involved in a process Green dims Magazine is being processed Green The processing of dedicated slides in the magazine is finished Red dims Some type of error has occurred during the process and the process is halted until the error is eliminated For more informat...

Page 34: ...dims Slide is being processed Green The processing of the slide is finished Red Some type of error has occurred during the process Grey Slide is either have been removed from the processing queue by the user or there is not slide in the magazine in that position or the slide in that position is placed into the safety container For more information on the reasons why a slide is placed into safety c...

Page 35: ...s recorded Barcode reading option is not set Barcode is not yet recorded Barcode reading is in the queue The barcode of the slide is recorded and recognized the barcode string is visible next to the icon Barcode reading could not be performed there is no barcode on the label area 5 Slide name Editing of slide name is available after double clicking this field 6 Profile set Details of the profile a...

Page 36: ...annot be modified but the scanning process can be stopped by clicking Progress bar that can be expanded and is scrollable lists detailed process and scanning progress information Figure 16 Progress panel V Set scanning parameters In Slide View the selected profiles can be parameterized and saved as well if needed If a profile parameter has been modified the modification can be applied to the profi...

Page 37: ...be edited here as well if required If barcode is not read upon clicking the button the label area will be recorded and the barcode will be identified if barcode reading function is enabled Dark spots on the preview image represent the focus points the darker ones mark the coarse focal points the pale ones mark the fine focus points The grid displays field of views based on which the scanning will ...

Page 38: ...he slide and other values 10x 20x etc depending on the size native resolution Image settings You can select from the following image formats JPEG PNG BMP There are four predefined Quality types and a custom settings option on the list Medium 60 Good 80 Fine 90 Excellent 95 Custom by which unique quality setting can be achieved as follows JPEG The quality can be adjusted with the Quality value slid...

Page 39: ...lue results a less sensitive scanning but it is possible that some of the smaller specimen areas will not be digitized Scan area inside the marker If the specimen cannot be identified as required for digitization for example weak contrast it can help to encircle completely the specimen with a black marker pen You have to draw a full circle with the pen to enable the detection Marker pen detection ...

Page 40: ...e Speck size slider Area Size Set the maximum size of specks not to be digitized by adjusting the slider Dilation Size Adjust the slider to the desired value to enlarge or decrease the scanned area The edge is extended discretely by 100 µm each time The recommended value for this setting is 1000 µm in Flash scanning mode Fill Holes If selected the holes inside the specimen will also be scanned Oft...

Page 41: ...ide the box is scanned It is useful if you only want to scan the area that is equivalent with the size of the coverslip so external specks will not be scanned Grab Compensation Image Inside Area On Off Selection Area Manual settings Width Height Area Angle Custom Areas Enable manual selection options If several objects are laid on each other the layer order can be modified if necessary by clicking...

Page 42: ...is not included sRGB standard Color scheme is defined by calibration standard Gamma value 2 2 is applied sRGB standard Microscope Like Color scheme is defined by calibration standard Gamma value White Point D50 Custom parameters are freely customizable as follows Color Scheme Calibrated Scheme is defined by the color calibration slide Raw the color information of the recorded raw image is applied ...

Page 43: ...re and Work flow VI Follow up scanning progress Progress View displays the actual progress in details Scanning queue is listed where the performed actions can be seen Figure 22 Progress View with preview March 19 2019 Rev 2 3DHISTECH Ltd 43 78 ...

Page 44: ...ropriate time frame at the left side of the window Figure 23 Scanning history panel of Progress View The following views are available to select by clicking the buttons at the bottom left corner of the panel All events Scanned successfully Different from planned non erroneous event has occurred Unsuccessful scan progress March 19 2019 Rev 2 3DHISTECH Ltd 44 78 ...

Page 45: ...gazine information are automatically saved in each minute In case of abnormal shutdown power outage software shutdown when restarting the control software upon clicking the tick mark in the pop up window the progress status and all the user settings and data will be restored and the scanning procedure can be continued March 19 2019 Rev 2 3DHISTECH Ltd 45 78 ...

Page 46: ...r Output resolution Image settings Format Bit depth Quality Focusing Focus distance Preview grabbing mode Preview threshold Use of automatic threshold specimen Use of specimen threshold value Use of marker pen threshold and specimen threshold values Use of removing specks according to the set value ON OFF Use dilation per FOV Filling of holes ON OFF Preview areas Coverslip area Selection area Cust...

Page 47: ...mic 1000 1 2 User s Guide 5 Using Profiles Label area Rotate by 180 degrees ON OFF Color correction Calibrated linear SRGB Standard SRGB Standard microscope like Custom March 19 2019 Rev 2 3DHISTECH Ltd 47 78 ...

Page 48: ...to health Decontaminate infectious materials after use Dust specks and humidity may decrease or harm the operating capability of the device Protect it with dust cover when not in use Switch the power off before covering it Defective devices do not classify as domestic waste Dispose of the device in compliance with the currently valid legal requirements Slides that are not used any longer do not cl...

Page 49: ...ser unit 1 Open service door 2 Gently move the slide holder 2 into the middle above the condenser 1 3 Do not let liquid penetrate into the system 4 Use compressed air to lay the dust To clean the glass surface of the condenser from any other contamination it is recommended to apply Isopropanol on a piece of lint free cotton cloth and gently clean the surface March 19 2019 Rev 2 3DHISTECH Ltd 49 78...

Page 50: ...ribes the most common troubleshooting solutions for the Pannoramic products If any problem arises that does not have solution in this manual contact the service personnel The product does not start Power supply is interrupted 1 Make sure that the main switch of the internal power supply is on 2 Check cable connections Virtual slide is improperly focused almost across its entire surface Focus range...

Page 51: ...ration then push back all the slides within the column Make sure to not remove a magazine as all the parameters set to the contained slides will be erased Slide status is marked with grey because the slide is moved into the safety container Slide cannot be placed back to its position in the magazine for some reason If more than 10 slides are moved into safety container the following error message ...

Page 52: ...ersonnel 6 3 1 Removing the protective cover To perform any maintenance work on the device the protective cover of the Pannoramic 1000 is needed to be removed Caution Only instructed persons or service technicians can remove reattach the cover of the device Figure 26 Removing reattaching the cover 1 Release the four latches at the top of the two cover plates at the back of the device 2 Remove cove...

Page 53: ...t is located above the main power supply switch at the back side of the Pannoramic 1000 3 Release lock 1 by pushing the lever upwards so the insert 2 can be pulled out Figure 27 Fuse compartment 4 Remove insert from the compartment Figure 28 Removing the fuse insert 5 Replace fuses put the insert back into its seating and push it inwards until you hear a snap so the lever locks Figure 29 Replacing...

Page 54: ...lation performed on a mechanical component must be followed by a complete device initialization routine software restart Figure 30 Removing a slide 1 Exit control software 2 Switch off power supply and disconnect power cable 3 Open magazine compartment door or service door depending on the position of the slide during the digitization process 4 Remove the slide either from the gripper arm or the s...

Page 55: ...2 User s Guide 6 3 3 Removing a slide 5 Close the door s 6 Connect the power cable of the power supply to the power outlet and switch on the power supply 7 Launch control software March 19 2019 Rev 2 3DHISTECH Ltd 55 78 ...

Page 56: ...it by holding it by its base plate To determine the appropriate number of people that can lift or move the device in such way observe the laws of your country regarding load carrying capacity limitations You can find the weight data of the base unit in section 9 Technical Data To transport Pannoramic 1000 do the following 1 Turn power supply off and detach all cables 2 Move Pannoramic 1000 by roll...

Page 57: ... I Microscope a Focus unit Mount the fixing block A for the piezo focus unit to the top of the microscope vertical plate with 2 pcs of M4x25 mm socket head cap screws and washers B Use a 3 mm hexagon wrench tool Figure 31 Mount fixing block on focus unit Select the objective in the middle with the software The piezo Z motor should be in a position when the 2 threaded holes are somewhere in the hol...

Page 58: ...ate of the microscope C with 2 pcs of M5x25 socket head cap screw D Use a 4 mm hexagon wrench tool Figure 32 Mount fixing blocks on objective changer Lift each objective holder B by hand and mount them with M4x20 socket head cap screws E 3x Use 3 mm hexagon wrench tool Figure 33 35 Figure 33 Mount fixing blocks on objective changer March 19 2019 Rev 2 3DHISTECH Ltd 58 78 ...

Page 59: ...c 1000 1 2 User s Guide 8 Packaging instructions for Pannoramic 1000 Figure 34 Mount fixing blocks on objective changer Figure 35 Mount fixing blocks on objective changer March 19 2019 Rev 2 3DHISTECH Ltd 59 78 ...

Page 60: ...nstructions for Pannoramic 1000 Mount the focus unit A with M3 spacers B and M3x16 socket head cap screws C Use a 2 5 mm hexagon wrench tool Figure 36 37 Figure 36 Mount focus unit Figure 37 Mount focus unit March 19 2019 Rev 2 3DHISTECH Ltd 60 78 ...

Page 61: ...ke a bridge above the stage with M5x30 socket head cap screws B Use a 4 mm hexagon wrench tool Pay attention to the sponges C at the bottom of the transport fix They should be above the 2 2 screws D at the left and right side of the stage next to the extension springs Figure 38 42 Figure 38 Mount fixing to stage Figure 39 Mount fixing to stage March 19 2019 Rev 2 3DHISTECH Ltd 61 78 ...

Page 62: ...amic 1000 1 2 User s Guide 8 Packaging instructions for Pannoramic 1000 Figure 40 Mount fixing to stage Figure 41 Mount fixing to stage Figure 42 Mount fixing to stage March 19 2019 Rev 2 3DHISTECH Ltd 62 78 ...

Page 63: ...rner Mount the red fixing to the aluminum frame A next to the X Y slide loading unit with M6x20 hexagon socket cap head screws and washers D Use a 5 mm hexagon wrench tool Lift the gripper unit C to the position of the holes of the fixing Screw them together with M3x10 hexagon socket cap head screws and washers E Use a 2 5 mm hexagon wrench tool Figure 43 44 Figure 43 Mount fixing to frame Figure ...

Page 64: ...tor B with a red strap C Figure 45 Figure 45 Mount fixing strap on tooth belt III Cover To lock magazine loading door at the right first open the service door at the left Use a 3 mm hexagon wrench tool to screw the door fixing unit A with 2 pcs of M4x16 socket head cap screw B Figure 46 Lock magazine loading door March 19 2019 Rev 2 3DHISTECH Ltd 64 78 ...

Page 65: ...les of the workstation and display 6 Place the workstation the monitor and all accessories to their dedicated place 8 2 Main parts and their accessories Figure 47 BOX 1 1 BOX 1 Transportation box a fixing foams for the scanner b P1000 scanner c objective s in scanner d camera adapter s in scanner e camera in scanner f BNC DIN PROFILE cable g microscope USB cable in scanner h USB 3 0 cable in scann...

Page 66: ...de the dedicated foam b coax express Radient card in PC c display port to DVI adapter d power supply cable for PC e drivers manual and utilities CD f keyboard and mouse has a separated small carton box g DVI HDMI cable h 3DH mouse pad 4 BOX 4 Carton box dedicated for the display a display b power supply cable c power supply d USB cable e audio cable f VGA cable 5 Documents a packing list b license...

Page 67: ...o first please examine it Where fixing points are closer to the edge is the front side Front side is signed too with text Figure 48 BOX 1 The scanner should be lifted up by holding the machine with a forklift or a mini stacker at its bottom between its feet and taken inside the BOX 1 s lower part onto the beams Please check the position of the instrument On the right there should be about 50 mm sp...

Page 68: ...e 50 BOX 1 Please take Side B to its place on the right The foams should fill the 50 mm gap Use the latches to fix the side wood panel Secure the machine with straps to the fixing points Figure 51 on the base Use edge protectors under the straps on the machine March 19 2019 Rev 2 3DHISTECH Ltd 68 78 ...

Page 69: ...lates on the top of the rocker panels foams Place in the transport plates Figure 52 Figure 52 BOX 1 Stand the other side wood panels on the basement one at a time then fix them with the draw latches Pay attention to the secondary lock buttons Put all the other fixing foams to their place March 19 2019 Rev 2 3DHISTECH Ltd 69 78 ...

Page 70: ...le Handle with care The symbol should be applied to easily broken cargoes Cargoes marked with this symbol should be handled carefully and should never be tipped over or slung Keep dry Cargoes bearing this symbol must be protected from excessive humidity and must accordingly be stored under cover If particularly large or bulky packages cannot be stored in warehouses or sheds they must be carefully ...

Page 71: ... instructions for Pannoramic 1000 Figure 53 Box labeling Package must be stored and transported between the temperature and humidity rates on Figure 54 Figure 54 Transportation and storage related labeling March 19 2019 Rev 2 3DHISTECH Ltd 71 78 ...

Page 72: ...ic 1000 1 2 User s Guide 8 Packaging instructions for Pannoramic 1000 8 5 Construction of the wooden box Figure 55 Construction of the wooden box 1 Base 2 Side A 3 Side D March 19 2019 Rev 2 3DHISTECH Ltd 72 78 ...

Page 73: ...9 Foam for fixing the scanner F 10 Latch 1 11 Latch 2 12 Foam for fixing the scanner B 13 Foam for fixing the scanner H 14 Foam for fixing the scanner I 15 Foam for fixing the scanner J 16 Foam for fixing the transport plates 17 Rocker panel right 18 Rocker panel front 19 Rocker panel left 20 Transport plate 21 P1000 Figure 56 Construction of the wooden box March 19 2019 Rev 2 3DHISTECH Ltd 73 78 ...

Page 74: ...Pannoramic 1000 1 2 User s Guide 8 Packaging instructions for Pannoramic 1000 Figure 57 Construction of the wooden box March 19 2019 Rev 2 3DHISTECH Ltd 74 78 ...

Page 75: ... shipment packed Permissible ambient temperature 40 C to 70 C Storage Permissible ambient temperature 0 C to 60 C Permissible relative air humidity non condensing 25 75 Operation Permissible ambient temperature 10 C to 35 C Permissible relative air humidity 75 Altitude at installation site max 2000 m Atmospheric pressure 500 hPa to 1060 hPa Degree of pollution 2 March 19 2019 Rev 2 3DHISTECH Ltd 7...

Page 76: ...tage 100 240 Vac Power consumption of the complete device 200W Light sources Brightfield illumination Excelitas PAX 10 Precision Aligned Xenon pulsed light source Average service life of ARC 1 0 x 109 flashes Scan camera Adimec QUARTZ Q 12A180 camera Global Shutter CMOS Pixel size5 5µm 5 5µm 5 5µm 5 5µm Camera resolution 4096 H 3072 W pixel Camera max speed 187 frame per second Bit depth 8 bit 14 ...

Page 77: ...ystem Microsoft Windows 10 64 bit EN CPU Intel Xeon Gold 5120 14C 2 2 GHz RAM 12x8 GB DDR4 2666 rg ECC Hard disk 1 2 TB Optical drive DVD SuperMulti SATA slim Display 96 dpi Graphics SXGA 1280 1024 True color Input devices keyboard mouse Ports 4 x USB 2 0 GB Ethernet March 19 2019 Rev 2 3DHISTECH Ltd 77 78 ...

Page 78: ...rcode 21 25 26 Brightfield 13 20 21 76 C CaseCenter 21 Control software 12 21 54 F Focus 50 M Marker 39 46 P Pannoramic 1000 8 9 10 12 13 15 19 20 21 22 26 52 56 Pannoramic Viewer 21 Preview 23 26 39 41 S Scan 13 39 40 41 46 51 76 Scanner 40 March 19 2019 Rev 2 3DHISTECH Ltd 78 78 ...

Reviews: