18
Allevi 3 | User Guide
YOUR FIRST BIOPRINT
The Allevi Bioprint Online software is the most comprehensive and versatile bioprinting software.
If you prefer watching videos, visit
and watch the
‘Your First Bioprint’
video.
Step 1
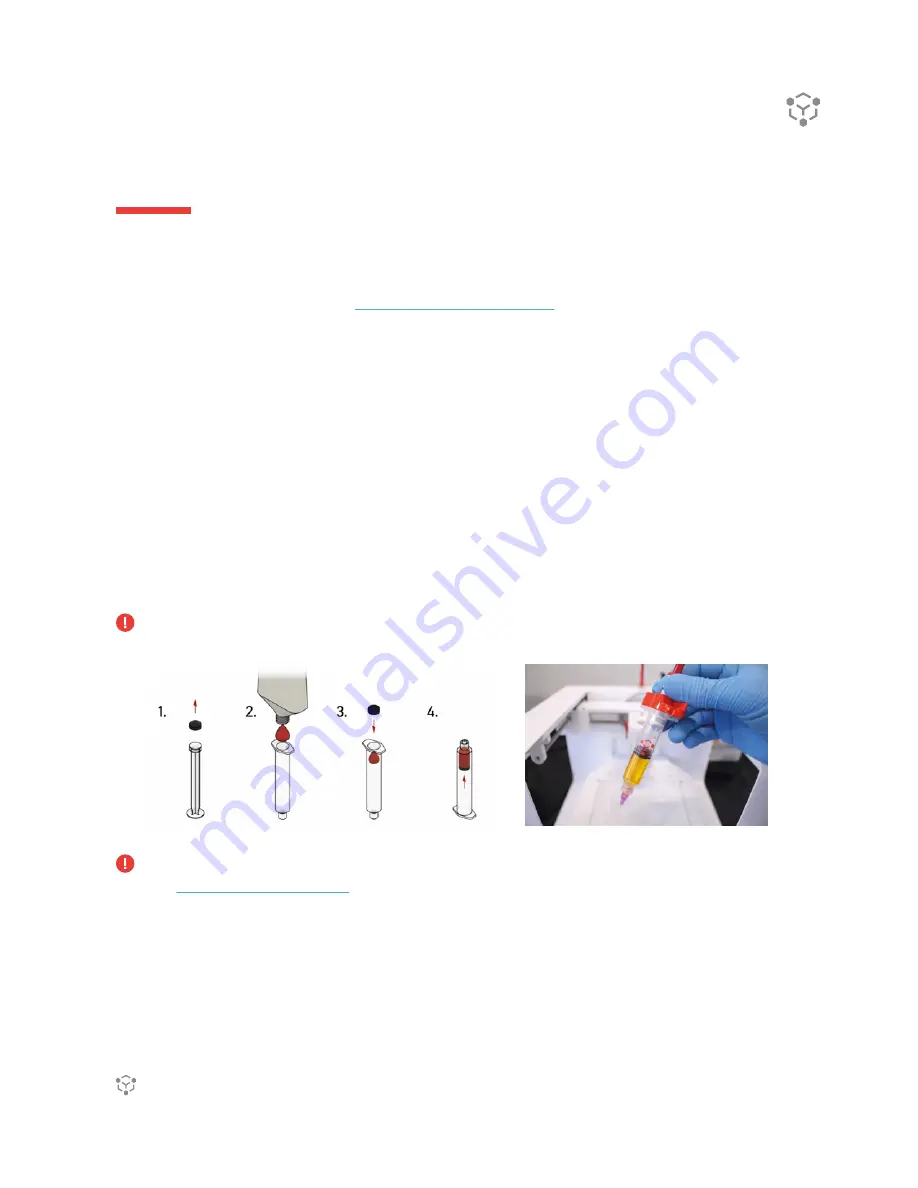
Store your jar of sample pluronic at 4° C until the pluronic is easily pourable.
a)
To load your syringe, remove the plunger from a printing syringe. Detach the rubber seal from
the plunger and set it aside.
b)
Add viscous biomaterial to the wide opening of the syringe barrel. If your material comes in a
tube or another syringe, squeeze it out directly. You can also use a spatula to place some material
in the barrel.
c)
Place the rubber seal in the syringe barrel.
d)
Use the plunger to push the rubber seal to move the material all the way to the tip of the syringe.
Invert the syringe and push the plunger pointing the syringe upwards. This can also help reducing
bubbles.
Note: If you are using the syringe plunger, make sure it doesn’t lock back into the rubber seal.
Note:
Bioinks may be loaded differently and use different needles depending on the type of material.
View our
guide on Allevi Support.
Step 2
Remove the middle and right-most CORE extruders from the gantry. This print will only utilize one
extruder so we only need the left-most extruder. In future prints, you will be required to calibrate
all connected extruders, so we recommend only having as many extruders attached as you want
to use.
Summary of Contents for Allevi 1
Page 1: ...Allevi 3 User Guide 1 1 2...
Page 2: ...BUILD WITH LIFE...
Page 4: ...WELCOME...
Page 8: ...GETTING STARTED...
Page 10: ...28mm 77 50mm Diameter 88 30mm 9 Allevi 3 User Guide PRINT BED DIMENSIONS...
Page 18: ...START PRINTING...
Page 24: ...23 Allevi 3 User Guide...
Page 25: ...MAINTENANCE TROUBLESHOOTING...
Page 28: ...Copyright Allevi Inc 2022 Allevi Inc 2929 Arch St 17th Floor Philadelphia PA 19104...
Page 29: ......


