background image

I

NDEX

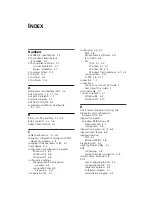
Numbers

3C509B NIC specifications   1-2
3Com Bulletin Board Service 

(3ComBBS)   D-1

3Com Installation Wizard   3-1

Custom installation   2-1
Express installation   2-1

3Com sales offices   D-4
3Com URL   D-1
3ComFacts   D-2
3ComForum   D-3

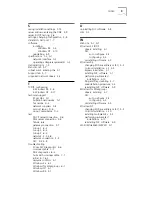
A

attachment unit interface (AUI)   A-2
AUI connector   1-2, 1-7, A-2
AUI port, slide latch   1-7
AutoLink program   4-1
AUTOLINK.LOG file   4-2
automated installation, creating file 

for   5-10

B

BIOS, non–Plug and Play   2-7, 3-3
BNC connector   1-2, 1-6
bulletin board service   D-1

C

cable specifications   1-2, A-3
changing configuration settings with DOS 

diagnostic program   4-8

changing I/O base address or IRQ   5-2
CompuServe   D-3
configuration and diagnostics program

Windows 3.x   6-1
Windows 95   5-6
Windows NT   5-6

configuration settings

changing with DOS diagnostic 

program   4-8

saving with 3Com NIC 

Diagnostics   3-14

Configuration tab   5-7

configuring   2-5, 4-1

DNS   3-8
Dynamic

Access

 software   3-11

ISA to EISA   4-6
NIC

DOS   4-1, 4-4
Windows 3.x   4-1
Windows 95   2-5
Windows for Workgroups   4-1, 4-4

saving settings   3-15
TCP/IP   3-6, 3-17

connectors   1-2
conventions

notice icons, About This Guide   2
text, About This Guide   2

crossover cable   C-1
Custom installation   2-1

Windows 95   2-4
Windows NT   2-10

D

DHCP server connection, testing   3-6
Diagnostic and Configuration 

Program, DOS   6-2

diagnostic program, 

Windows 95/Windows NT

Diagnostics tab   5-7
running tests   5-8

diagnostic programs, list of   6-5
diagnostic test failure   6-6
diagnostic testing

DOS   6-2
Windows 95/NT   5-6

Diagnostics tab   5-7
disabling Plug and Play   2-7
DNS

configuring   3-8
testing the server connection   3-8

domain name, entering   3-9
DOS

auto configuring the NIC   4-5
configuring the NIC   4-4
diagnostic program   6-2
installation program   4-1
uninstallation program   4-4

Summary of Contents for III ISA

Page 1: ...http www 3com com EtherLink III ISA Network Interface Card User Guide A member of the 3Com EtherLink III family of network interface cards Part No 09 1310 000 Published January 1998...

Page 2: ...and as such is provided with only such rights as are provided in 3Com s standard commercial license for the Software Technical data is provided with limited rights only as provided in DFAR 252 227 70...

Page 3: ...k Velocity ATMLink PCI and FDDILink network interface cards have a Lifetime Limited Warranty For further details please see 3Com s Limited Warranty statement in this guide To ensure the very best 3Com...

Page 4: ...herlands France Israel 3Com France Marketing Department Immeuble McKinley BP 965 1 Avenue de l Atlantique 91976 Les Ulis Courtaboeuf Cedex France Germany Austria Switzerland 3Com GmbH Marketing Depart...

Page 5: ...m Installation 2 2 Multiple NIC Installations 2 2 Windows 95 Setup 2 2 Performing the Preinstallation Procedure 2 4 Configuring the NIC in a Plug and Play PC 2 5 Disabling Plug and Play on the NIC 2 7...

Page 6: ...Completing the Installation and Configuration 3 16 Windows 95 3 16 Windows NT 3 17 4 SOFTWARE INSTALLATION AND CONFIGURATION UNDER WINDOWS 3 X Installing NetWare Drivers for DOS Windows 3 1 and Window...

Page 7: ...Software 5 9 Performing Automated Installations 5 10 Installing from the Hard Disk 5 10 Installing from a Diskette 5 10 6 WINDOWS 3 X TROUBLESHOOTING Checklist 6 1 Diagnostic Testing Under Windows 3...

Page 8: ...shooting Hubs with Crossover Cable C 1 D TECHNICAL SUPPORT Online Technical Services D 1 World Wide Web Site D 1 3Com Bulletin Board Service D 1 Access by Analog Modem D 2 Access by Digital Modem D 2...

Page 9: ...ice Screen 2 8 2 8 Install from Disk Screen 2 9 2 9 Select Device Screen 2 9 2 10 I O Range Assigned to the NIC Screen 2 10 2 11 Windows NT NIC Installation Overview 2 11 3 1 Selecting Custom Installa...

Page 10: ...f the Network Screen 3 17 3 19 Microsoft TCP IP Properties Screen 3 18 4 1 Main Menu of the DOS Installation Program 4 2 4 2 NIC Configuration Screen 4 5 6 1 Assembling a Loopback Plug 6 3 A 1 RJ 45 C...

Page 11: ...NIC Models 1 2 1 2 NIC LED Interpretation 1 7 4 1 NetWare NLMs 4 3 4 2 Network Driver Text File Names 4 3 4 3 Option Settings 4 8 5 1 3Com NIC Diagnostics Program Tab Screens 5 7 6 1 Diagnostic Progra...

Page 12: ......

Page 13: ...the information in the README TXT file on EtherDisk diskette 2 If a release note is included the release note contains the latest information How to Use This Guide This table shows where to find speci...

Page 14: ...en The words enter and type When you see the word enter in this guide you must type something and then press the Return or Enter key Do not press the Return or Enter key when an instruction simply say...

Page 15: ...herLink III ISA 3C509B NICs are shown in Figure 1 1 These NICs connect your ISA or EISA PC to an Ethernet network using up to three different types of media Figure 1 1 3C509B Network Interface Cards E...

Page 16: ...1 and 2 Table 1 1 Parameters for 3C509B NIC Models NIC Model Cable Connector Transceiver Maximum Network Segment 3C509B TPO Category 3 4 or 5 unshielded twisted pair 10BASE T RJ 45 On board 328 ft 10...

Page 17: ...ion that accompanied your PC You must have one ISA or EISA slot available in your PC in which to install the NIC CAUTION Each NIC is packed in antistatic packaging to protect it during shipment Before...

Page 18: ...gest are brown Figure 1 2 Installing the 3C509B NIC 4 Remove and discard the backplate 5 Ensure that the shape and length of the edge connector on the NIC match the slot that you intend to use Figure...

Page 19: ...ink is not active To enable the link you must load the network drivers See Link LED in this chapter for more information Follow these steps to connect the RJ 45 port on the 3C509B TPO TPC TP and COMBO...

Page 20: ...cting to the BNC Port on the 3C509B TPC NIC 2 Connect the other end of the network cable to another PC or a 50 ohm terminator Go to Link LED later in this chapter Follow these steps to connect the AUI...

Page 21: ...rk link you must install the network driver Table 1 2 describes the LED states Table 1 2 NIC LED Interpretation If the NIC LED indicates a problem check the following 1 Ensure that your network hub an...

Page 22: ......

Page 23: ...e two ways to install and configure the NIC using the 3Com Installation Wizard are Express installation and Custom installation Express Installation Express installation the installation method that m...

Page 24: ...figuration settings disable tests and save installation settings for future installations If you are installing the NIC in a Windows 95 PC that does not have a Plug and Play BIOS installed you must in...

Page 25: ...Installation Wizard Express installation Custom installation Quick guide User guide Chapter 3 User guide Chapter 2 No Yes Disable Plug and Play on the NIC Run Add New Hardware Wizard Plug and Play BIO...

Page 26: ...er a preinstl 4 Click OK The Preinstallation Software screen appears as shown in Figure 2 2 displaying a list of available IRQs Record these IRQs You need to verify that one of these available IRQs is...

Page 27: ...nstallation Wizard Custom installation option go to the next section Configuring the NIC in a Plug and Play PC This section describes how to set up your system environment when installing the NIC in a...

Page 28: ...e 1 5 Click OK The Copying Files dialog box appears prompting you for the location of files on EtherDisk diskette 1 6 If it is not already displayed in the Copy files from entry box type a 7 Click OK...

Page 29: ...95 2 Insert EtherDisk diskette 2 in drive A 3 Click Start in the Windows 95 taskbar and then click Run 4 Enter a pnpdsabl bat The DOS PNPDSABL screen appears as shown in Figure 2 6 Figure 2 6 DOS PNPD...

Page 30: ...double click the Control Panel icon and then double click the Add New Hardware icon The Add New Hardware Wizard starts and displays the first screen 2 Click Next You are prompted to let Windows 95 sea...

Page 31: ...n the Copy manufacturer s files from entry box enter a 7 Click OK The Select Device screen shown in Figure 2 9 appears with 3Com EtherLink III ISA 3C509 3C509b in ISA mode selected Figure 2 9 Select D...

Page 32: ...ation Wizard starts CAUTION I O base address 0x110 is reserved for system resources If this address is assigned to a hardware device in your PC contact your network administrator before continuing The...

Page 33: ...T Figure 2 11 Windows NT NIC Installation Overview User guide Chapter 1 No Yes Install Microsoft Networking Is Microsoft Networking installed Install the NIC in your PC User guide Chapter 3 Windows NT...

Page 34: ...erDisk diskette 1 in drive A 6 Ensure that the path to drive A appears in the entry box and then click OK The Select OEM Option screen appears 7 If not already selected select 3Com EtherLink III 3c509...

Page 35: ...k Guide Custom Installation In the last step of the Windows 95 setup procedure in Chapter 2 clicking Next starts the 3Com Installation Wizard In the last step of the Windows NT setup procedure in Chap...

Page 36: ...For Windows 95 non Plug and Play PCs make sure that the I O Base Address value shown in the list box under Current Value is the same value that you wrote down in Configuring the NIC in Chapter 2 Also...

Page 37: ...Request Level 4 In the Set Value selection box click the scroll arrow to select an interrupt request level that matches one of the available IRQs that you wrote down in Performing the Preinstallation...

Page 38: ...in Figure 3 4 Figure 3 4 Network Connection Test Screen Follow these steps to test the network connection 1 Click Perform Network Connection Test to verify that the network is functioning correctly Wh...

Page 39: ...ry Screen To Not Install TCP IP Follow these steps if you do not want to install TCP IP 1 Select the No radio button 2 Click Next Go to the section Identifying Your PC on the Network later in this cha...

Page 40: ...n an IP address automatically 1 Select the Obtain an IP address automatically radio button This option dynamically assigns a new IP address each time you connect to the network 2 Click Test IP Connect...

Page 41: ...r in the Gateways list box before you can advance to the next screen 6 Click Add New Gateway to add the new gateway configuration The gateway is listed in the Gateways list box 7 Click Test IP Connect...

Page 42: ...ly 1 Select the Obtain a DNS address automatically radio button This choice gives you a new DNS address each time you log on to the network 2 Click Test DNS Connection to verify that the connection to...

Page 43: ...able DNS 2 Enter the host and domain data in their respective fields 3 To configure a new server enter the new server address and then click Add New Server The new server appears in the Servers list b...

Page 44: ...a 1 Type the name of your computer There are many PCs and other devices on a network each one must be uniquely identified on the network This name identifies your PC on the network The name can have u...

Page 45: ...etwork bandwidth utilization reducing latency controlling jitter and supporting multiple traffic priority levels When you click Next in the previous section the DynamicAccess Software Inquiry screen a...

Page 46: ...e 3 11 The PACE Support Setup screen appears as shown in Figure 3 12 Figure 3 12 PACE Support Setup Screen 2 Select the Enable PACE Support radio button 3 Select the check box next to each application...

Page 47: ...ction the Repeat Last Installation screen appears as shown in Figure 3 13 Figure 3 13 Repeat Last Installation Screen To Not Save Installation Settings Follow these steps if you do not want to save th...

Page 48: ...adio button and then click Next The Confirm Installation Settings screen appears as shown in Figure 3 14 Figure 3 14 Confirm Installation Settings Screen 2 Select the check boxes for tests that you wa...

Page 49: ...ted diskette in drive A Upon completion remove the diskette from the drive You can use this diskette to perform future installations Otherwise enter the name of the drive for example C where you want...

Page 50: ...ay appear If this screen appears click Finish Otherwise continue The System Settings Change dialog box appears prompting you to restart See Figure 3 17 Figure 3 17 System Settings Change Dialog Box 3...

Page 51: ...licking Finish on the Installation Complete screen closes the 3Com Installation Wizard Windows NT then displays the Adapters tab of the Network screen as shown in Figure 3 18 Figure 3 18 Adapters Tab...

Page 52: ...or specify an IP address manually Your network administrator will specify which method to use and if required provide an IP address for you to use To obtain an IP address automatically Follow these st...

Page 53: ...ress and default gateway address in their respective entry fields c Click OK You are prompted to restart Windows NT d Click OK TCP IP is installed and configured Verify that all existing installed har...

Page 54: ......

Page 55: ...r the AutoLink program logs on to the server and updates the client software AutoLink creates a new AUTOEXEC BAT file and saves the old file as AUTOEXEC 3CM AutoLink also creates a new CONFIG SYS file...

Page 56: ...Link program display or print the AUTOLINK LOG file to see a list of all events occurring during the AutoLink installation and configuration process To display the file Enter type autolink log more To...

Page 57: ...diskette 2 Table 4 1 NetWare NLMs NetWare Server NLM Name NetWare 3 12 ETHERTSM NLM NBI31X NLM MSM31X NLM NetWare 4 11 4 1 ETHERTSM NLM NBI NLM MSM NLM Table 4 2 Network Driver Text File Names Network...

Page 58: ...pter 1 and the network driver earlier in this chapter 2 Reboot to DOS 3 Insert EtherDisk diskette 2 in drive A 4 Run the installation program Enter a install The main menu is displayed as shown in Fig...

Page 59: ...the NIC to be configured by the EISA configuration program for correct EISA PC settings You can configure an ISA NIC for EISA mode only if the NIC is installed in an EISA slot If you have configured a...

Page 60: ...IC option is selected Press Enter 5 When the NIC Configuration dialog box is displayed select Modify and press Enter The I O Base Address field is selected An I O Base Address dialog box appears 6 Use...

Page 61: ...tton and press Enter 4 A screen identifying the NIC is displayed with theTest menu bar item already selected 5 Select Install and press Enter 6 When the NIC Configuration dialog box appears select Mod...

Page 62: ...can set the boot PROM size to indicate the presence and size of a network boot PROM To disable Plug and Play go to Disabling Plug and Play on the NIC in Chapter 2 Table 4 3 Option Settings Option Def...

Page 63: ...e PC use the arrow keys to select the NIC you want to configure Press Tab to move to the Select button and press Enter 4 Press Tab to display the dialog box and then select the option that you want to...

Page 64: ......

Page 65: ...eck whether the NIC software is correctly installed Refer to Chapter 2 and Chapter 3 If the problem persists go to related procedures in this chapter or refer to Appendix D Technical Support Resolving...

Page 66: ...le click Network adapters and then double click 3Com EtherLink III ISA Adapter 3 Select the Resources tab 4 Depending on the type of conflict that you have select either Input Output Range or Interrup...

Page 67: ...you change the I O base address before you restart Windows NT make sure that the address that you assign matches the I O base address on the Adapters tab screen Follow these steps to verify the base a...

Page 68: ...Control Panel icon and then double click the Network icon The Network screen appears 2 Select the Adapters tab and then click Add The Select Network Adapter screen appears 3 Insert EtherDisk diskette...

Page 69: ...e The Windows setup program displays a message warning that a network card of this type is already installed 2 Click OK The 3Com EtherLink III 3c509 ISA Adapter Bus screen appears A message warns you...

Page 70: ...n installed and configured reboot Windows NT Windows 95 and Windows NT Troubleshooting A comprehensive section on troubleshooting tips and techniques is provided in the online Help To access the onlin...

Page 71: ...ork traffic information that is updated by the NIC driver several times a minute Diagnostics The Diagnostics tab provides access to the 3Com NIC Diagnostics program that lets you test the 3C509B NIC o...

Page 72: ...s tests the ability of the 3C509B NIC to transmit and receive data while connected to the network Follow these steps to run the Network test 1 Click Run Network Test The Network Connectivity Test scre...

Page 73: ...estart your PC 5 Click Yes The NIC is no longer recognized by your operating system All 3C509B NIC software is removed from your PC Reinstalling NIC Software When an event such as a hard disk crash oc...

Page 74: ...h to the file that contains the saved configuration settings that you want to use to reinstall the NIC 2 Click OK The 3Com Installation Wizard starts and displays the first screen 3 Click Install 3Com...

Page 75: ...g system you are running see Installing Other Supported Network Drivers in Chapter 4 If the problem persists go to related procedures in this chapter or refer to Appendix D Technical Support Diagnosti...

Page 76: ...uration and Diagnostic Program Follow these steps to run the Configuration and Diagnostic Program 1 Boot to DOS Use a DOS diskette 2 Insert EtherDisk diskette 2 in drive A 3 Run the installation progr...

Page 77: ...Ethernet coaxial wire This test requires either installing a loopback plug at the transceiver connection on the NIC or running the test on an idle network A failure in this test usually indicates a ca...

Page 78: ...ata while connected to the network If you have successfully run the Group 1 and Group 2 tests a failure in the Group 3 test usually indicates a cabling hub or network problem CAUTION Do not use an act...

Page 79: ...4 Go to the Run Tests dialog box to start the tests 5 After the test is completed a Exit the program on the echo server b Exit the Configuration and Diagnostic Program Table 6 1 Diagnostic Programs D...

Page 80: ...tion settings settings that conflict with other NICs or improper installation For more information about a failed diagnostic test Select the test that failed in the Run Tests dialog box and press Ente...

Page 81: ...al area network 3C509B COMBO 3C509B TPC IEEE 802 3i 10BASE T and Ethernet IEEE 802 3 industry standard for a 10 Mbps CSMA CD local area network Physical Dimensions Length 155 956 mm 6 14 in Height 100...

Page 82: ...ts Table A 1 lists the pin assignments for the AUI attachment unit interface connector 8 7 RD 6 5 4 RD 3 TD 2 TD 1 8 Table A 1 AUI Connector Pin Assignments Pin Function Pin Function 1 Collision shiel...

Page 83: ...ou use for establishing a connection to the network should not be used for any other purpose It must be dedicated to the link between the NIC and the network For complete cabling details refer to the...

Page 84: ......

Page 85: ...he user guide that came with the PACE supported application for specific range and protocol information The Additional Ranges tab is shown in Figure B 1 Figure B 1 PACE Additional Ranges Tab 1 To add...

Page 86: ...e the range for TCP IP 5 Click Add The range appears in the list box To remove a range select the range in the list box and clickRemove Do one of the following To change advanced values click Advanced...

Page 87: ...o 32 connections a client may only want to conference with four other people at a time The recommended setting is 16 Low Priority Ratio When PACE support is enabled high priority packets are always tr...

Page 88: ...prioritization can sometimes alleviate the failure to make a multimedia connection between a PACE enabled workstation and a non PACE workstation Disabling switch packet prioritization only affects th...

Page 89: ...the hub The hub performs an internal crossover so that the signal can go from TD to RD and TD to RD When you look at an RJ 45 connector from the front that is the opposite side from where the wires e...

Page 90: ...ble Pinouts If the file server and client PC function together as a small network then either the existing cabling or the hub is failing With a correct crossover connection the LED lights With a strai...

Page 91: ...Web site 3Com Bulletin Board Service 3ComBBS 3ComFactsSM automated fax service 3ComForum on CompuServe online service World Wide Web Site Access the latest networking information on 3Com Corporation s...

Page 92: ...day 7 days a week Call 3ComFacts using your Touch Tone telephone using one of these international access numbers Country Data Rate Telephone Number Australia up to 14400 bps 61 2 9955 2073 Brazil up...

Page 93: ...ces including network planning installation hardware maintenance application training and support services When you contact your network supplier for assistance have the following information ready Di...

Page 94: ...Limited Australia China Hong Kong India Indonesia Japan Korea Malaysia New Zealand Philippines Singapore Taiwan Thailand 61 2 9937 5000 Sydney 61 3 9866 8022 Melbourne 8610 68492568 Beijing 86 21 637...

Page 95: ...Peru Venezuela 408 326 2093 305 261 3266 Miami Florida 541 312 3266 55 11 546 0869 562 633 9242 571 629 4110 52 5 520 7841 7847 51 1 221 5399 58 2 953 8122 3Com Mediterraneo Italy Spain 39 2 253011 M...

Page 96: ...sent to 3Com without RMA numbers will be returned to the sender unopened at the sender s expense To obtain an RMA number call or fax Country Telephone Number Fax Number U S A and Canada 1 800 876 3266...

Page 97: ...S diagnostic program 4 8 saving with 3Com NIC Diagnostics 3 14 Configuration tab 5 7 configuring 2 5 4 1 DNS 3 8 DynamicAccess software 3 11 ISA to EISA 4 6 NIC DOS 4 1 4 4 Windows 3 x 4 1 Windows 95...

Page 98: ...maximum network segments 1 2 multiple installations making installation file for 3 15 performing 5 10 multiple NICs in Windows NT PC installing 5 4 N NetWare 4 1 NLM files 4 3 network drivers 4 3 iden...

Page 99: ...connection 3 4 NIC 3 3 5 8 troubleshooting 3Com NIC Diagnostics 5 6 crossover cable C 1 DOS diagnostics 6 2 hubs with crossover cable C 1 initial 5 1 6 1 resource conflicts 5 1 Windows 3 x 6 1 Window...

Page 100: ......

Page 101: ...d parties that the operation of the software products will be uninterrupted or error free or that all defects in the software products will be corrected For any third party products listed in the 3Com...

Page 102: ...STATEMENT This device complies with Part 15 of the FCC Rules Operation is subject to the following two conditions 1 This device may not cause harmful interference and 2 This device must accept any int...

Page 103: ...notices and any other proprietary rights notices appearing on the Software and the supporting documentation on any copies that you make NO ASSIGNMENT NO REVERSE ENGINEERING You may not transfer or as...

Page 104: ...idents and by the laws of the United States You agree that the United Nations Convention on Contracts for the International Sale of Goods 1980 is hereby excluded in its entirety from application to th...

Page 105: ...NOTES...

Page 106: ...NOTES...

Page 107: ...NOTES...

Page 108: ...NOTES...

Page 109: ...NOTES...

Page 110: ...NOTES...

Reviews: