The
installation CD includes the User Guide, which contains more detailed information on planning,
installing and configuring the device. Additional tools and utilities are provided to assist with the
management of your network. See “Documentation and Software Utilities” on page 7 for instructions.
3
Connect the Power
The access point complies with the IEEE 802.3af power-over-Ethernet standard. It receives power over a
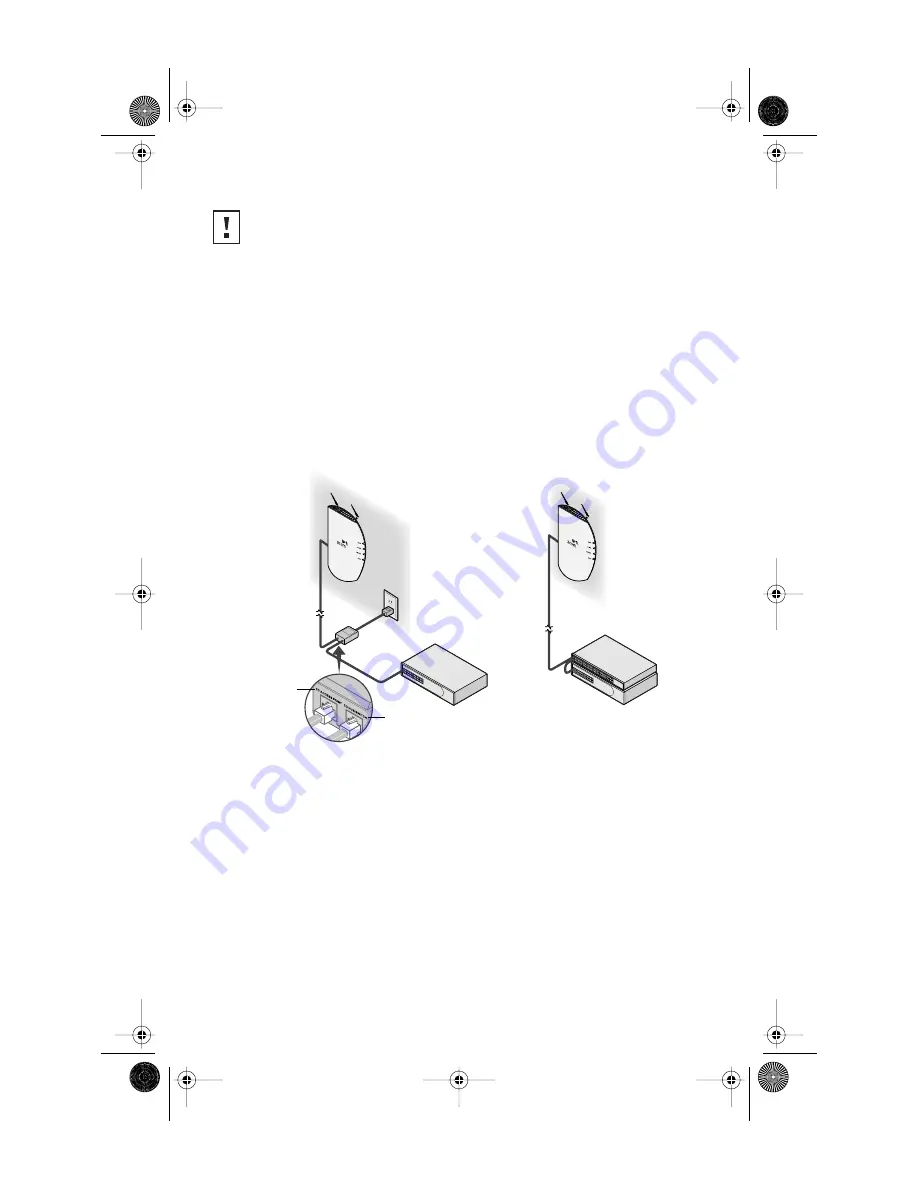
standard category 5 straight (8-wire) Ethernet cable. There are two ways to supply power to the access
point (refer to the illustration below):
■
Use the supplied 3Com Integrated Power-over-Ethernet power supply.
In this case,
you need to supply a second Ethernet cable to connect to the wired LAN.
■
Connect the access point directly to your own power-over-Ethernet hub or switch, which
must also comply with the IEEE 802.3af standard.
Using the Power Supply
The power supply can be located at any point between the access point and the LAN access port,
wherever a convenient power outlet exists. If you supply your own Ethernet cable for connecting power,
be sure that it is standard category 5 straight-through (8-wire) cable that has not been altered in any
way. Use of nonstandard cable could damage the access point.
Refer to the illustration above, and follow these steps:
1
Connect one end of the Ethernet cable to the Ethernet port on the access point.
2
Connect the other end of the Ethernet cable to the port labeled
To Access Point
on
the power supply.
3
Connect the power cord to the power supply and plug the cord into a power outlet.
CAUTION:
Do not handle the antenna tips, especially after they are connected to the access
point, as this could lead to electrostatic discharge (ESD), which could damage
the equipment.
"To Access Point"
"To Hub/Switch"
Using the Power Supply
Using A Power-over-Ethernet
LAN Port
09-2292-00AC.fm Page 3 Tuesday, March 11, 2003 3:53 PM


