


32
C
HAPTER
2: I
NSTALLING
AND
C
ONNECTING
A
WX S
WITCH
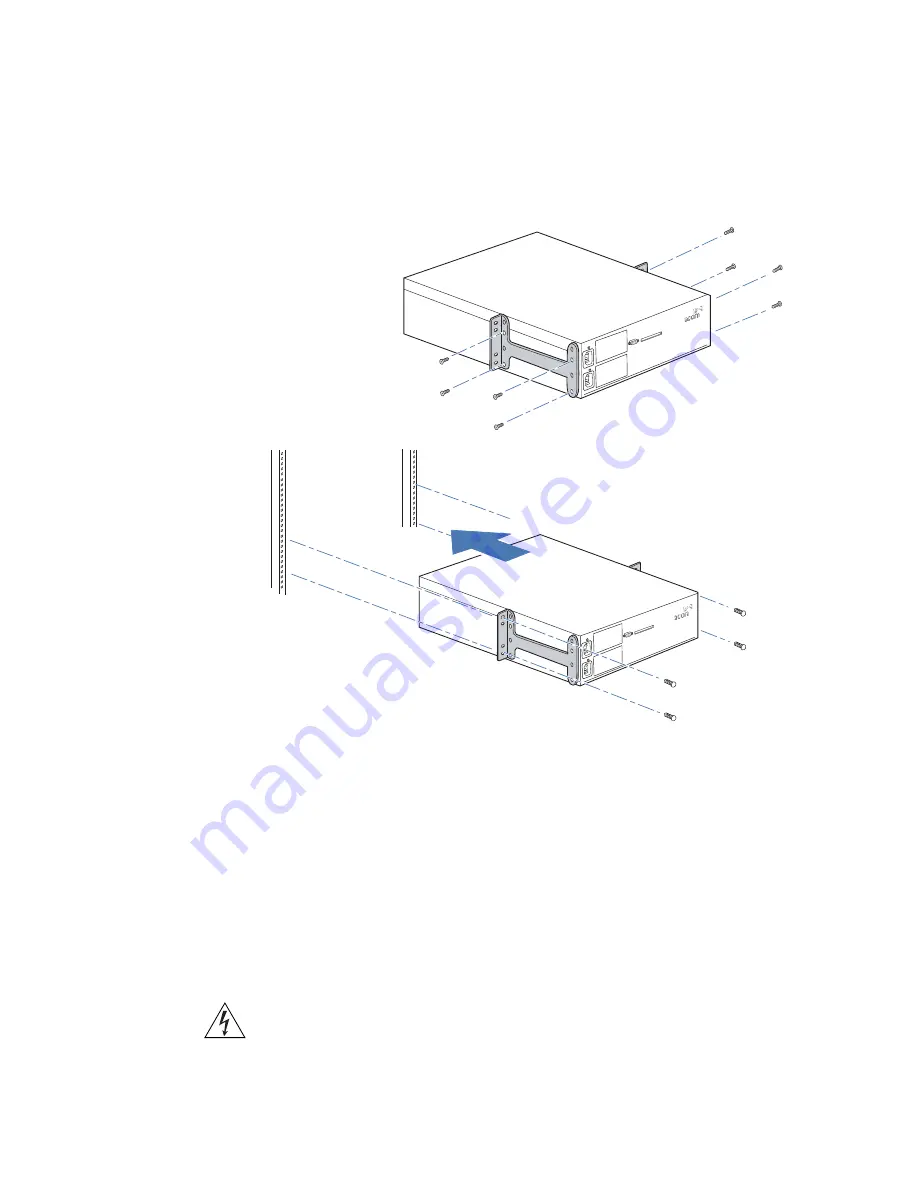
Figure 8
WX4400 Installation—Center-Mount Equipment Rack
1
Remove the four bracket screws from each side of the WX switch.
2
Align a bracket over the screw holes:
For a front-mount equipment rack, align the bracket so that the
bracket flange is flush with the WX switch’s front panel and extends
away from the switch.
For a center-mount equipment rack, align the bracket so that the
bracket flange is located near the center screw holes.
3
Reinsert the screws to secure the brackets to the WX switch.
4
Repeat for the other bracket.
WARNING:
3Com recommends that you ask someone to assist you with
the remaining steps. If you accidentally drop the WX switch, you can be
injured and the switch can be damaged.
First, attach brackets to chassis.
Then, install chassis into rack.
Summary of Contents for 3CRWX120695A
Page 22: ...22 CHAPTER 1 WX SWITCH OVERVIEW ...
Page 46: ...46 CHAPTER 2 INSTALLING AND CONNECTING A WX SWITCH ...
Page 52: ...52 CHAPTER A WX TECHNICAL SPECIFICATIONS ...
Page 56: ...56 CHAPTER B WX TROUBLESHOOTING ...
Page 62: ...62 APPENDIX C OBTAINING SUPPORT FOR YOUR 3COM PRODUCTS ...
Page 66: ...66 INDEX ...


