4-port ISDN S/T MIM
45
Cables
The T1 interface cable for 2-Port T1/CT1/PRI MIM modules is the 100-ohm
straight-through shielding network cable. You must order the cable you need from
3Com when you order the interface card. To prevent damage to your router and
to avoid voiding your warranty, use only the appropriate cable offered by 3Com.
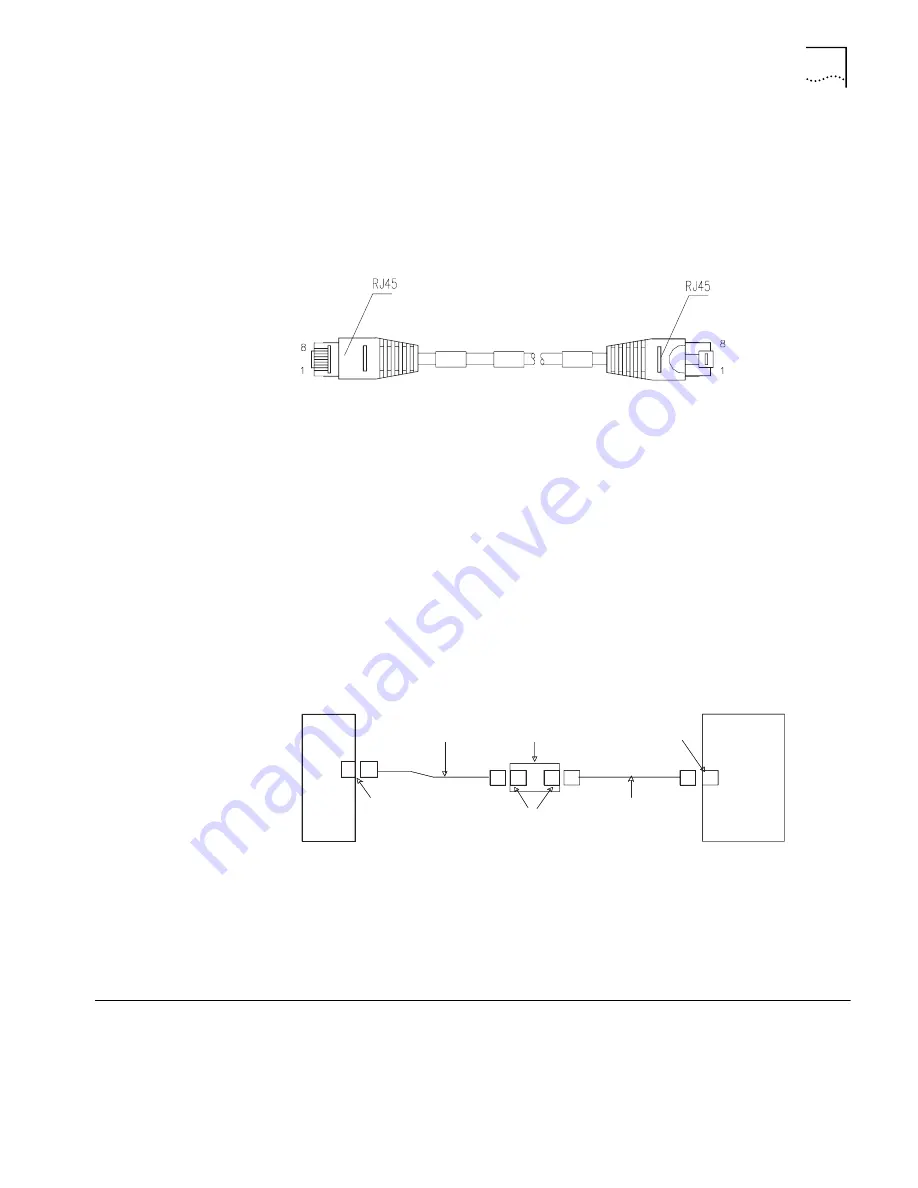
The T1 cable is shown in Figure 48.
Figure 48
T1 Cable
In addition, you may choose to use the network interface connector to extend the
T1 cable. Both ends of the connector are RJ-45 jacks that can connect two
network cables. Note that both T1 cable and network interface connector are
optional accessories. You should order them together with the 2-Port T1/CT1/PRI
MIM.
To connect the interface cable:
1
Power off the router.
2
Insert one end of the T1 cable into the RJ-45 connector on the T1 module.
3
Connect the other end of T1 cable to the peer device. If the cable is long enough,
connect it directly to the peer device.
If the T1 cable is not long enough, extend it as shown in Figure 49.
Figure 49
Extending the T1 cable
4
Power on the router, and check the corresponding READY LED for the slot on the
faceplate of the router. If the LED is on, the module passed the power-on self-test
(POST) and can work normally. If the LED is off, the module failed to pass the
POST. Contact your Service representative.
5
Check the state of synchronous LINK LED on the panel of the 2-Port T1/CT1/PRI
MIM. If it is off, the line failed. Check the line to locate the problem.
4-port ISDN S/T MIM
The 4-Port ISDN S/T MIM transceiver and processes the 4-channel data stream on
the ISDN BRI S/T interface. The 4-Port ISDN S/T MIM can work in dialup mode and
leased line service mode.
The 4-port ISDN S/T MIM can be installed in any of the Router 5000 Family, except
the Router 5012
RJ-45
RJ-45
RJ-45
Straight-through
network cable
T1 cable (100-ohm
straight-through
shielded network cable)
Network
interface
connector
Leased
line, etc.
Summary of Contents for 3C13701
Page 14: ...12 CHAPTER 1 INTRODUCING THE ROUTER 5000 FAMILY ...
Page 34: ...32 CHAPTER 2 INTRODUCING ROUTER 5012 SICS ...
Page 57: ...ADSL MIMM 55 ...
Page 58: ...56 CHAPTER 3 INTRODUCING ROUTER 5000 FAMILY MIMS ...
Page 68: ...66 CHAPTER 4 INSTALLING THE ROUTER ...
Page 90: ...88 CHAPTER 7 TROUBLESHOOTING ...
Page 100: ...98 APPENDIX A CABLE SPECIFICATIONS ...
Page 104: ...102 APPENDIX A OBTAINING SUPPORT FOR YOUR PRODUCT ...


