background image

9

LIGHTING THE MAIN BURNERS:

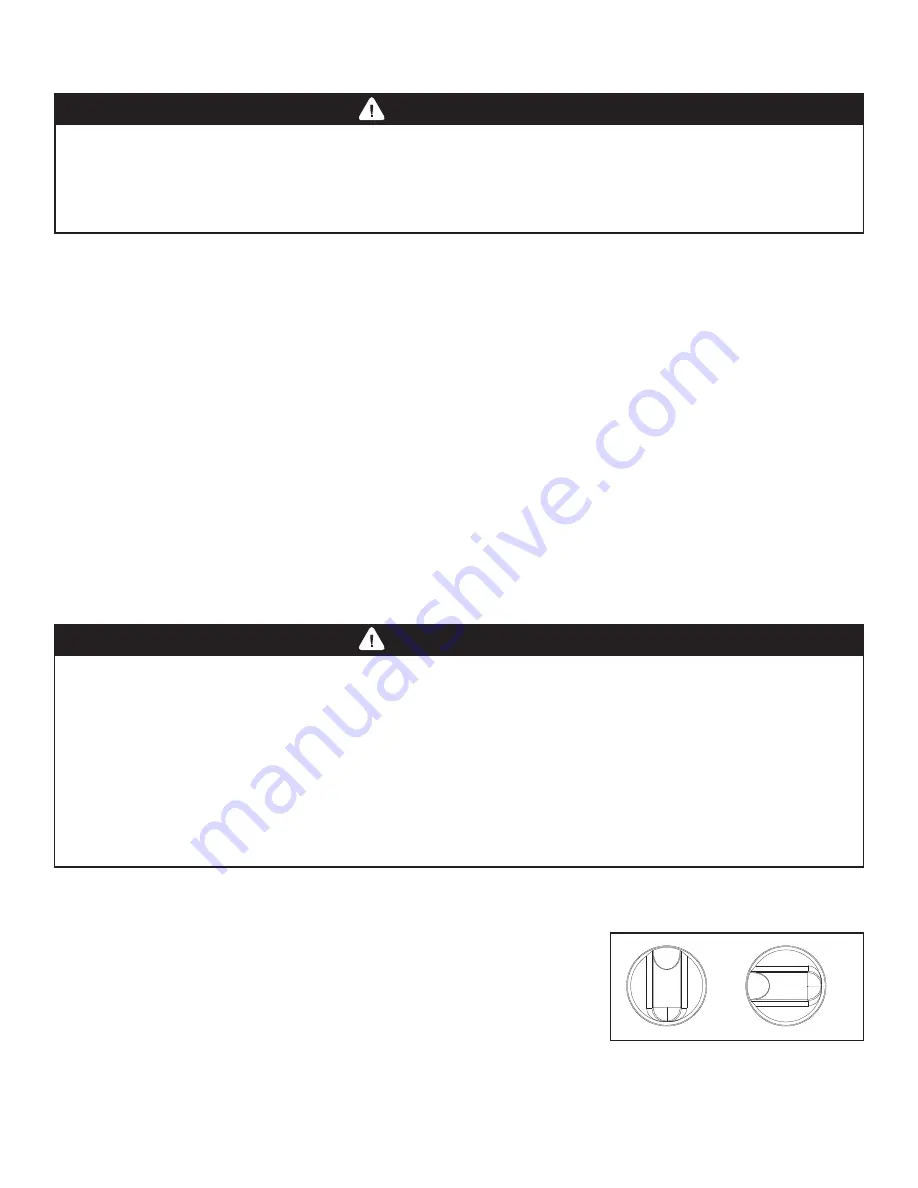
1.  Open lid before lighting burner.

2.  Make sure all control knobs are “OFF”.

3.  Select burner to be lit. Push and hold down control knob and turn SLOWLY 

(2 to 3 seconds) to “HIGH”. You should hear igniter click.


Note: Step 3 may need to be repeated 2-3 times to light grill.

4.  If ignition does NOT occur in 5 seconds, turn control knob to “OFF”, 

wait 5 minutes to allow gas to dissipate and repeat lighting procedure.

5.  To light other burners, follow steps 3-4.

WARNING

DANGER

Property damage, bodily harm, severe burns, and death could result from failure to follow these 
safety steps. These steps should be performed after the grill has been assembled and prior to 
each use. DO NOT operate this grill until you have read and understand ALL of the warnings and 
instructions in this manual.

• 

Ensure that the grill is properly assembled.

• 

Inspect gas supply hose for burns, chaffing, kinks, and proper routing before each use. If it is evident 
there is excessive abrasion or wear, or the hose is cut, it must be replaced prior to grill being used. 
Replace with hose and regulator Model No. 7480-155-7480-0, which can be obtained by contacting 
customer service at 855-735-9922.

• 

Leak check all gas connections, hose and propane tank. See section on “Leak Testing”.

• 

Position your grill on a non-combustible level surface in a well ventilated location, a safe distance
10 ft. (3.1 m) from combustible materials, buildings and overhangs.

• 

Properly place empty grease cup under grease drain hole in bottom of grill to catch grease during use.

• 

DO NOT block ventilation areas in sides, back or cart compartment of grill.

PRE-START CHECK LIST:

LIGHTING INSTRUCTIONS:

Read, understand and follow all warnings and instructions contained in this manual. DO NOT skip any 
of the warnings and instructions contained in the preceding sections of this manual. 

Follow the instructions exactly.

1.  OPEN THE GRILL LID before attempting to light a burner so that fumes do not accumulate inside 

the grill. An explosion could occur if grill lid is down.

2.  Check that all burner control knobs and the cylinder valve are turned to the “OFF” position.

3.  Turn on the fuel supply by slowly rotating the cylinder valve knob counter-clockwise to full open.

4.  DO NOT stand with head, body, or arms over the grill when lighting.

OFF

HIGH

Summary of Contents for GAS7480BF

Page 1: ...ING DEATH OR PROPERTY DAMAGE UNE EXPLOSION DANGEREUSE RISQUE DE SE PRODUIRE SI CES AVERTISSEMENTS ET INSTRUCTIONS SONT IGNOR S LIRE ET RESPECTER TOUS LES AVERTISSEMENTS ET INSTRUCTIONS DE CETTE NOTICE...

Page 2: ...Shut off gas to the appliance 2 Extinguish any open flame 3 Open lid 4 If odor continues keep away from the appliance and immediately call your gas supplier or your fire department 1 Do not store or...

Page 3: ...ARNING Be alert to the possibility of serious bodily injury if the instructions are not followed Be sure to read and carefully follow all of the messages CAUTION Indicates a potentially hazardous situ...

Page 4: ...tray cup and clean hose and regulator assembly and inspect for damage before use Never cook on grill without grease cup tray in position DO NOT use water on a grease fire Closing lid to extinguish a...

Page 5: ...not in use Handle the tank with care Always secure the cylinder in an upright position Never connect an unregulated LP gas cylinder to your grill DO NOT expose LP gas cylinders to excessive heat or i...

Page 6: ...ion device OPD This grill is designed to fit Worthington Manchester or SMPC brand 20 lb 9 1 kg cylinders Other brand DOT cylinders may fit this grill if cylinder has similar dimensions of top and bott...

Page 7: ...Damaged Rubber Seal HOSE REGULATOR SPECIFICATIONS AND INSTALLATION DO NOT attempt to connect grill as purchased for LP propane gas to any other fuel supply source such as a natural gas line For dual...

Page 8: ...ve the protective plastic cap from cylinder valve 7 Check that the hose does not contain kinks does not contact sharp edges and does not contact surfaces that may become hot during use 8 Hold regulato...

Page 9: ...If you hear a rushing sound or smell gas turn gas off Tighten any leaking connections If leak is detected at connection nut and tightening does not stop leak reinspect propane tank rubber seal 5 Appl...

Page 10: ...g used Replace with hose and regulator Model No 7480 155 7480 0 which can be obtained by contacting customer service at 855 735 9922 Leak check all gas connections hose and propane tank See section on...

Page 11: ...rner control knob and SLOWLY 2 to 3 seconds turn to HIGH You should hear the igniter click Note Step 3 may need to be repeated 2 3 times to light side burner 4 If ignition does NOT occur in 5 seconds...

Page 12: ...flare ups may occur Excessive flare ups can over cook your food and cause a dangerous situation for you and your grill Excessive flare ups result from the build up of grease in your grill If this sho...

Page 13: ...ons for future reference Read instructions on lighting your grill to light the side burner Never close the side burner cover when the burner is lit Use a 10 diameter pot or smaller that does NOT have...

Page 14: ...equire the use of an abrasive plastic cleaning pad Use only in direction of brushed finish to avoid damage Do not use abrasive pad on areas with graphics Car wax may help protect the exterior finish o...

Page 15: ...each burner which are located in back of grill 4 Remove burner through back of grill 5 Use a narrow bottle brush or a stiff wire bent into a small hook to run through each burner tube or use compresse...

Page 16: ...burners and could result in a burner tube fire or fire beneath grill See Burner Assembly Maintenance under Proper Care and Maintenance If storing grill outdoors cover grill with a grill cover for pro...

Page 17: ...ted Reconnect wire or replace electrode wire assembly Wire is shorting sparking between ignitor and electrode Replace ignitor wire electrode assembly Bad ignitor Replace ignitor Grill does not get hot...

Page 18: ...oper Care and Maintenance instructions GRILL COOKING TIPS CLEANLINESS Always wash hands thoroughly with soap and hot water prior to handling food and after handling raw meat uncooked poultry or seafoo...

Page 19: ...0 12 Note Screws needed for assembly are pre installed and will need to be loosened partially and or removed to assemble grill 13 3 Grilles de cuisson en acier inoxydable 4 Tentes de chaleur en acier...

Page 20: ...19 1 9 2 11 3 5 6 12 4 8 7 10 13...

Page 21: ...20 1 2 3...

Page 22: ...4b 4a 21...

Page 23: ...22 5a 6 Black Negro Black Negro Red Rojo Red Rojo 5b...

Page 24: ...23 7 8a 8b...

Page 25: ...24 9 10...

Page 26: ...25 11 12...

Page 27: ...26 13 14...

Page 28: ...vrir le couvercle 4 Si l odeur persiste vous tenir l cart de l appareil et t l phoner imm diatement votre fournisseur de gaz ou au service d incendie DANGER AVERTISSEMENT IMPORTANTES RELATIVES LA S CU...

Page 29: ...30 32 Boyau et r gulateur Sp cifications et installation 32 33 V rification des fuites 33 34 Liste de v rification avant le d marrage 35 Directives d allumage 35 36 Fonctionnement du gril 37 38 Autre...

Page 30: ...ber sur le boyau et l assemblage du r gulateur Si cela se produit teignez imm diatement l alimentation en gaz Videz le contenant plateau graisse et nettoyez le boyau et l assemblage du r gulateur et a...

Page 31: ...en caoutchouc du r servoir de propane la recherche de toute fissure usure ou d t rioration avant l utilisation Un joint d tanch it en caoutchouc endommag peut provoquer une fuite de gaz pouvant cause...

Page 32: ...es marchandises dangereuses en service le cas ch ant et fournie avec un dispositif de pr vention de remplissage excessif ainsi qu un syst me de connexion cylindrique compatible avec la connexion pour...

Page 33: ...ier le gril con u pour fonctionner au propane toute autre source d alimentation en combustible comme une ligne de gaz naturel Les barbecues acceptant deux types de carburants peuvent tre convertis au...

Page 34: ...ection en plastique de la valve de la bonbonne 7 V rifiez que le boyau ne contient pas de plis n est pas en contact avec des ar tes coupantes ou des surfaces pouvant devenir chaudes au cours de l util...

Page 35: ...ords du r gulateur aux tuyaux de gaz Capuchon de la tige de soupape du br leur infrarouge Connexion au tuyau du br leur infrarouge Raccord du tuyau au collecteur de gaz La pleine longueur du tuyau du...

Page 36: ...D ALLUMAGE Assurez vous de bien lire comprendre et suivre tous les avertissements et directives contenus dans ce manuel N ignorez PAS les avertissements et directives contenus dans les sections pr c d...

Page 37: ...pendant 3 5 secondes afin d allumer le br leur 5 Si l allumage ne se produit pas dans les 5 secondes tournez le bouton de commande la position TEINT attendez 5 minutes afin que le gaz puisse se dissip...

Page 38: ...des viandes sur un gril au gaz Ceci ajoute la saveur unique de cuisson sur un gril au gaz Faites attention en ouvrant le couvercle car des flamb es soudaines peuvent se produire Des flamb es excessiv...

Page 39: ...MISE HORS TENSION DU GRIL 1 Fermez la valve de la bonbonne 2 Tournez tous les boutons de commande des br leurs en position TEINT Note teignez la bonbonne de propane en premier pour viter que du gaz s...

Page 40: ...avec un savon doux ou un nettoyant non abrasif et de l eau ti de savonneuse Les surfaces en acier inoxydable Pour conserver l apparence de votre gril nettoyez le avec un savon doux et de l eau ti de s...

Page 41: ...s obstru s peuvent emp cher le flux de gaz jusqu aux br leurs et provoquer un incendie l int rieur du boyau du br leur ou sous le gril Pour nettoyer l assemblage du br leur suivez ces directives pour...

Page 42: ...plir Le propane fuit 1 Mettez la valve de la bonbonne de propane en position FERM 2 Attendez 5 minutes que le propane se d gage 3 Suivez les directives de la section V rification des fuites dans le ma...

Page 43: ...eur est bien enclench dans la valve L vent d a ration du br leur doit tre ajust Consultez la section R glage des br leurs La flamme jaillit Vents violents N utilisez pas le gril durant les p riodes de...

Page 44: ...ujours les mains m ticuleusement avec de l eau chaude et du savon avant de manipuler les viandes volailles ou fruits de mer crus Si vous utilisez un plateau pour transporter viandes volailles et fruit...

Page 45: ...et le garantit pour la dur e de vie de l appareil dans le cas des br leurs tube en acier inoxydable cinq 5 ans dans le cas de toute autre pi ce en acier inoxydable trois 3 ans dans le cas des soupapes...

Reviews: