background image

13

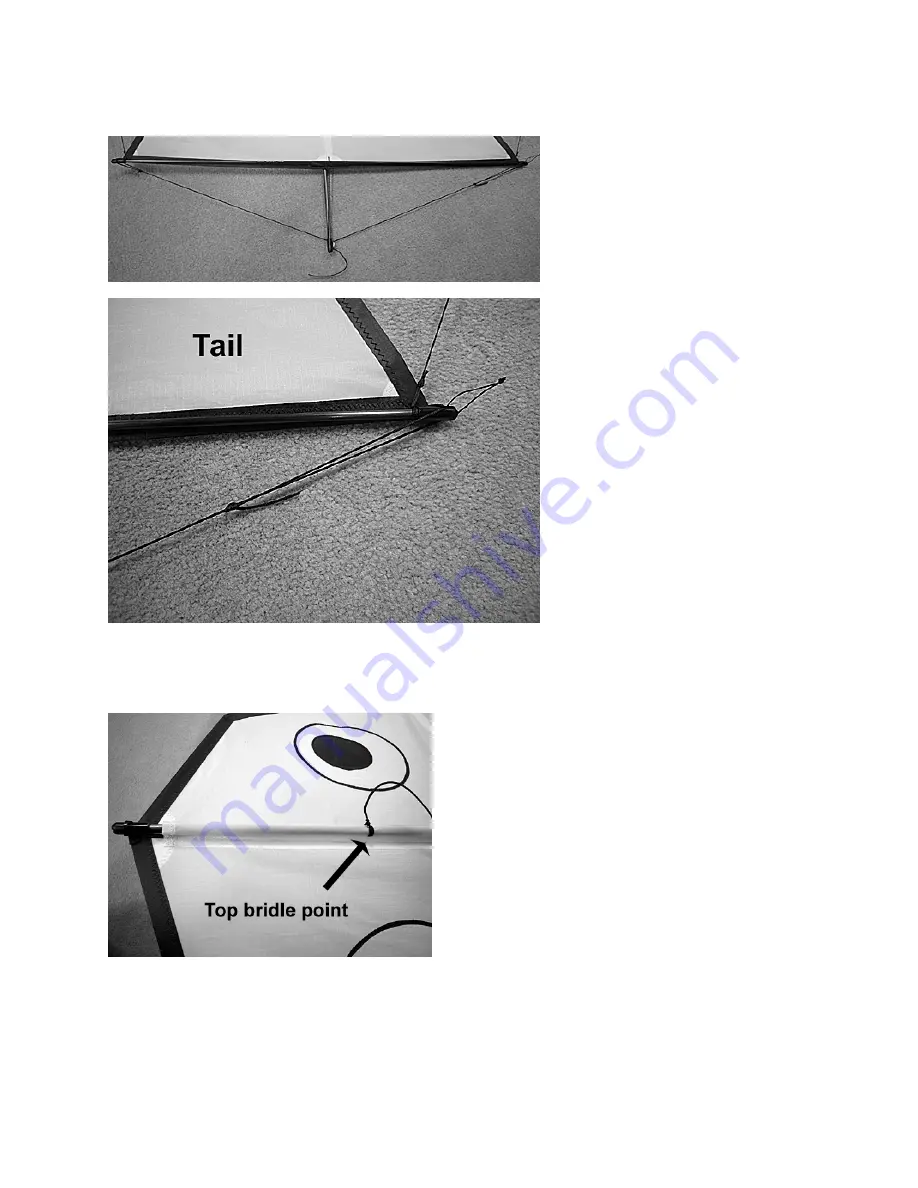
Now construct a sliding tensioner 
loop on each end of the line. You 
will not use a ring or hook. 
Rather, the loop formed will slip 
over the tail spreader rod stubby 
nock.

Bridling:


 Cut one 30 cm piece of line from the bridle line. Make a loop and set aside. This will 

be your tow point. 

Use the remaining line for your bridle. Attach 
one end 16 cm (6.25 inches) from the top. Using 
a needle, penetrate the spine sleeve and wrap the 
line around the rod. Leave it loose enough to be 
able to remove the spine rod if necessary. Tie a 
knot. Repeat with the other end of the bridle line, 
at 26 cm (10.25 inches) up from the bottom of 
the 

kite skin

 (not from the bottom of the rod). 

Lark's head the loop to the bridle as your tow 
point. A good starting point for the tow point is a 
bit less than 2 meters from the top bridle point. 

A nice sized bag will measure 165 long x 15cm wide (finished size laying flat). Cut size 
approximately 170 cm x 32 cm wide.

Done! Enjoy flying your replica 

Vogeldrachen

, or bird kite.

Questions? Email us at [email protected], Bob and Charmayne

Summary of Contents for Arno Haft's

Page 1: ...Arno Haft s Vogeldrachen Bird Kite Bob and Charmayne Umbowers 31 March 2007 www 2kiters com ...

Page 2: ...st line It will be cut into the following lengths see instructions spine line and loop 30 cm and 6 5 cm respectively 2 wing tip lines 60 cm total Divide in half 2 lower wing loops 122 cm total Divide in half 4 tiny upper wing and head loops 26 cm Divide in fourths 2 small tail loops 13 cm total Divide in half rigging lines between tail wing and between spine outer tail tips 2 meters total Do not d...

Page 3: ...ader sleeve 8 cm x 2 8 cm English 2 wing spreader sleeves each 38 inches long x 1 3 4 inches wide each 1 spine sleeve 52 1 4 inches long x 1 3 4 inches wide Cut 1 strip of black ripstop for the tail spreader rod sleeve 3 inches long x 1 1 8 wide Cut then heat seal all reinforcements from 3 9 ounce Dacron See reinforcement diagram Fine tune as necessary before sewing in place Sewing procedures Opti...

Page 4: ...n together Part 1 of 4 Parts Wings Sew A B and I onto the wings Make a right and a left wing Sew H on the wings The center of H is 10 5 inches 26 6cm from the inner edge Straight stitch the outer edge It will be covered with the edge binding and the top edge will be sewn as you edge bind It is helpful later if you position a piece of tape with a mark on it pointing to the center of H Note Sewing a...

Page 5: ... strap 1 4 x 3 5 or 6 x 9 cm so that it is centered horizontally on the taped D piece The ends are even top and bottom forming a loop in the center Sew with a straight stitch across the ends and where the loop starts Zig zag on the strap See drawing Later when you are putting the spine sleeve in place you will catch the outer edges of piece D Note The dihedral will slide into the strap but will no...

Page 6: ...thread Stitch close to the edge Edge bind the head and the tail as shown in diagram 2 and the photo below Head Spine loop 80 test line Position the 6 5 cm spine loop on top of the reinforcement on the FRONT of the kite Stitch in place securely See Diagram 3 1 Tail Spine line 80 test line Position the 30 cm spine line on top of the reinforcement on the ...

Page 7: ...ggest you pin the sleeves before sewing to keep the fabric from creeping lengthwise Make all three sleeves Set aside the 2 shorter wing spreader sleeves Attach spine sleeve to the body Fold the body in half and crease On the right side of the body draw a pencil line at intervals on the crease to make sleeve placement easier Also mark the position of the dihedral loop which is on the back Open out ...

Page 8: ...f the jump The loop must remain free Do not sew into the sleeve stay on the allowance Repeat on the other side The following pictures may help you You may also straight stitch close to the seam of the sleeve and then zig zag close to the sleeve edge This is the neatest and most secure method but involves more work ...

Page 9: ...ront This sleeve is tight sew close to the edges Wings to body Using a 1 cm or 3 8 seam allowance sew the wings to the body as shown in Diagram 6 Right sides together You may use narrow double sided tape inside the seam allowance as this seam will be top stitched in place Straight stitch Finger press seams towards the wings Reinforcements part 4 Position and sew on reinforcements C and E onto the ...

Page 10: ...ing the wing from the tail See diagram 7 It goes from reinforcement C to reinforcement E Stitch both sides Edge binding part 2 Finish the rest of the edge binding so that the entire bird is outlined Spreader sleeves These go on the BACK of the kite Follow the method for the spine Center the sleeve between the wing tip and the spine The sleeve does not span the entire distance Diagram 8 shows their...

Page 11: ...g tensioner lines between the head and wings One end of the line is tied to the wing loop The other end forms the adjusting tensioner through the head loop Trim excess Rods 1 Spine Use 2 graphite 2200 5 6 mm x 48 rods Use one rod full length and glue a 2200 Stubby nock onto one end Cut the other rod to 27cm Glue the ferrel to one end of the short rod The rod goes half way into the ferrel Glue a 22...

Page 12: ...super glue it to the rod Now thread the other end of the line through the eyes of the flattened hook and make the sliding tensioner knot Repeat with the other line The tail rod is done and may be put into the kite and the hooks put through the lower wing loop rings The tensioning line attached to tail spreader rod hooks to lower wing loop Framing lines at spine and outer tail Using the remaining p...

Page 13: ...he line around the rod Leave it loose enough to be able to remove the spine rod if necessary Tie a knot Repeat with the other end of the bridle line at 26 cm 10 25 inches up from the bottom of the kite skin not from the bottom of the rod Lark s head the loop to the bridle as your tow point A good starting point for the tow point is a bit less than 2 meters from the top bridle point A nice sized ba...

Page 14: ...How to make the sliding knot to tension framing lines 14 Step 1 Step 4 tighten Step 2 Step 5 Step 3 Step 6 tighten The loop can be adjusted to tension the line between two areas ...

Page 15: ...15 Note add a seam allowance on both wings and body where they join together Reinforcements are not quite to scale Use for shape only ...

Reviews: