43
Copyright © 2021 Nortek Security & Control LLC
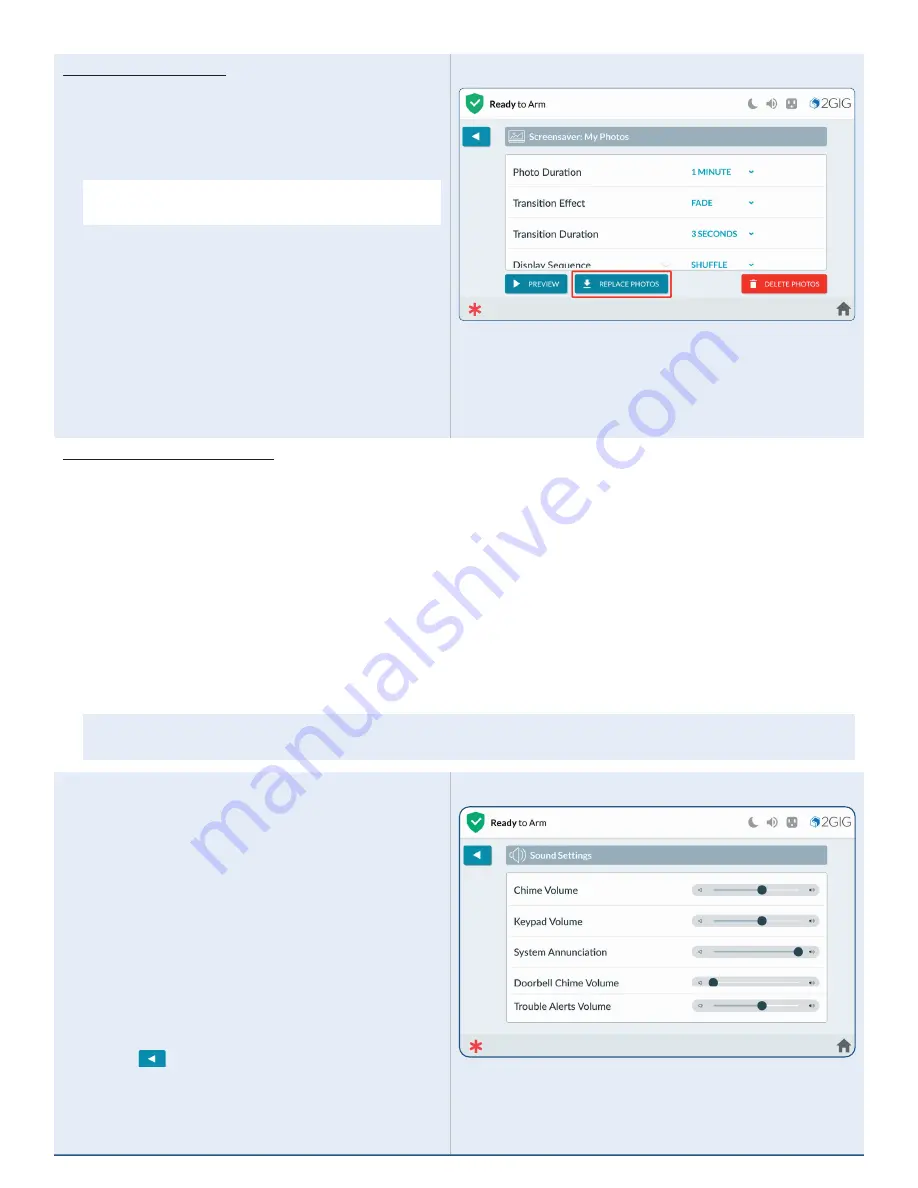
Screensaver: My Photos
1 .
On the Screensaver option, tap > .
2 .
To display your own photos:
a .
Create a folder on a USB flash drive named:
“Slideshow” .
NOTE:
The USB flash drive must be formated
FAT/FAT32 .
b .
Copy up to 50 photos to the “Slideshow” folder
on the USB flash drive. Supported file formats
include: JPG, Windows BMP, and PNG .
c .
Insert the USB drive into the top of the panel
(you will need to remove the cap to expose the
USB connector) .
d .
Press the “Replace Photos” button .
e .
Tap
REPLACE PHOTOS
. All previously
loaded photos will be deleted from the Panel,
and the new photos will be added .
Screen Saver - Replace Photos
Changing Screensaver Settings
Select from the following settings to adjust how your Screen Saver Photos are displayed:
1 . Photo Duration
– Select how long each photo will display before transitioning to the next photo (Options 30
seconds, 1, 2, or 5 minutes) .
2 . Transition Effect
– (Options: None, Fade, Push, and Wipe) .
3 . Transition Duration
– Number of seconds to transition between photos . (Options: 2, 3, or 5 seconds) .
4 . Display Sequence
– Order in which the photos are displayed. (Options: By Photo Name, Shuffle (Random).
5 . Full Landscape Mode
– Tap to
Enable
or
Disable
.
Clean Screen
To clean the screen without affecting on-screen functions, press
START
for 30 seconds available for cleaning .
Wipe the touchscreen with a soft, dry, microfiber cloth that is specially designed for cleaning sensitive surfaces.
WARNING:
Once cleaning mode begins, the touchscreen and all functions will be unavailable for 30 seconds,
including the Emergency Buttons .
Sounds
The
Sounds
menu lets you adjust the volume of the
voice, chime, doorbells, keypad tones, and system
annunciations .
1 .
Touch and hold the desired control and then
swipe to the left to lower the volume or swipe to
the right to raise the volume:
»
Chime
»
Keypad
»
System Annunciation
»
Doorbells
»
Trouble Alerts Volume
2 .
Tap
when finished.
Sounds Menu Screen


