17
If the signal cable provided with the product is found to be too short, please contact
our company for replacement. It is forbidden to lengthen it at will.
If the signal cable is too long in practical application, please do not wind it up; If you
need to cut it short, please handle the thread end as shown in the above figure.
7.2 Cable laying
7.2.1
Cable access hole sealing
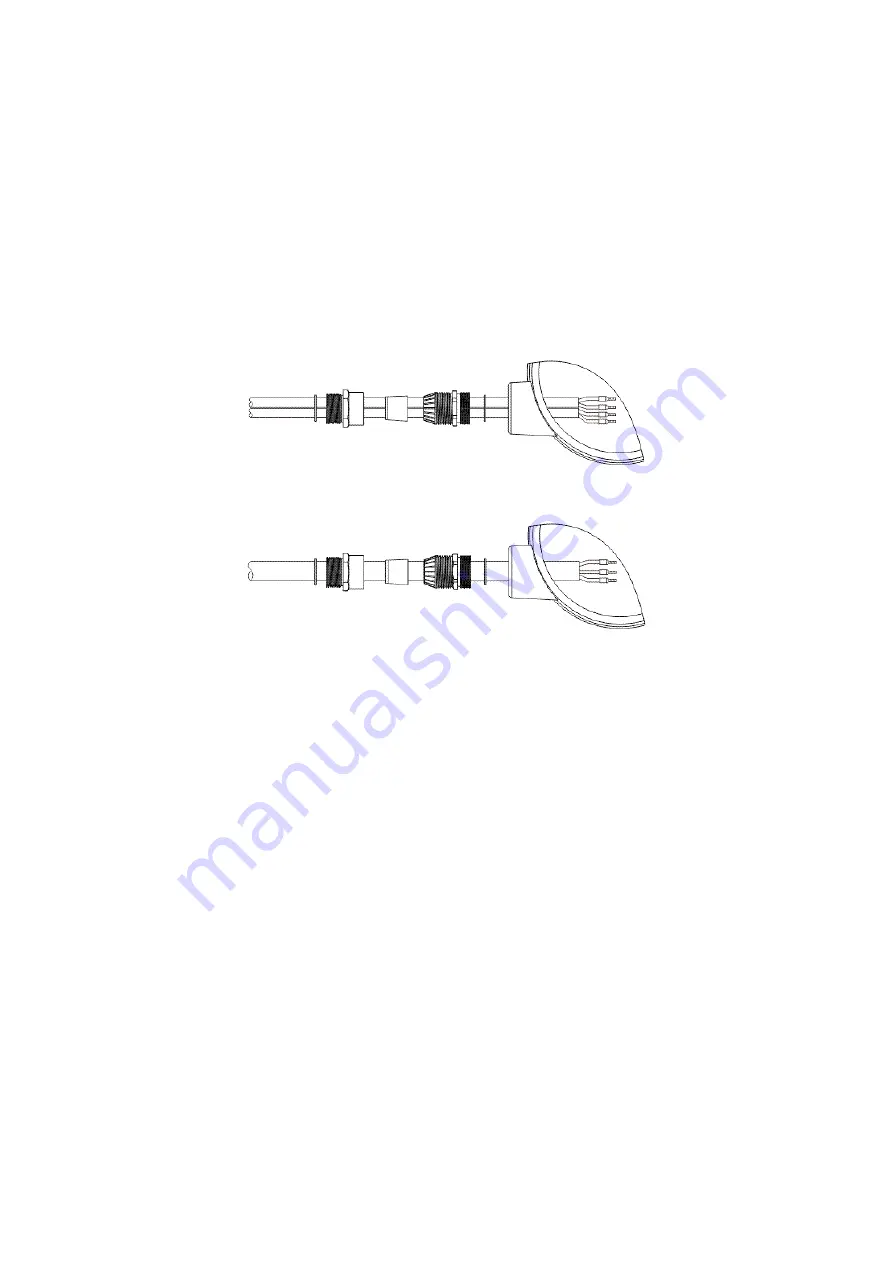
Put the parts of the sealing plug into the cable as shown in the figure below, and then screw
them into the cable access hole of the instrument in turn.
When connecting the conduit with the sealing plug, pay attention not to damage the sealing
performance of the cable, and do not over compress the cable.
Figure 7
-
1 Schematic diagram of double hole sealed cable threading (applicable wire
diameter 3-5mm)71
Figure 7
-
2 Schematic diagram of single hole sealed cable threading (applicable wire diameter
6-10mm)72
7.2.2
Use conduit correctly
In order to protect cables and prevent electrical noise interference, it is
recommended to use conduit to lay cables and construct according to the following
requirements:
(1) Power cables and output signal cables are not allowed to share conduit, nor are
they allowed to share conduit with excitation cables and signal cables, and power
cables cannot be laid in the same cable tray with the above other cables or at
least kept isolated.
(2) Excitation cables and signal cables are allowed to share conduit, but excitation
cables and signal cables of different heat meters are not allowed to share conduit
or bundle together.
(3) The instrument shall be connected with the conduit with a waterproof sealing plug
with conduit connector, and the position of conduit A (see the figure below) shall
be lower than the instrument cable access port. Install a drain valve at the end
of the standpipe to regularly drain the accumulated water in the conduit.


